Showing posts with label Section 10-Aft Fuselage. Show all posts

Monday, October 30, 2017

Empennage, Aft Fuselage (Part 51)

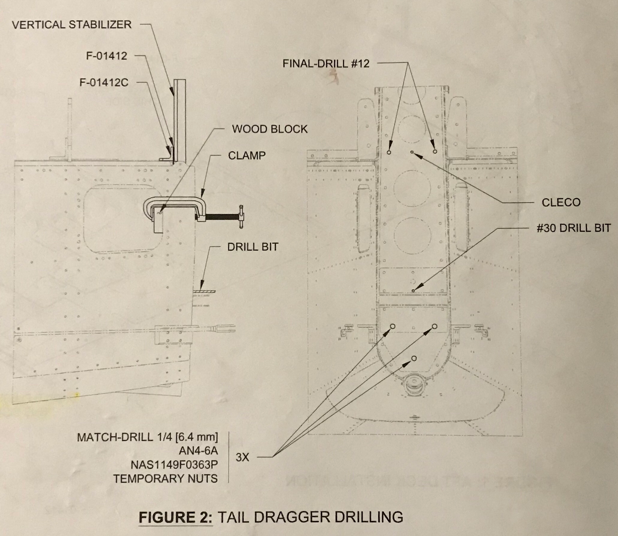
After completing the “new” Vertical Stabilizer, the next step was to Match-Drill and Final-Drive the APPROPRIATE hole locations to attach it to the Aft Fuselage.  If you follow my blog, you know this is where the train came off the tracks and I made a bone head mistake a few weeks ago.  Here is where the holes are supposed to go.....and I followed the directions this time!  You have no idea how many times I checked this step.....again and again and again!


Section Complete

Saturday, October 14, 2017

Empennage, Aft Fuselage (Part 50)

As I’ve mentioned in other posts, I decided to use the optional flush screw installation on the Access Panel Cover Plates.  I dimpled the eight holes in the plate below with #6 screw dimple dies.  I have not yet treated the Cover Plates with Alumiprep, Alodine, or Epoxy Primer.  I will do so in the next few days. 

This is the left side of the fuselage with the Cover Plate attached.  Eight AN507-632R8 screws are used to hold the Cover Plate in place.

This is the right side Cover Plate.  The same hardware is also used on this side. 

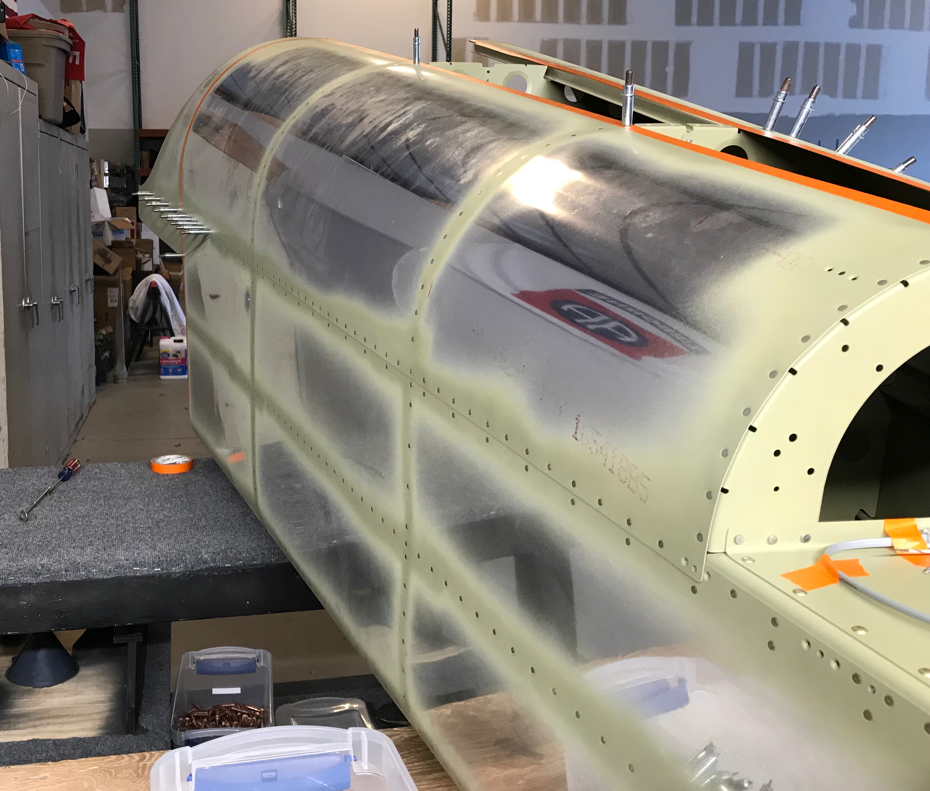
My buddy Frank helped me finish up riveting the F-01475 Top Skin.  We shot all the remaining rivets between the Top Skin and Left/Right Top Side Skins.  This picture is looking forward..... 

This picture is looking aft.....

This is the inside of the Aft Fuselage looking aft.  The two rows of rivets we set today are the ones on the left and right side of center.

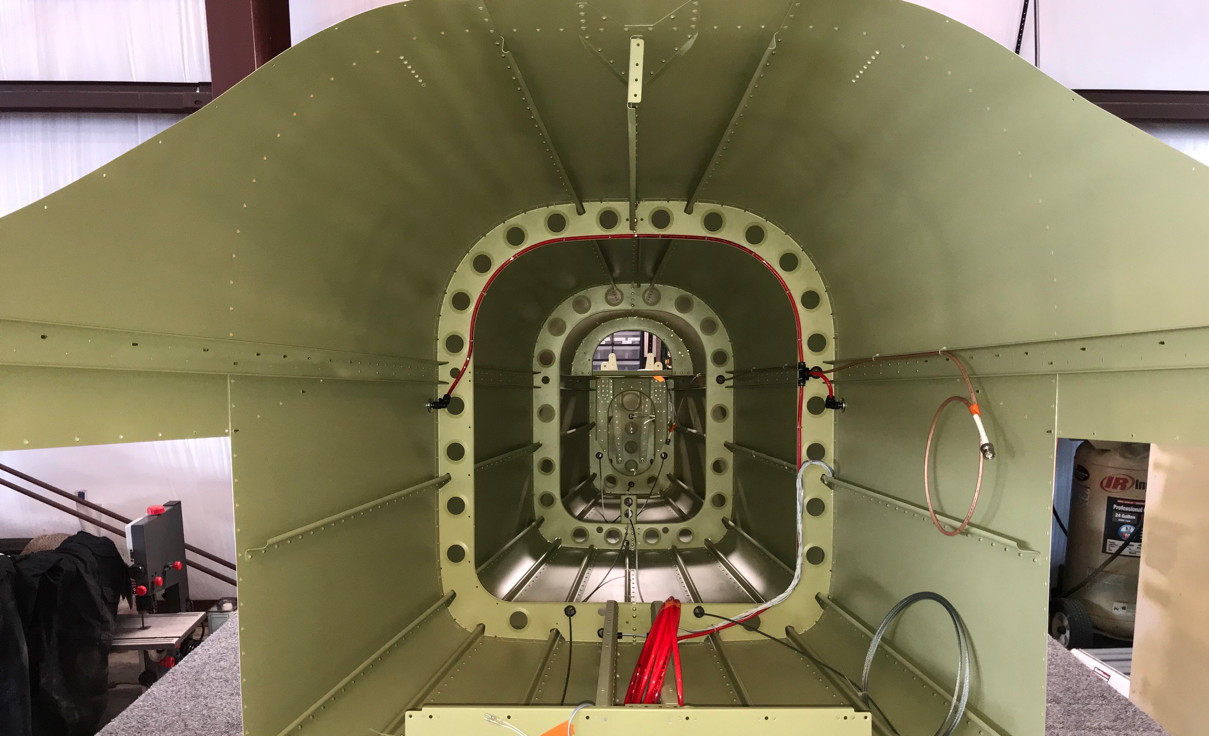
This is the looking aft inside the entire Aft Fuselage assembly.  I just thought this was a cool picture.....

The three last remaining rivets in the Aft Fuselage are the ones circled below.  These rivets connect the F-14131 Upper Aft Fuselage Rib to the F-01407 Bulkhead.  I was able to set the bottom rivet with the hand squeezer, but don’t have the reach for the top ones.  I also tried the pneumatic squeezer, but the bottom was to big.  So, I guess I’m going to have to shot these two with the rivet gun and bucking bar. 

Thursday, October 12, 2017

Empennage, Aft Fuselage (Part 49)

It only took a short session tonight to finish riveting the right Top Side Skin.  My buddy Jeff helped me shoot the last 44 rivets and it went pretty quickly.  The clecos you see on the side are locations that do not get rivets during this section of the build.  The Aft Fuselage assembly will be joined to the Fuselage in the future and be riveted at that time.  In the three photos below, I’ve attached the Top Skin to the Aft Fuselage.  The Top Skin is now ready for riveting, but I will have to wait for a second set of hands to set the last 118 rivets.  Once those rivets are set, the Aft Fuselage section will be complete!


Monday, October 9, 2017

Empennage, Aft Fuselage (Part 48)

Work completed October 10 - 11, 2017


- - - - - - - - - - - - - - - - - - - - - - - - - - - - - - - - - - - - - - - - - - - - - - - - - - - - - - - - - - - - - - - - - - - - - - - - - - - - - - - - - -

Work completed October 9, 2017


Below is an excerpt from the plans dealing with the attachment holes for the Vertical Stabilizer.  Since I am building the tailwheel model, there are five bolts that hold the Vetical Stabilizer to the Aft Fuselage assembly.  There are two #12 holes at the top and three 1/4” holes in the bottom.  


Empennage, Aft Fuselage (Part 47)

Alright.....I’m having to play a little catchup here.  I didn’t get a chance to post for several days, but was still doing work on the plane. I’m going to catch up here as best as I can.

Work completed October 7 - 8, 2017


- - - - - - - - - - - - - - - - - - - - - - - - - - - - - - - - - - - - - - - - - - - - - - - - - - - - - - - - - - - - - - - - - - - - - - - - - - - - - - - - - -

Work completed October 3 - 6, 2017


Monday, October 2, 2017

Empennage, Aft Fuselage (Part 46)

Short work session today, but I was able to finish attaching the Right Side Skin to the Bottom Skin.  I ran out of time yesterday and was not able to install the last 20 rivets.  The arrow points to the row of rivets I set today. 

Here is the section between the F-01407 and F-01406B Bulkheads.  The row of rivets I finished today is on the left side of the picture. 


Sunday, October 1, 2017

Empennage, Aft Fuselage (Part 45)

More Side Skin riveting.....almost done!  Today’s session was the last (or bottom) row of Side Skin rivets that attach the Bottom Skin.  All of the rivets from today’s session were back riveted using a back riveting plate and 12” back rivet set.  The arrows below point to the rows in the section between the F-01410 and F-01408 Bulkheads.

These two rows of rivets were installed between the F-01408 and F-01407 Bulkheads.

And lastly, this row is between the F-01407 and F-01406B Bulkheads.  I ran short on time today, so I wasn’t able to complete both sides.  The left side is shown below.  I will finish the right side tomorrow. 


Saturday, September 30, 2017

Empennage, Aft Fuselage (Part 44)

I continued setting rivets in the Side Skins.....damn there are a lot of rivets!!!!  With the exception of a few rivets I’ll need some help with, the three rows of rivets have been installed.  The last remaining row in the very bottom that attaches the Side Skin to the Bottom Skin. 

Here is a shot of the inside of the Right Side Skin showing some completed rivet locations.

Many more rivets to go!


Friday, September 29, 2017

Empennage, Aft Fuselage (Part 43)

I received the hardware order from Van’s that included additional K1100-06 Nutplates and AACQ-4-3 blind rivets.  I started today by installing the F-01497A and F-01497B Rudder Cable Guides on the Right Side Skin.  The picture below shows the #30 holes that were previously prepared and dimpled.

This pictures shows the completed installation of the Cable Guides on the Left Side Skin using AACQ4-4 and 4-3 bling rivets.  The Cable Guide on the Right Side Skin looks the same.


In Part 34, I started the installation of the Cable Guide in the Left Side Skin using AACQ4-4 rivets for all six rivet locations.  Becasue the F-01497B section of the Guide is about 1/2 the thickness of the F-01497A, the AACQ4-4 rivets were to long after being set.  In the picture below, you can see the longer AACQ4-4 (installed on Left Side Skin) and the shorter AACQ4-3 (installed on the Right Side Skin).  I didn’t like the result of the larger 4-4 rivets, so I used the shorter 4-3’s on the smaller pieces.


Here are both of the Cable Guides installed on the Left and Right Side Skins with the 4-3 rivets installed on the smaller pieces. 

I installed the remaining five K1100-06 nutplates on the Access Panel.  Again, because I chose countersunk screws for the Cover Plate installation, the top two holes on each side had to be countersunk to accept the dimpled holes of the Plate.  You can see the freshly countersunk holes through the Left Side Skin and Longeron.  The Right Side Skin looks the same and I will eventually put primer on these holes for rust protection.

The clecos are becoming fewer.  On this side, I only have the very bottom row of rivets to install that attach the Right Side Skin to the Bottom Skin. 


Thursday, September 28, 2017

Empennage, Aft Fuselage (Part 42)

The work completed in the picture below was actually accomplished yesterday (9/27/17).  I didn’t enter the blog post prior to midnight, so it was posted on the following day.  Anyway, no big deal.  I completed the rivets in the Left and Right between the F-01408 and F-01407 Bulkheads (circled in black). I only took a picture of the Left Side Skin, but the Right Side Skin looks the same. 

- - - - - - - - - - - - - - - - - - - - - - - - - - - - - - - - - - - - - - - - - - - - - - - - - - - - - - - - - - - - - - - - - - - - - - - - - - - - - - - - - -

The work completed below was completed today (9/28/17).  I continued making progress riveting the Side Skins.  I installed the rivets between the F-01407 Bulkhead and the forward end of the Side Skin.  Circled below is the location the rivets were installed and shows the Right Side Skin.  The Left Side Skin looks the same. 

Here is the Right Side Skin showing a majority of the rivets attaching the Side Skin to the F-01486A-R Stiffener (horizontal row of rivets).

I moved on to installing the rivets in the Right Side Skin and the F-01411 Bulkhead (vertical circle).  Lastly, the rivets attaching the Right Side Skin, F-01486B-L Stiffener, and F-01479 Aft Bottom Skin we’re installed.  The plans called for the use of AN-426AD3-4 rivets, but I found them to be a little too short.  So, I installed 3-4.5 rivets and I liked the results.  I will also use 3-4.5 rivets for the remaining location that attach the Aft Bottom Skin.


I included the session hours for both session in the totals below:

Tuesday, September 26, 2017

Empennage, Aft Fuselage (Part 41)

I riveted the bottom few rivets on the Side Skins and the Aft Fuselage Bottom Skin.  Pictured below is the right side of the Fuselage.  The Right Rudder Stop has also been installed into place using four AN426AD4-6 flush rivets.  All of these rivets were pains in the a**.  The area is very small to work in and hard to get a bucking bar behind the rivets.  My buddy Jeff had to help me out as these rivets were definitely a two dude job. 

The two rivets circled below are the shop heads of the rivets attaching the Rudder Stop.  The other two rivets are on the other side of the Bulkhead. 

I installed many more AN426AD3-3.5 on the Right Side Skin.  The horizontal row of rivets in the center of the picture are attached to the F-01486A-R Stiffener.  I used a rivet gun and bucking bar to set all of these rivets. 

The upper horizontal row of rivets are attached to the F-01418B-R Longeron.  I used my pneumatic squeezer with the 2” longeron yoke to set these rivets.