Showing posts with label Section 32-Baggage Area. Show all posts

Saturday, February 22, 2020

Fuselage, Baggage Area (Parts 11 and 10)

Saturday, February 22, 2020 (Part 11)

Started this session by completing the install/riveting of the right Baggage Area Side Covers (picture at the end of this post).  

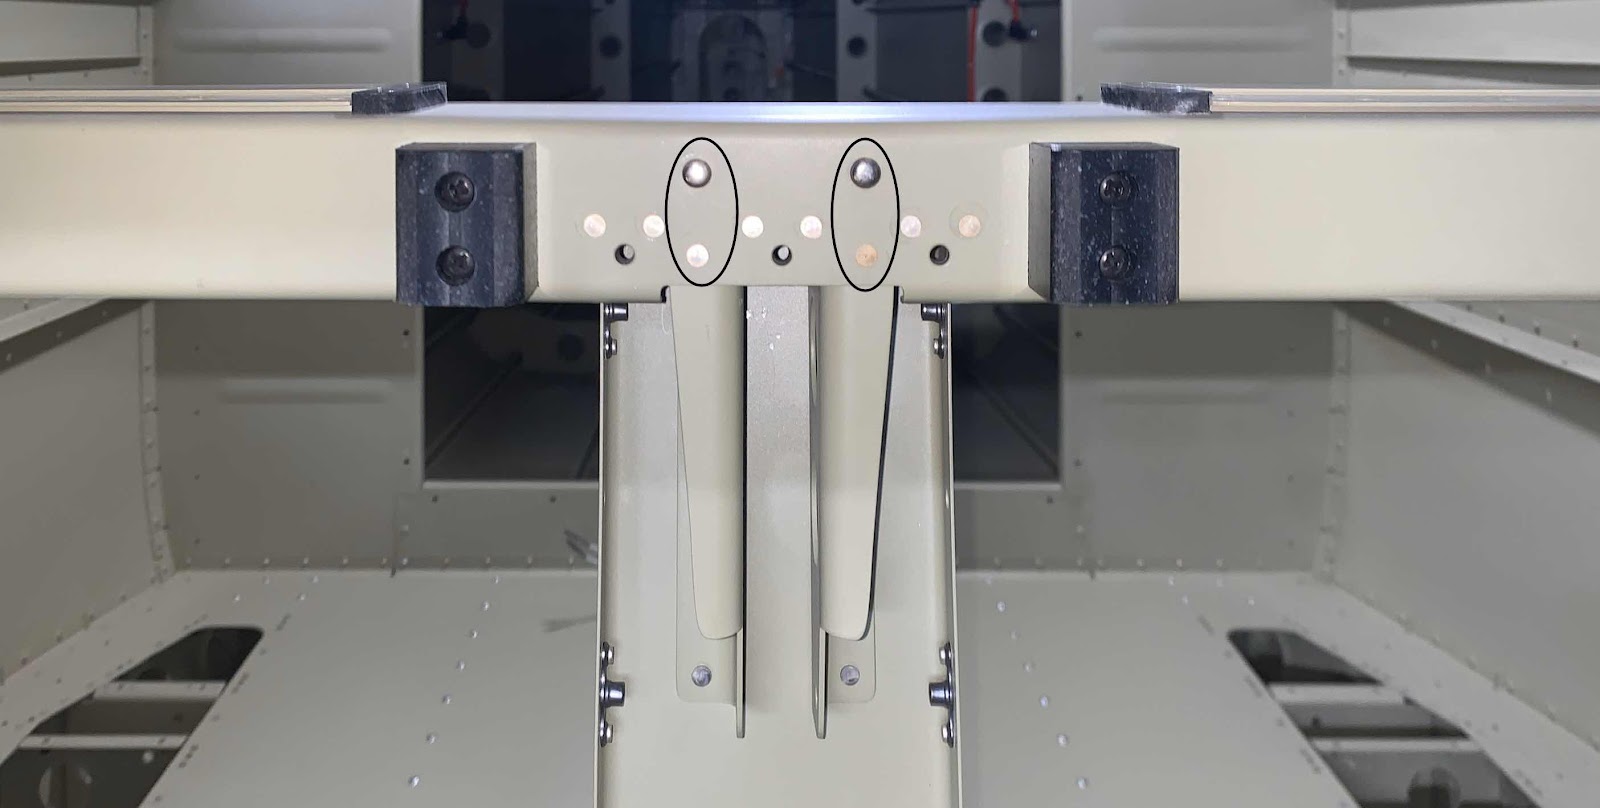
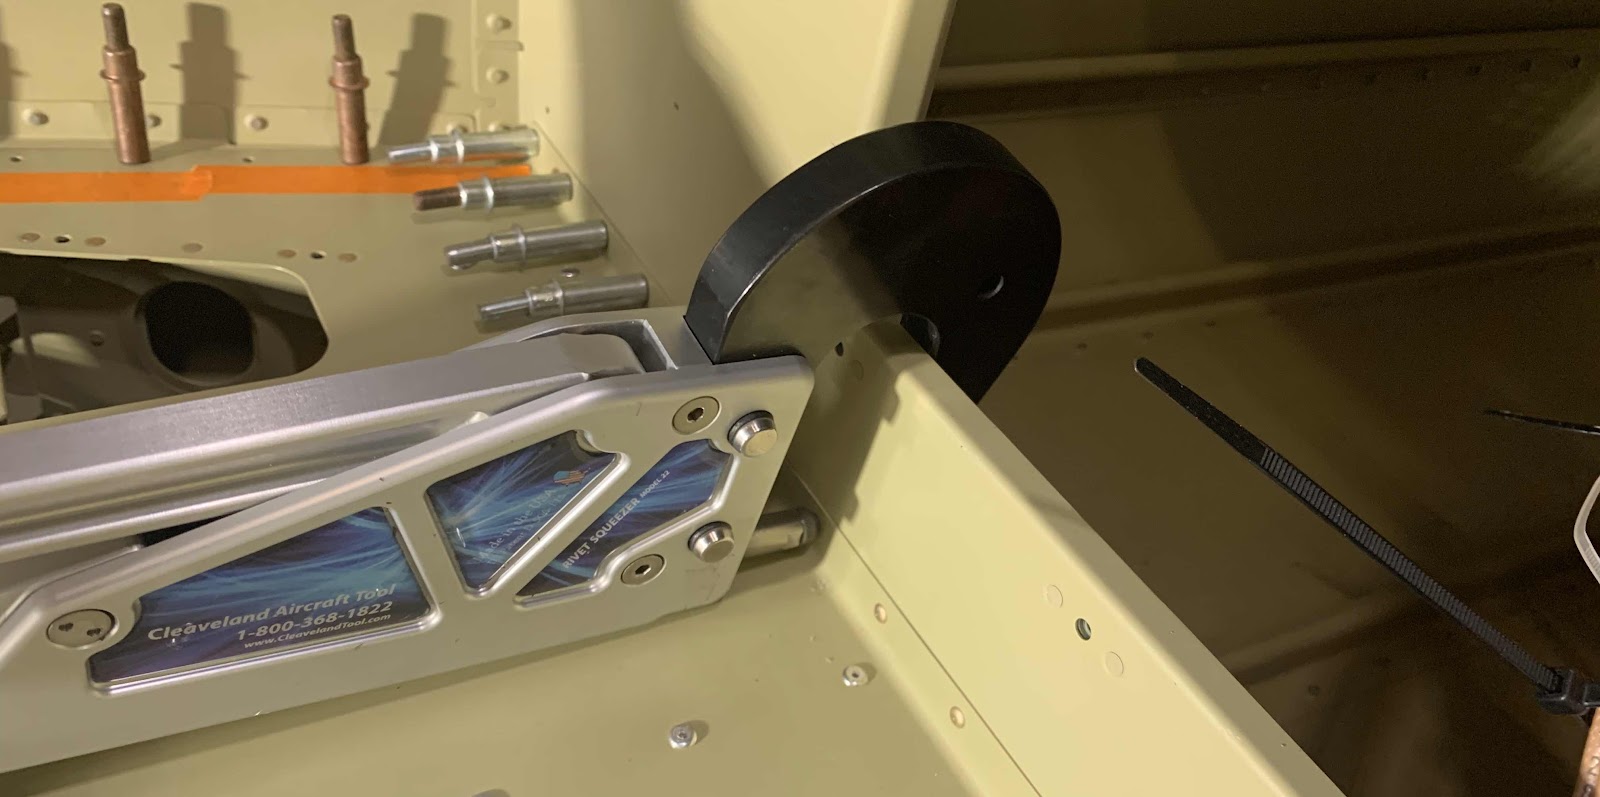
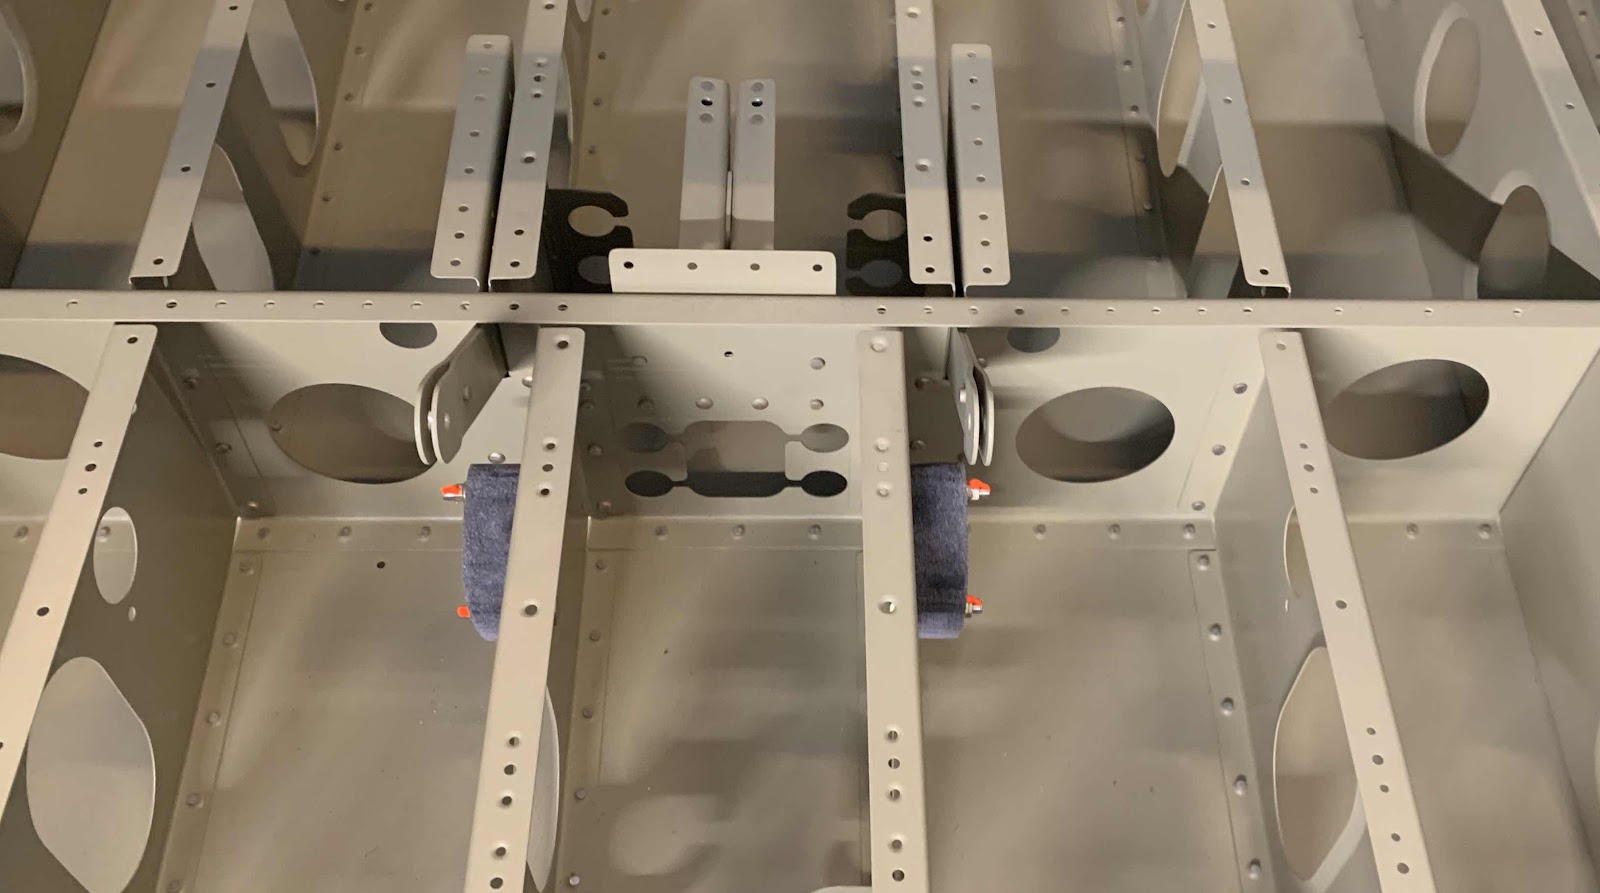
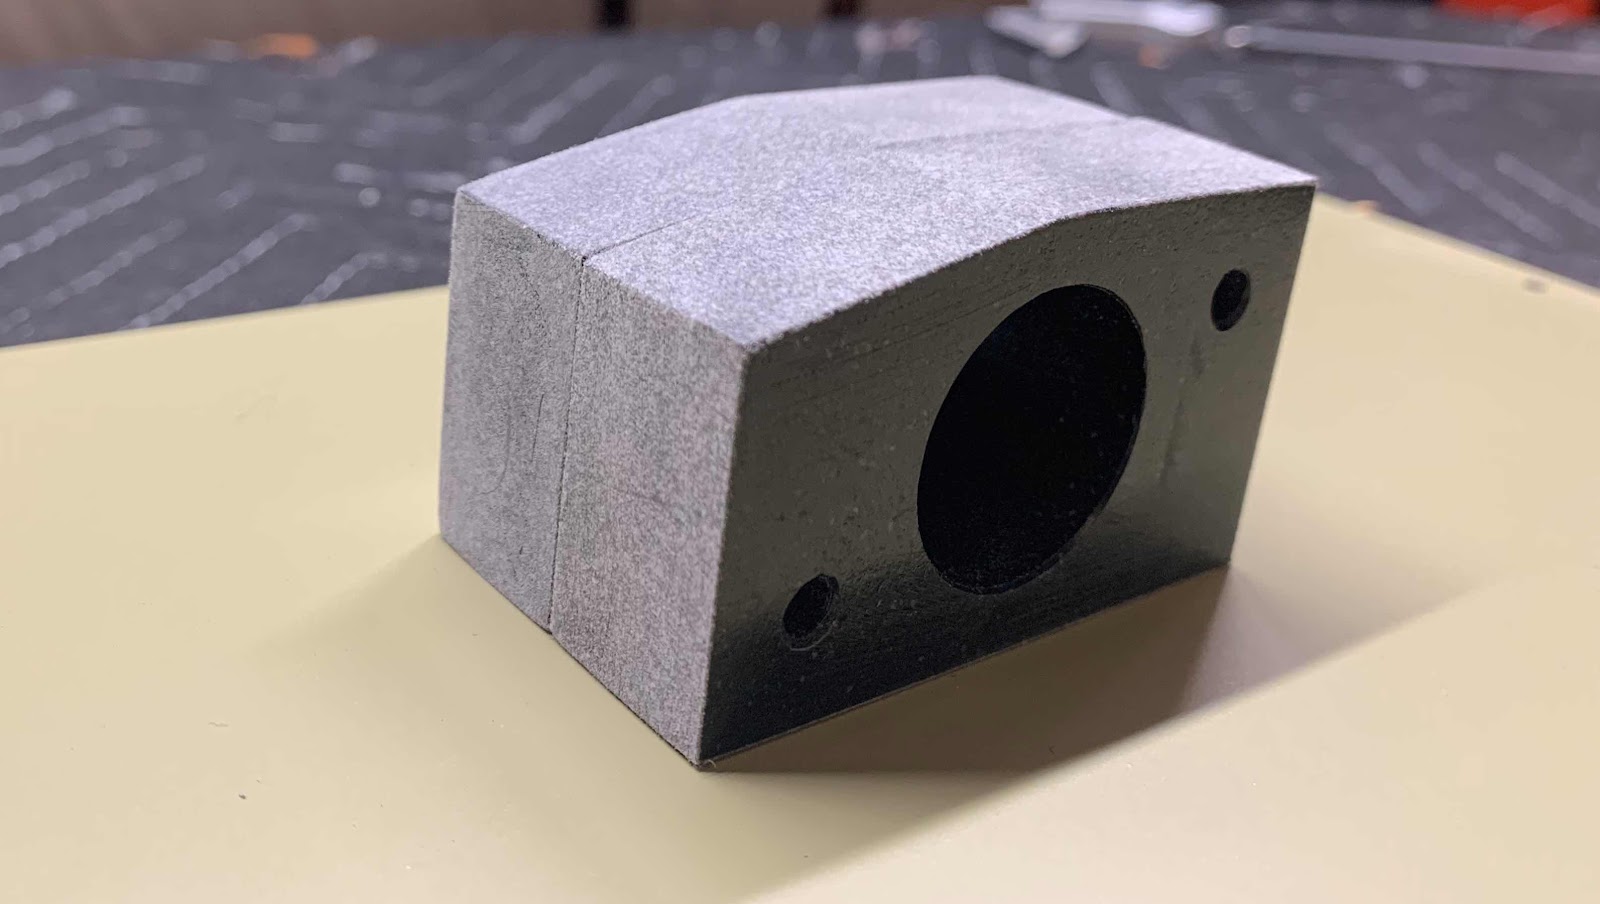
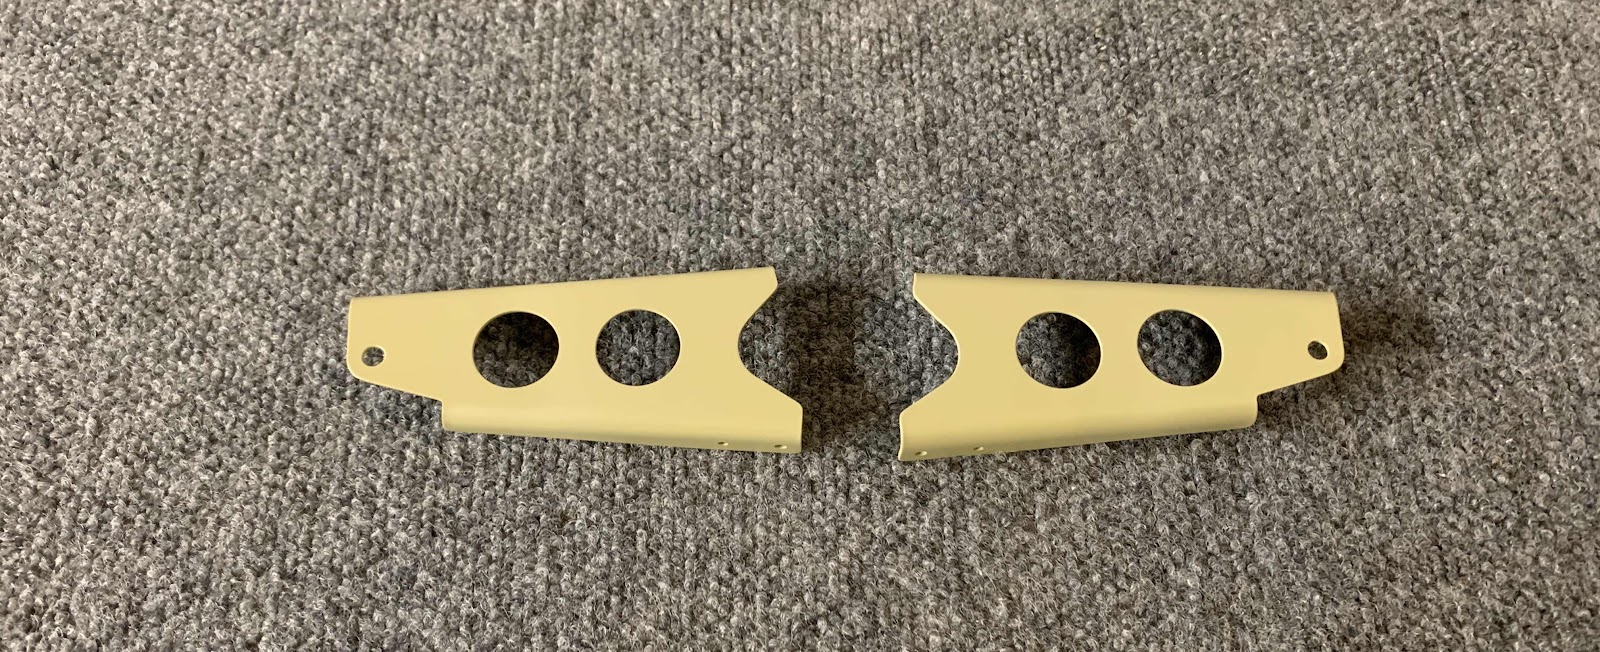
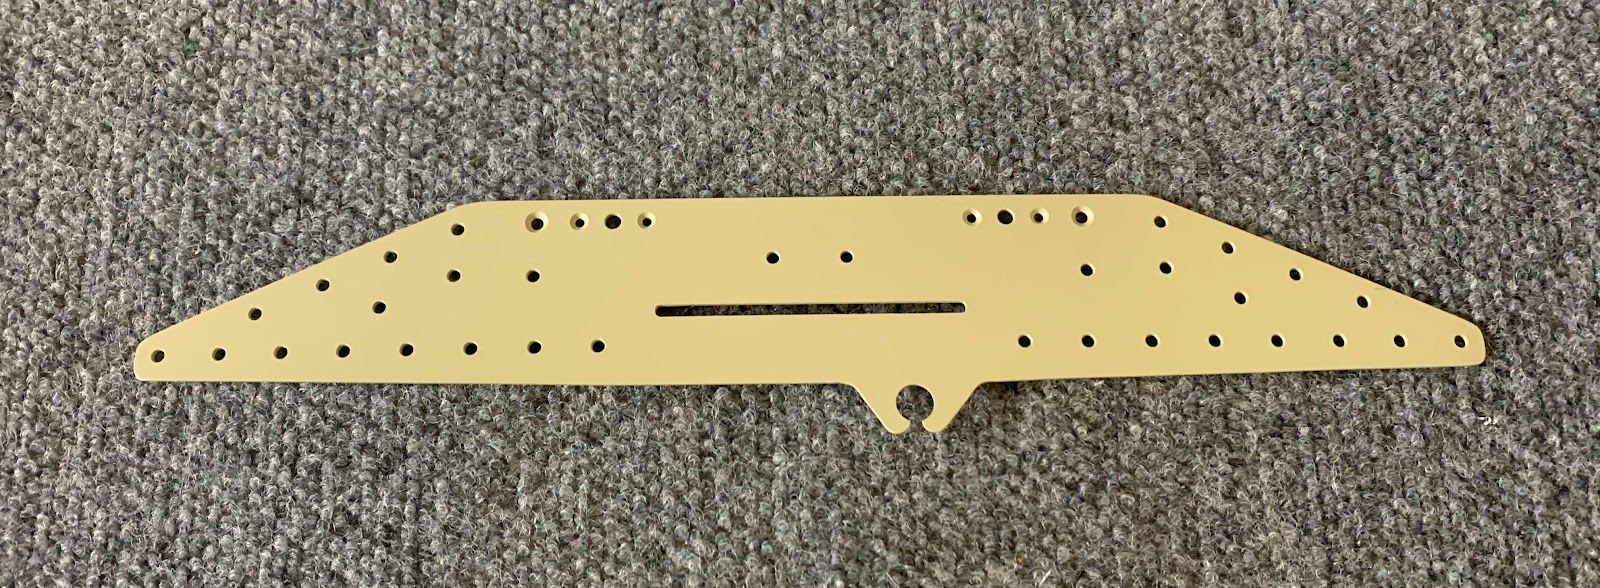
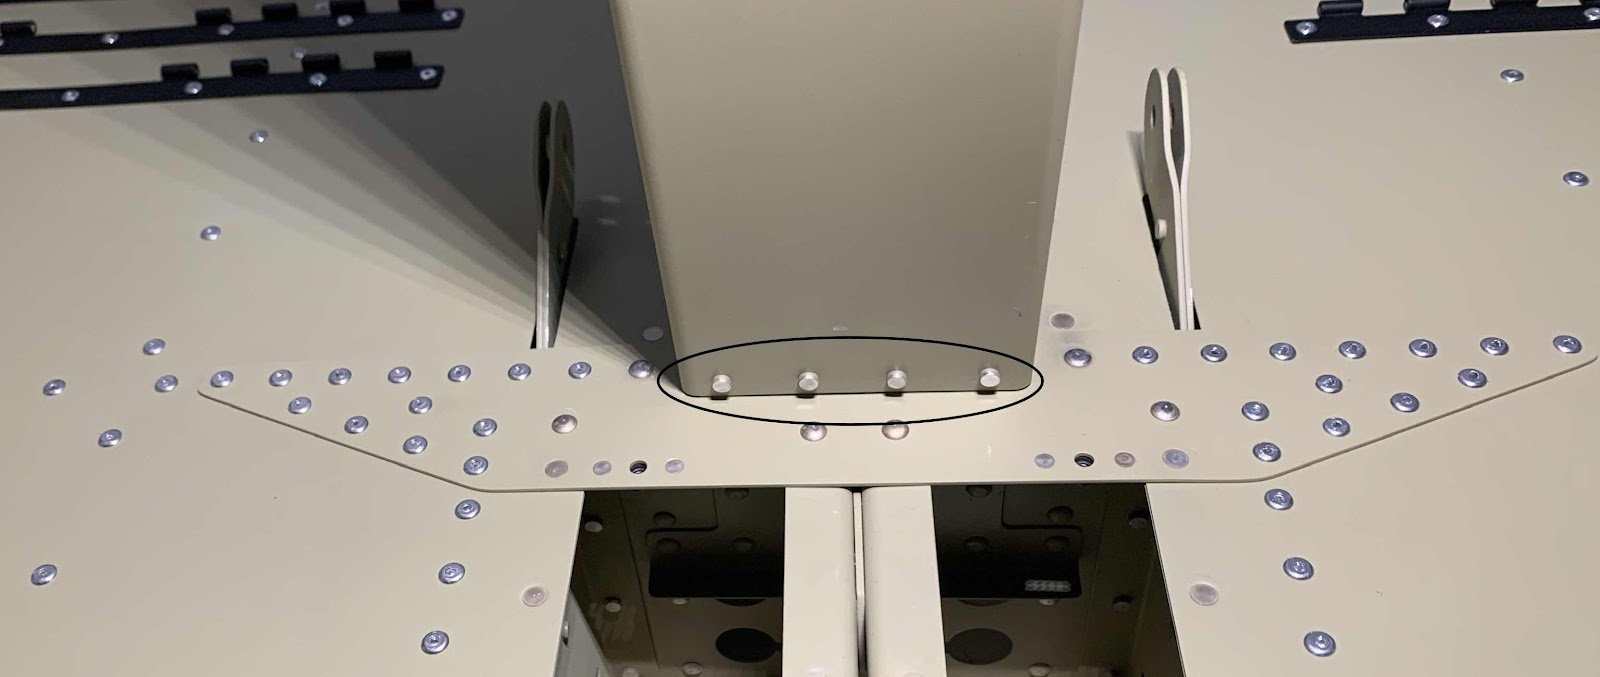
Next, I installed the four AN470AD4-4 rivets between the F-01405G Flap Motor Channel and the F-01405L Bulkhead Doubler.  Shown below are the manufactured heads.....

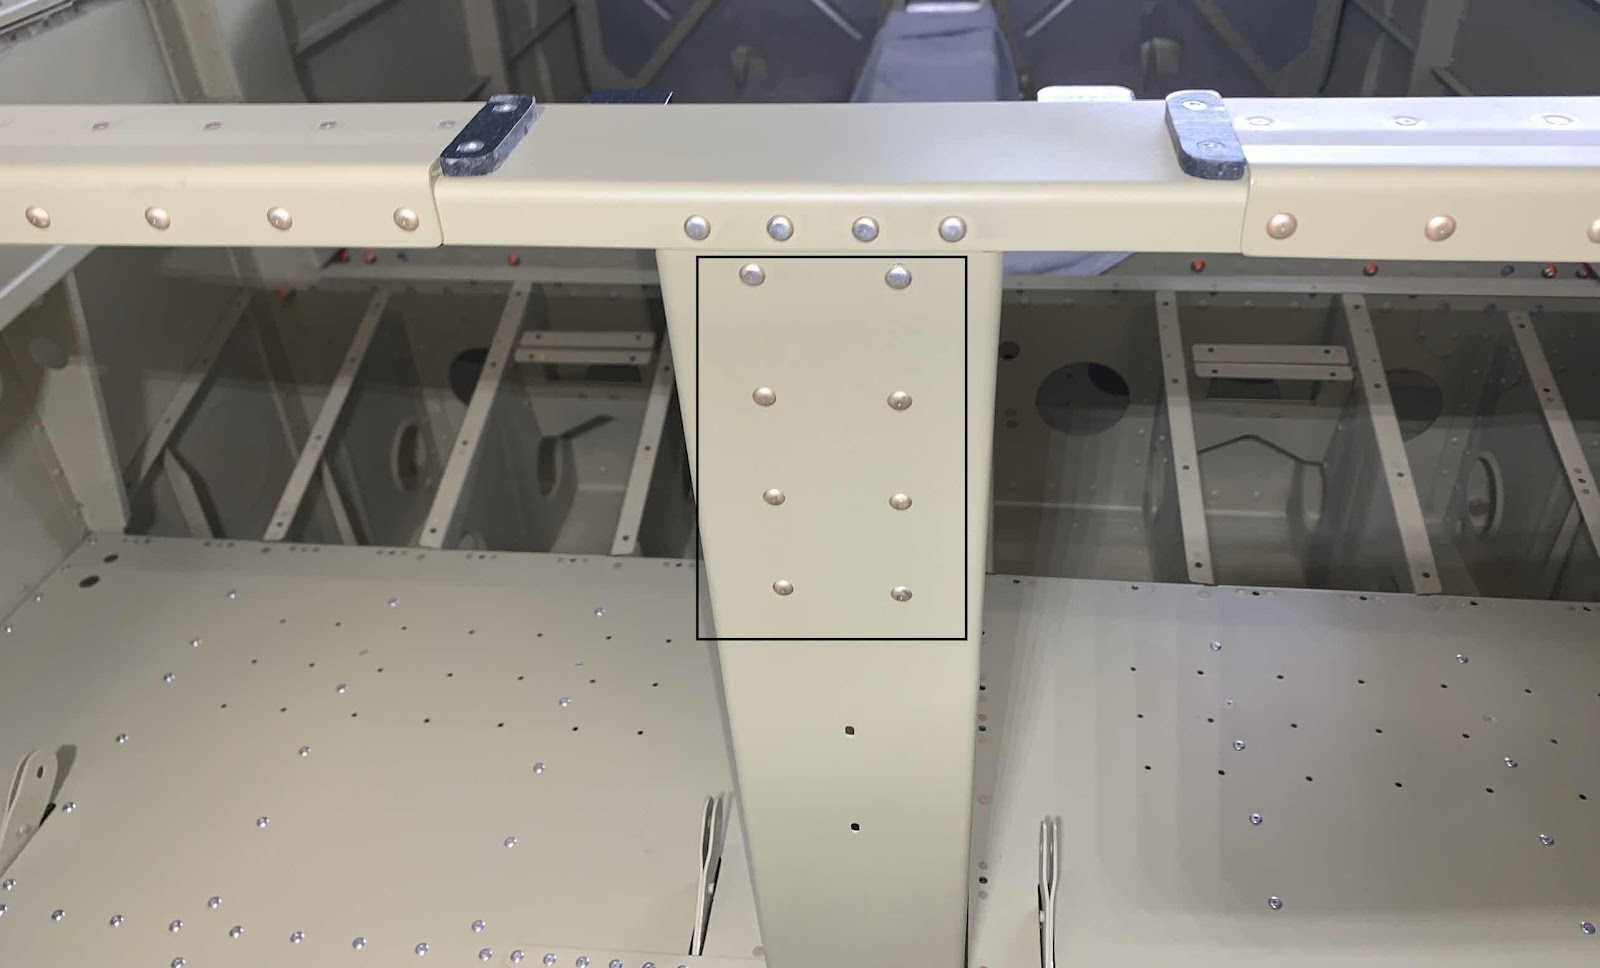
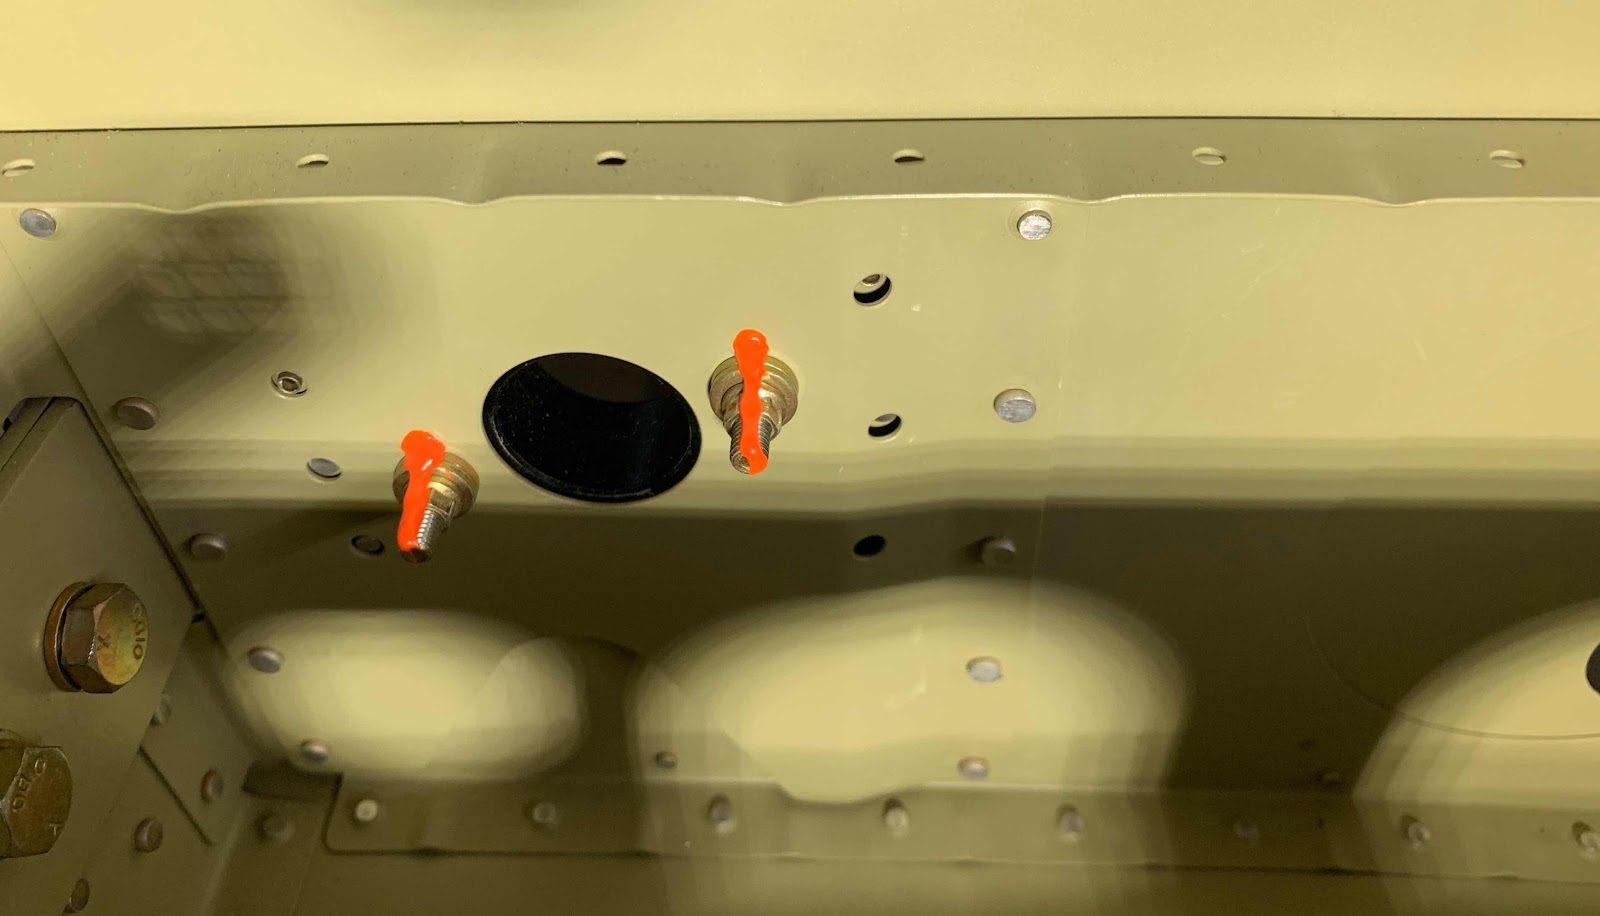
.....and the shop head sides.  Because of the slight rearward angle of the Channel, I found it much easier to shot the rivets in this direction.  It would have been difficult (not impossible) to shoot the rivets in the other direction without using a double offset cup rivet set.  The way that I set the rivets, I didn’t have to use any special set shooting them.....just a normal 3.5 inch cup set and angled bucking bar.

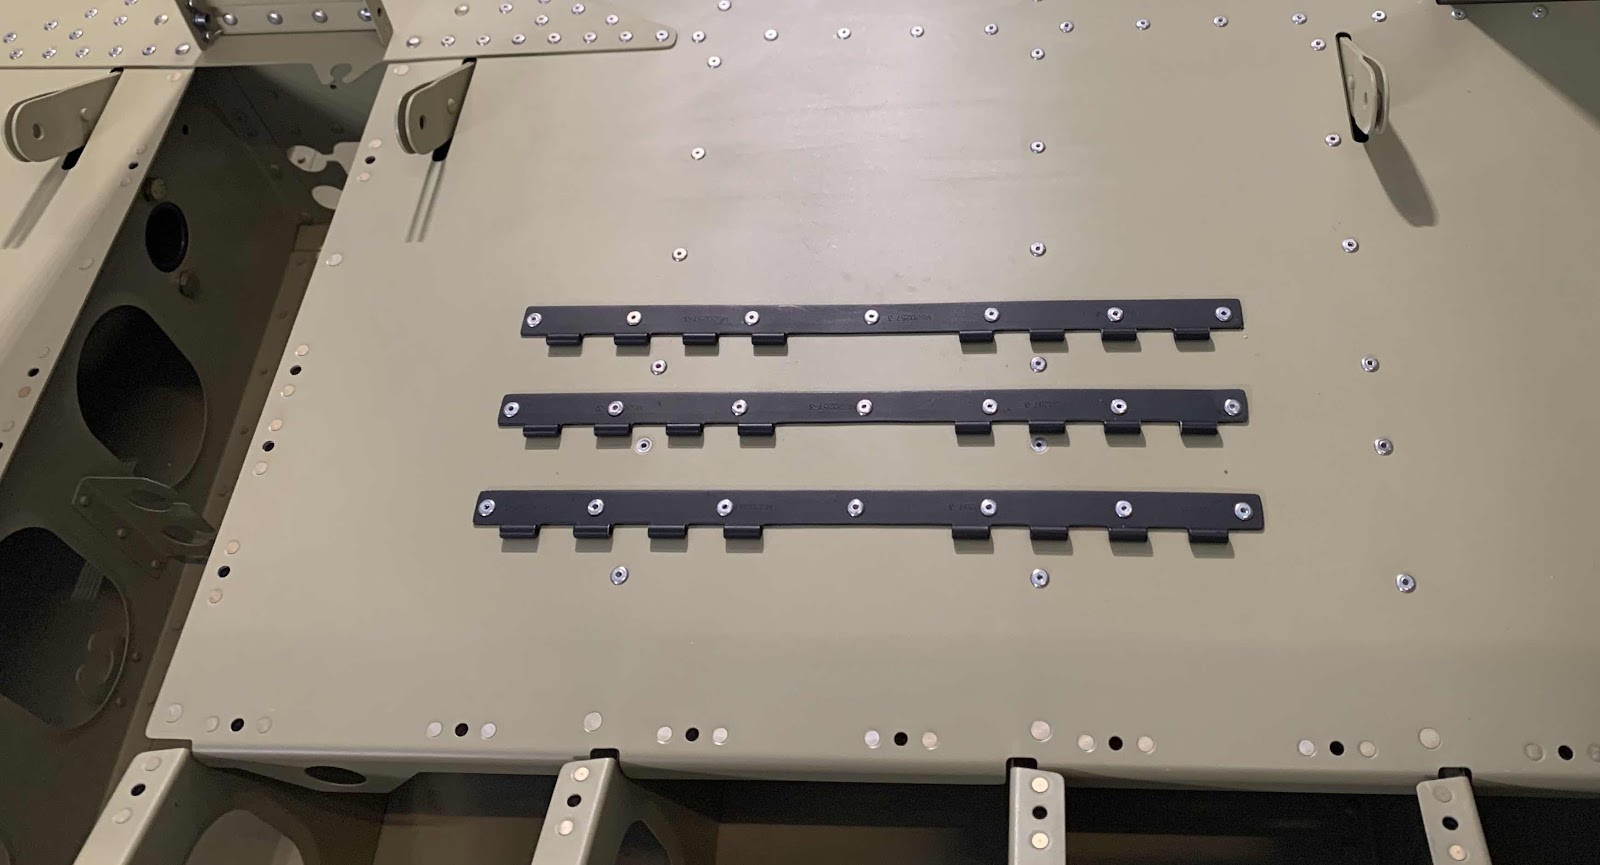
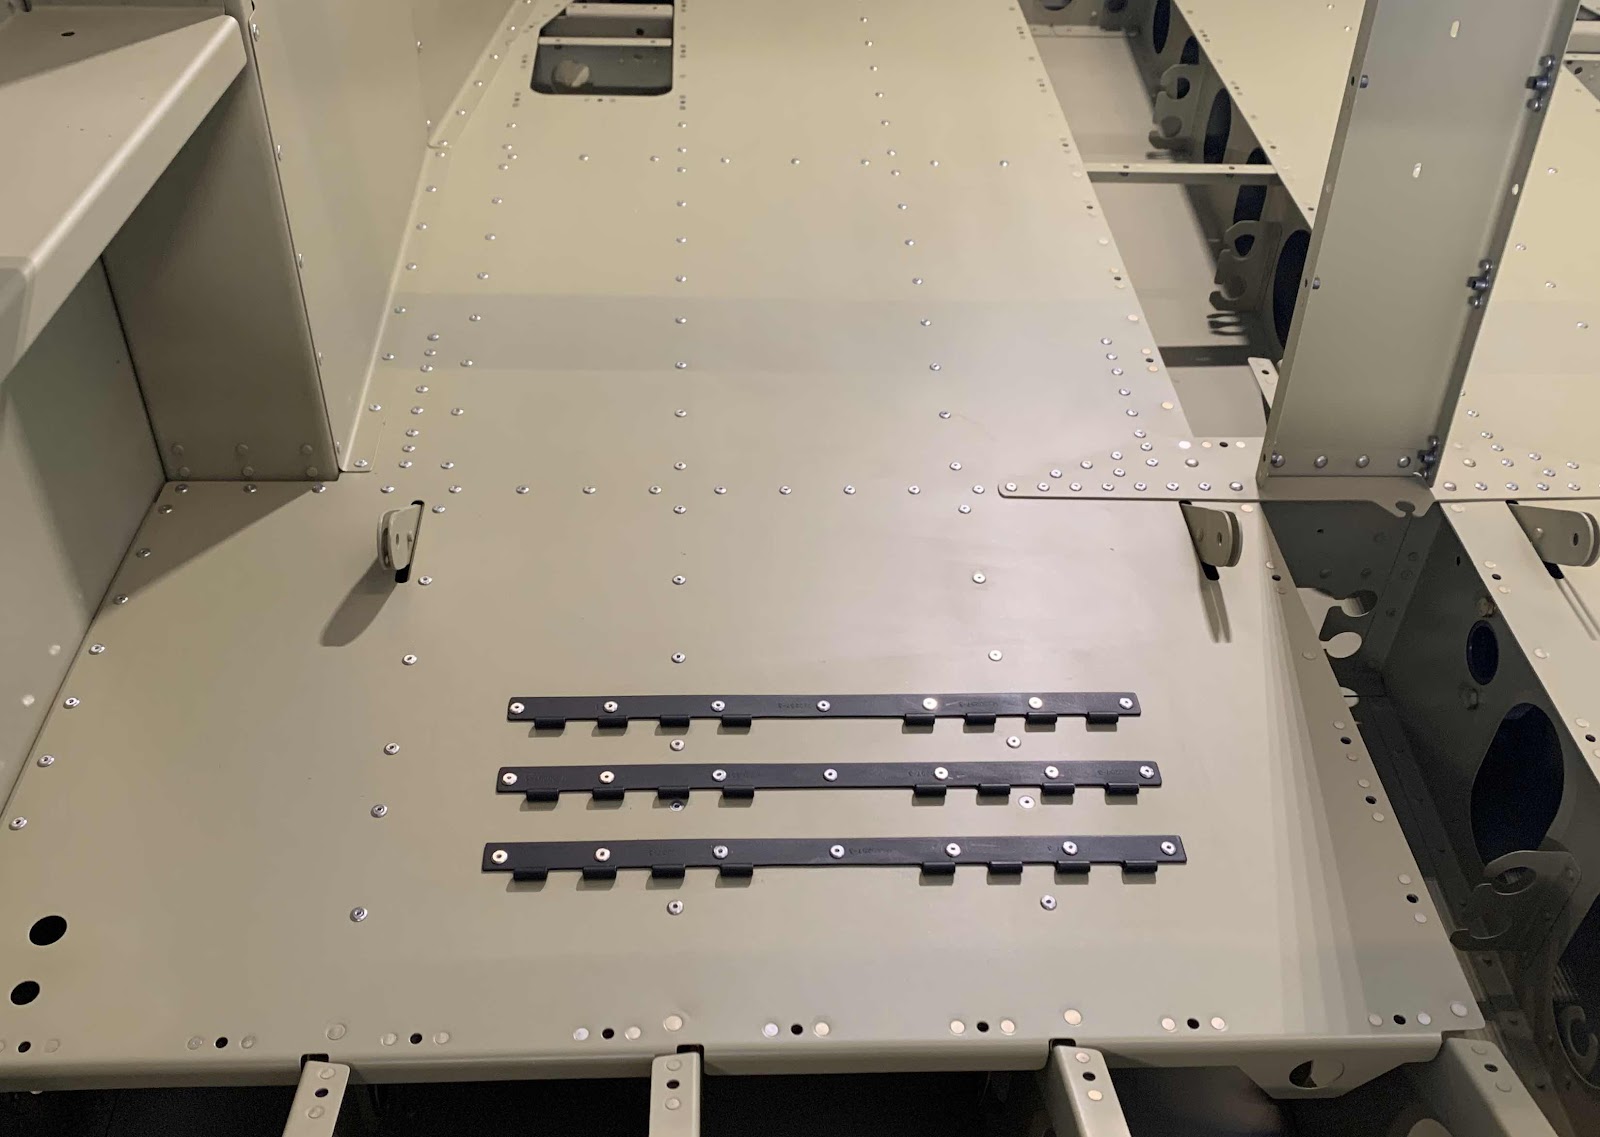
I also did a few things to the six F-01447B Seatback Hinges.  I initially treated all of them with Alumiprep and Alodine.  After letting them dry, I sprayed them with Akzo primer.  In Section 29 (FWD/MID Fuselage Side Structure), the four F-14144 Seatback Guides and four F-01405F Guides were riveted to the F-01405F Brace.  Those four Guides were black.  Sooooo, I decided to paint the six Seatback Hinges black also.  I know, I know.....once you install the seats, you won’t be able to see them anyway.  But, you can now and I like it.....so there’s that!  Here are the three Seatback Hinges installed with LP4-3 blind rivets on the left side.....

.....and on the right side.

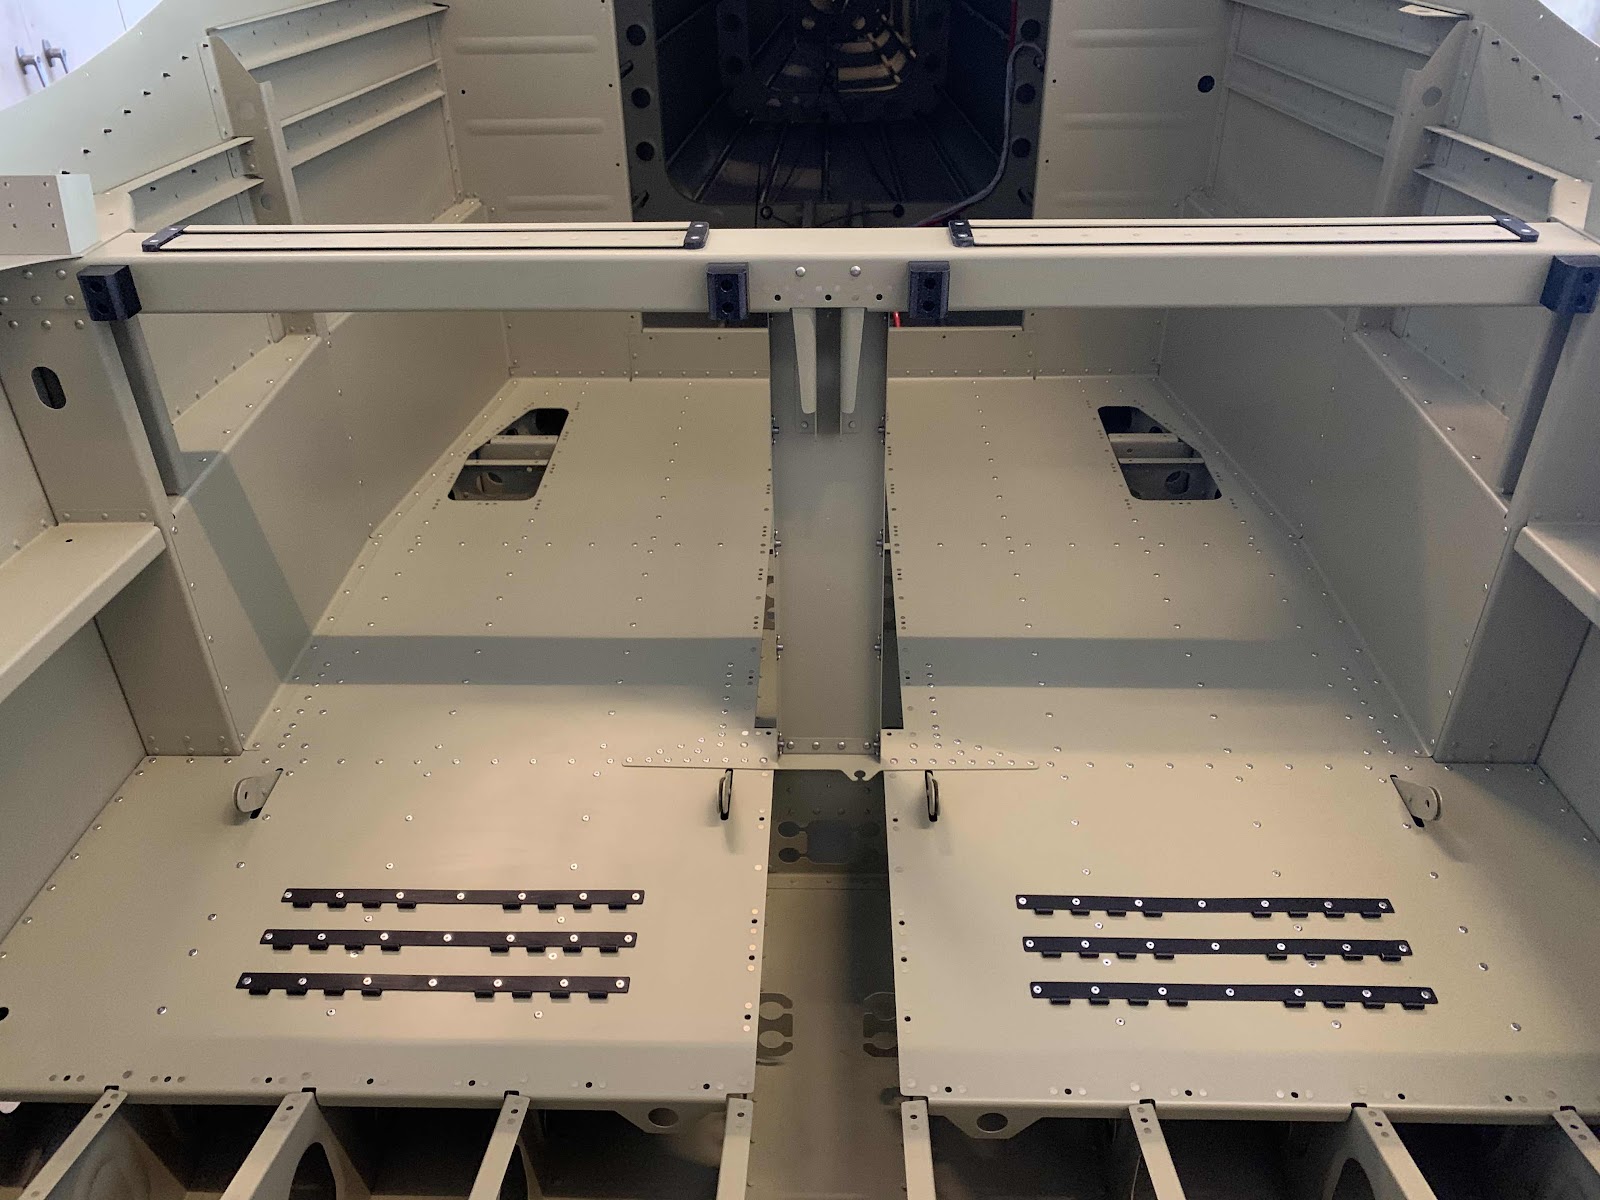
Once all six of the Seatback Hinges were installed, the section was completed.  In the picture below, you can see all of the Baggage Area Side Covers installed and complete.  Additionally, this photos shows ALL the completed steps in this section.  Pretty cool picture.

Section Complete
- - - - - - - - - - - - - - - - - - - - - - - - - - - - - - - - - - - - - - - - - - - - - - - - - - - - - - - - - - - - - - - - - - - - - - - - - - - - - - - - - -
Friday, February 21, 2020 (Part 10)

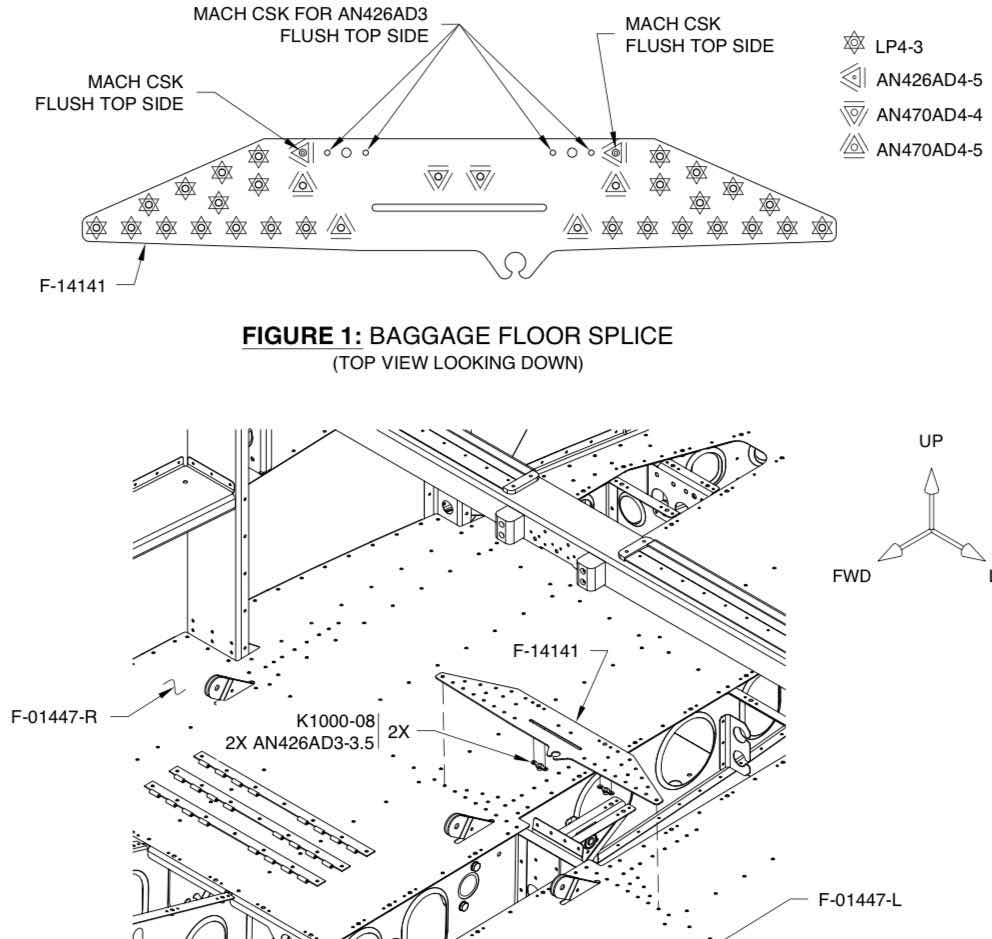
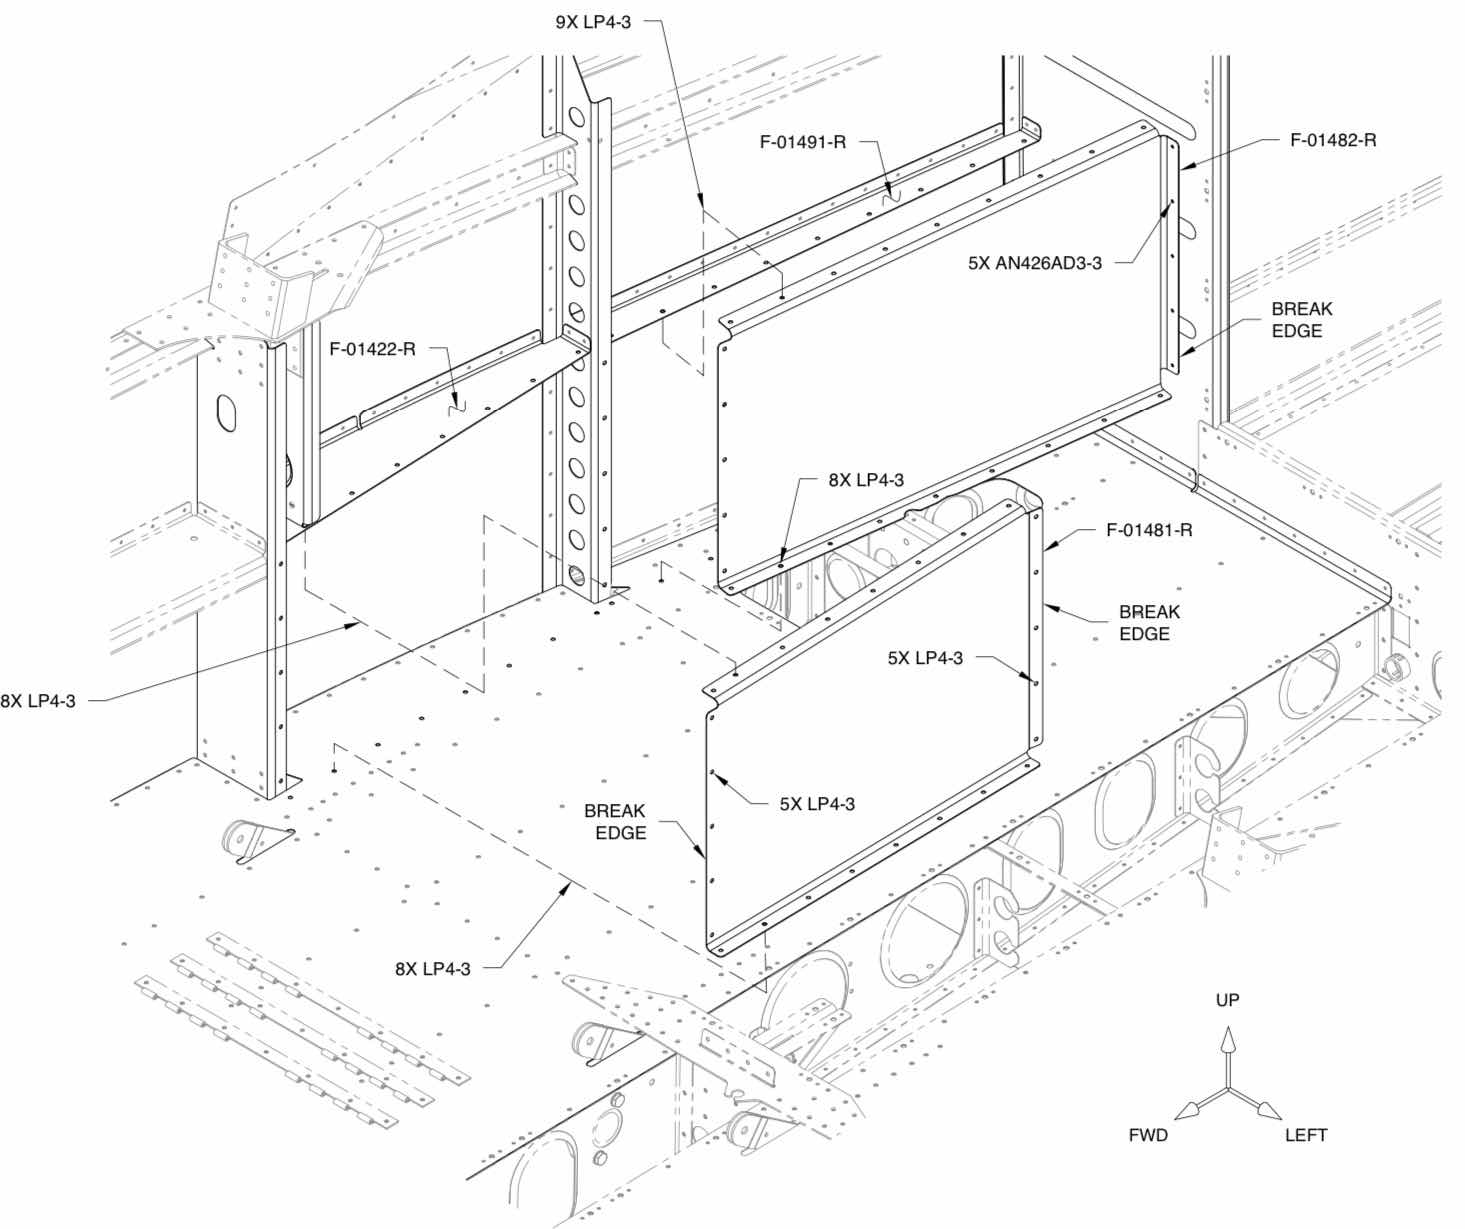
Today, we started the install process of the F-01481-L & -R and F-01482-L & -R Baggage Side Covers.  The Side Covers actually get riveted to several pieces in the Baggage Area.  The except below shows exactly how many parts and the orientation of each Side Cover.

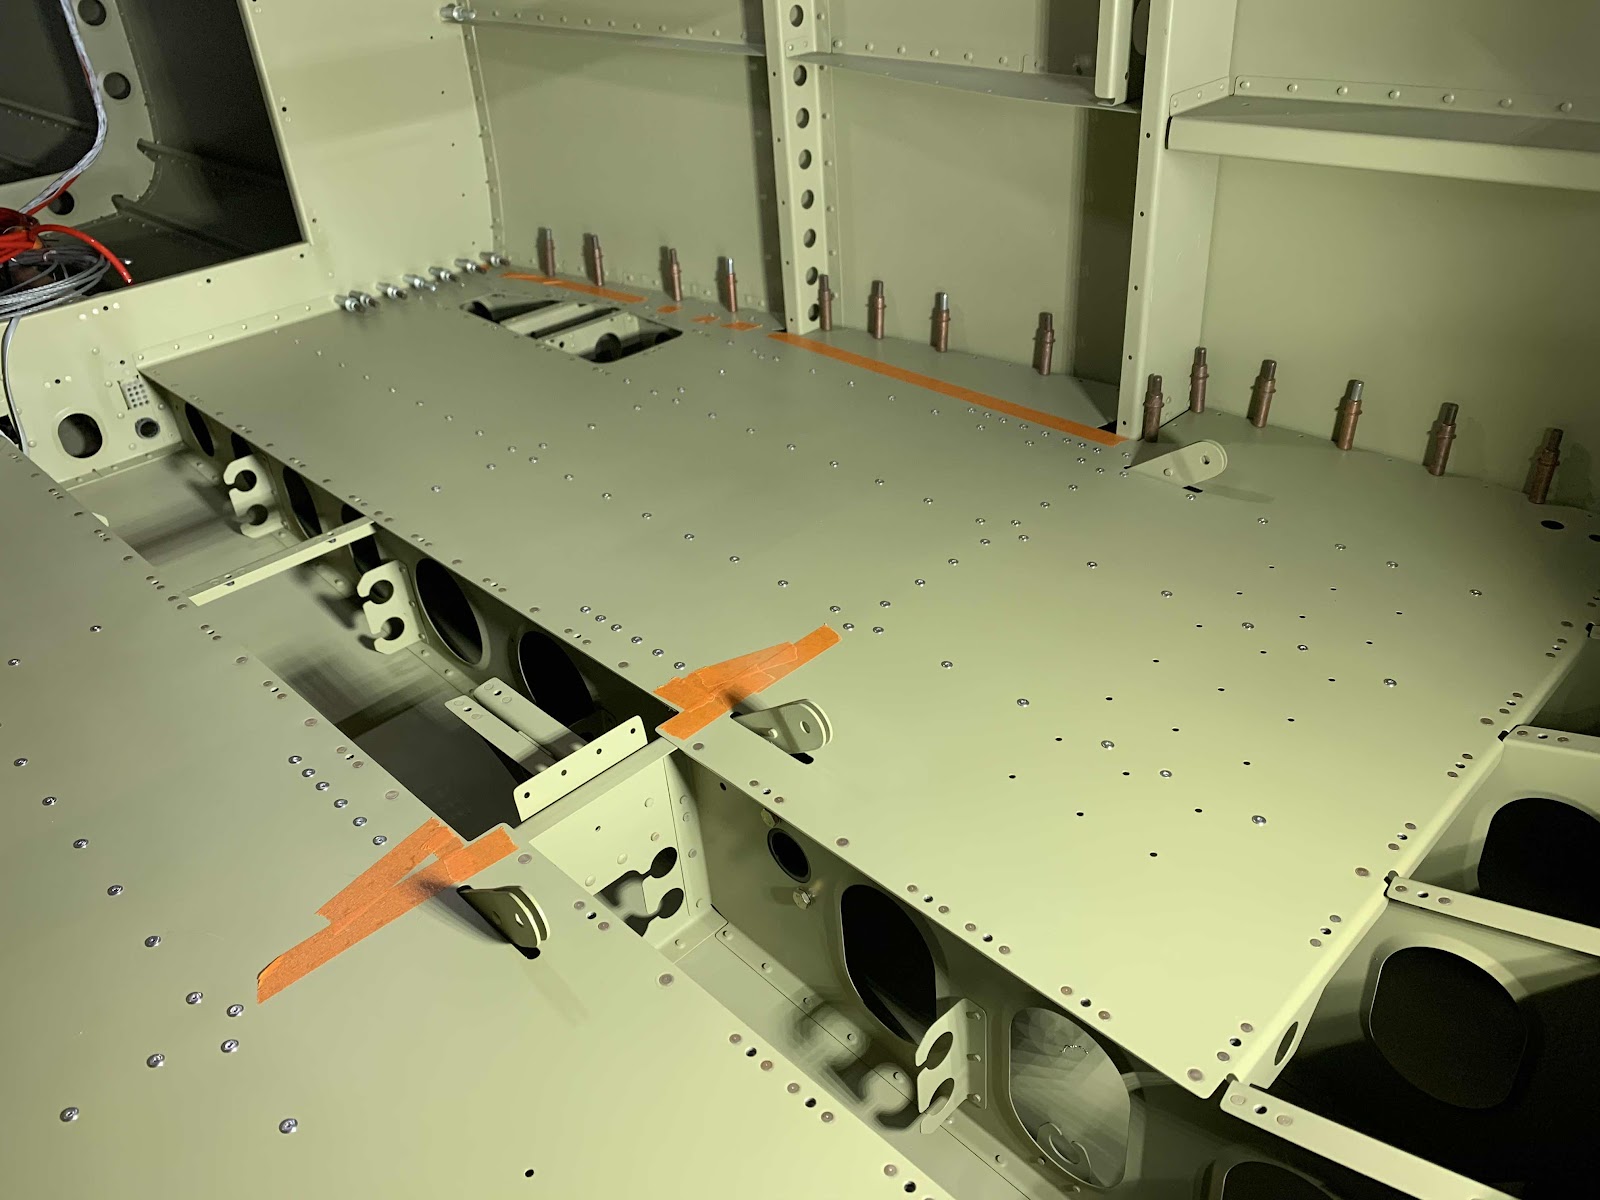
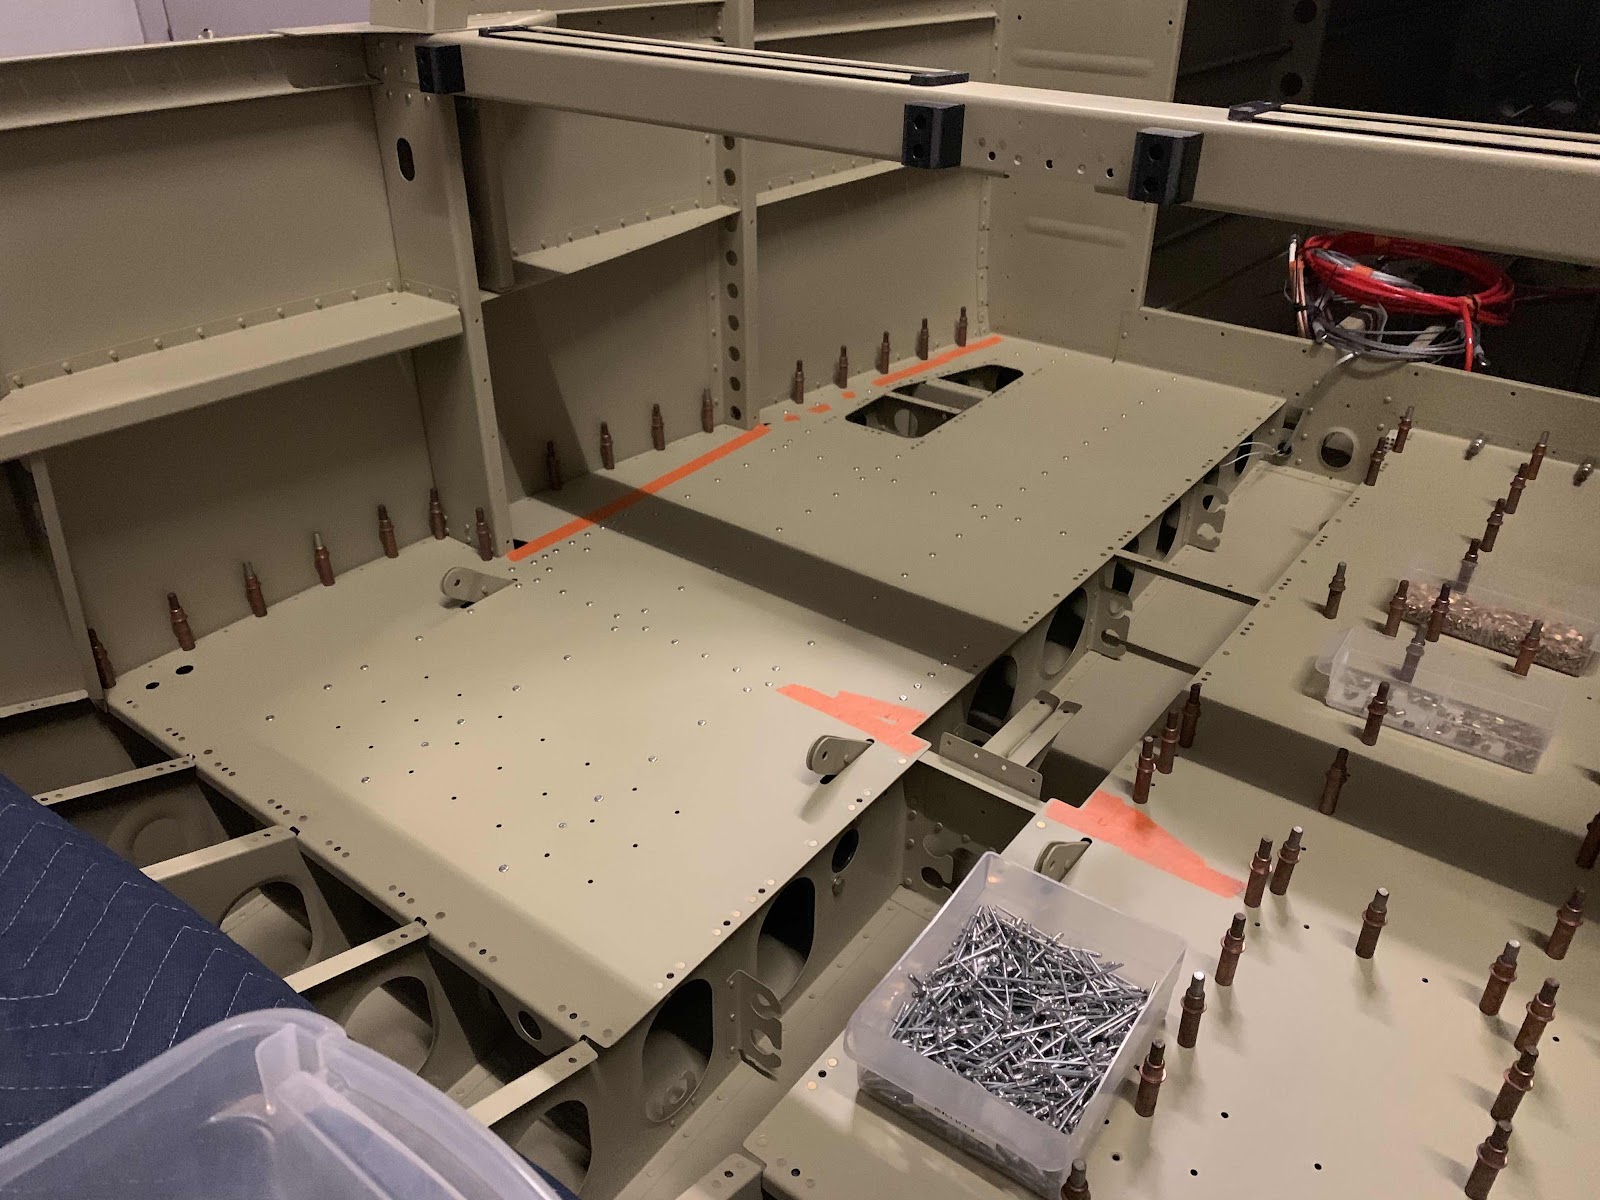
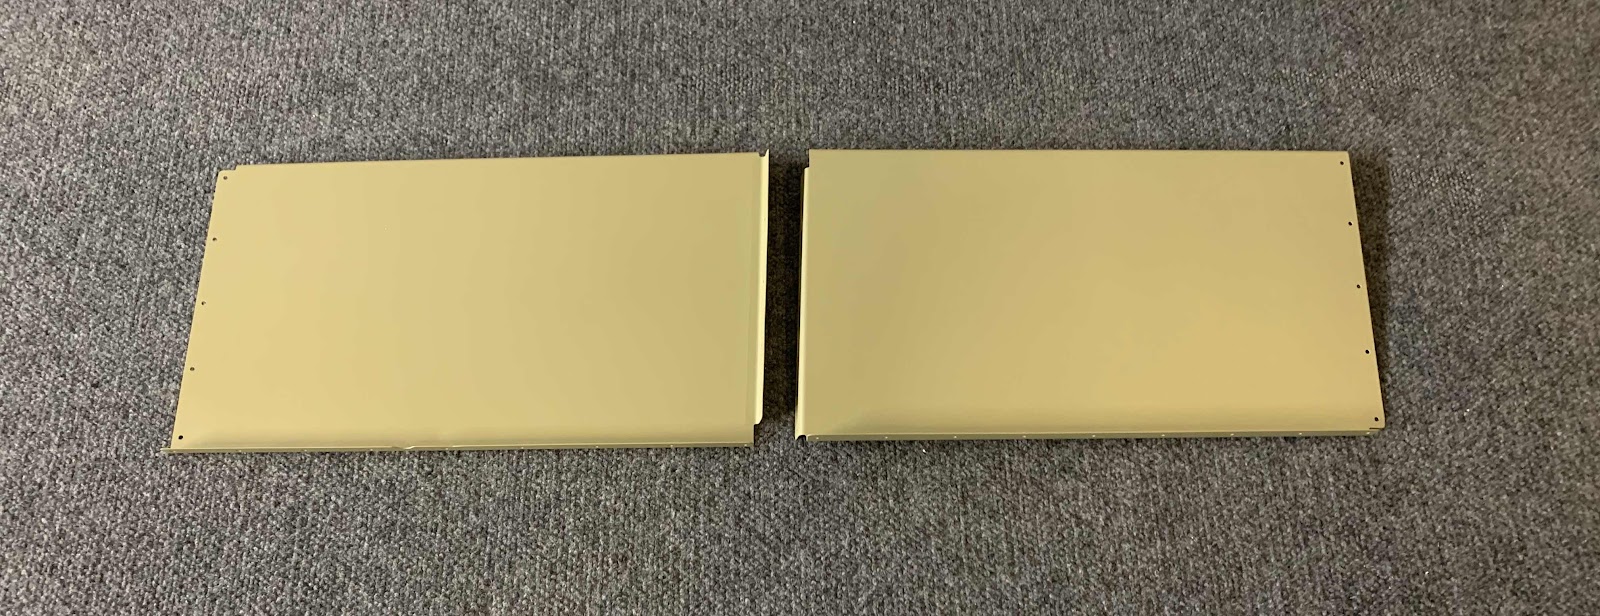
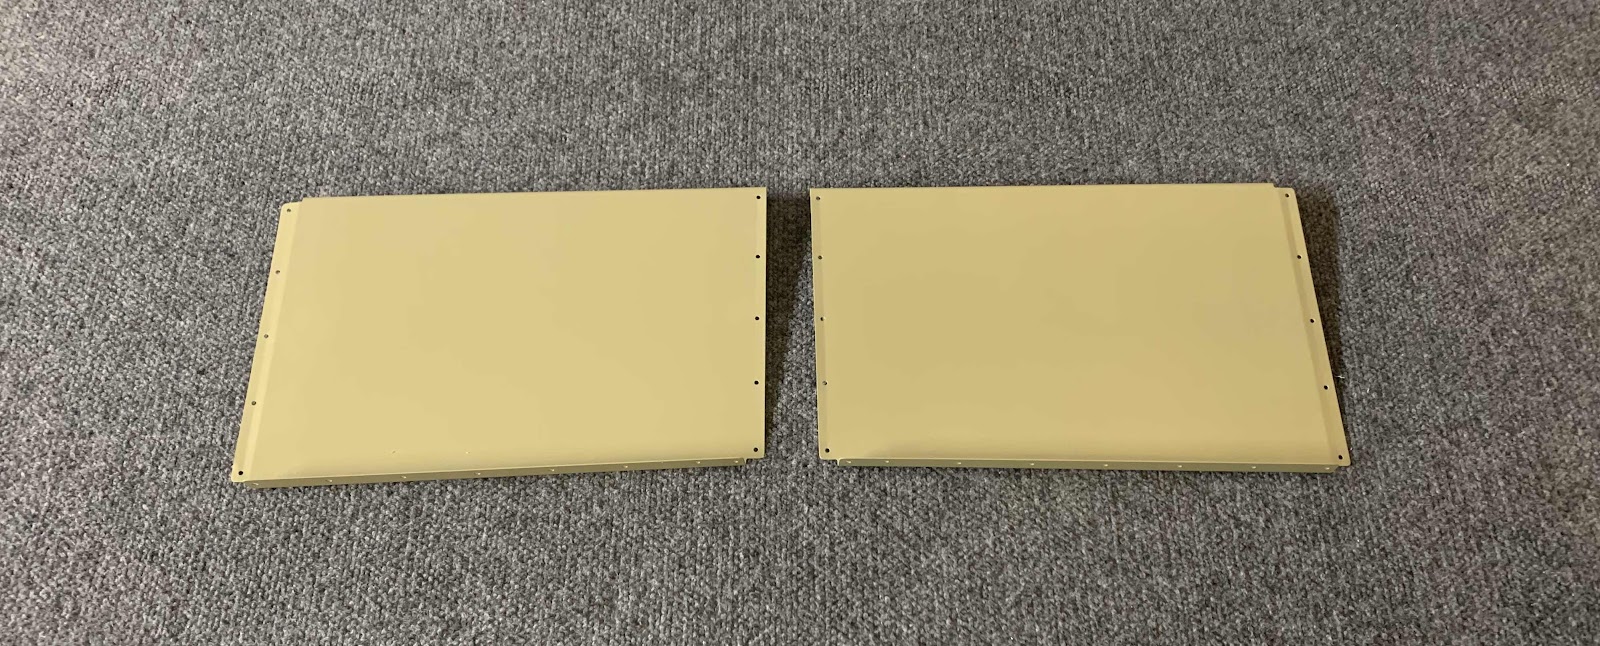
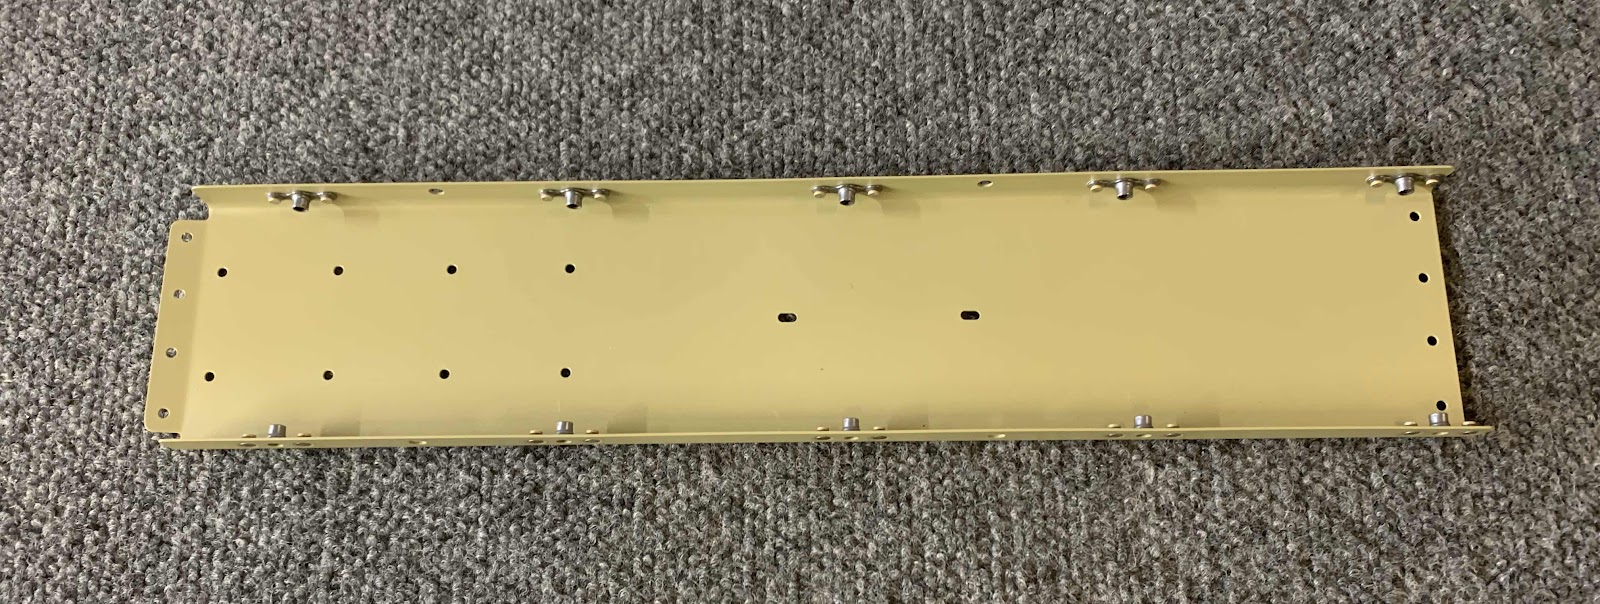
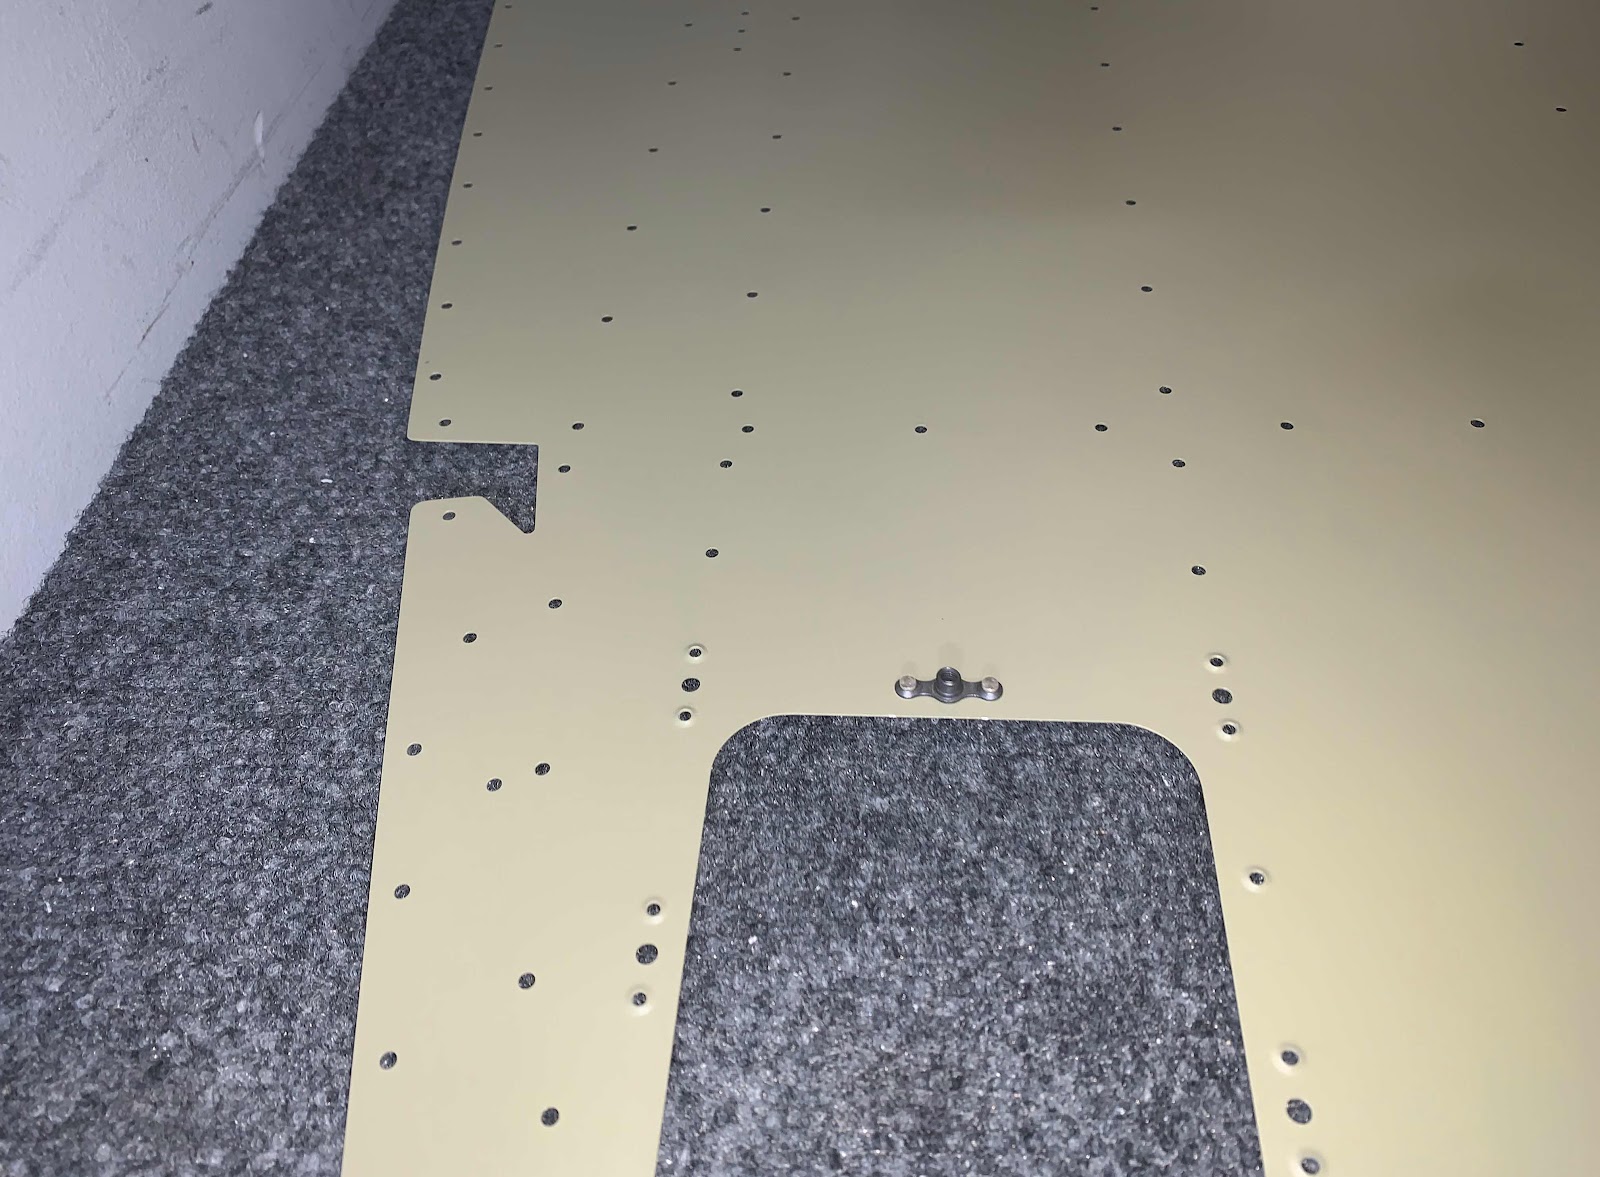
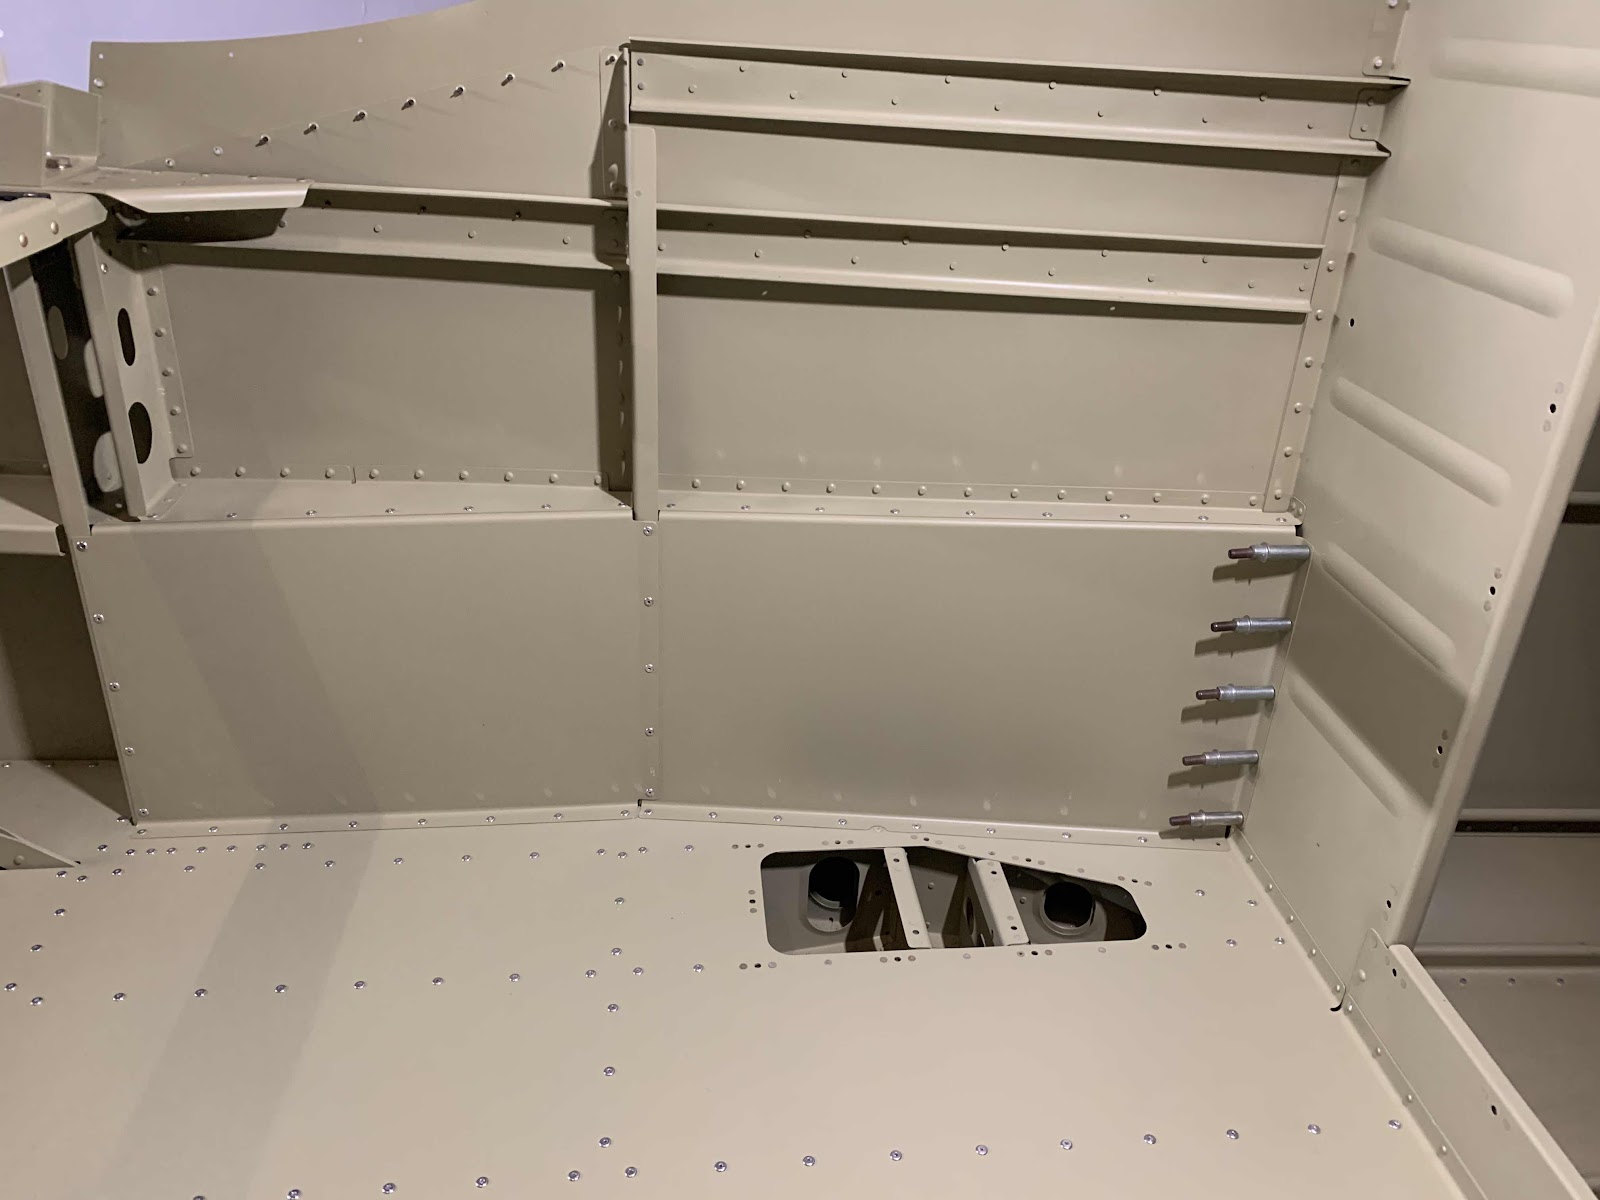
Here is the right Baggage Side Covers clecoed into place.....

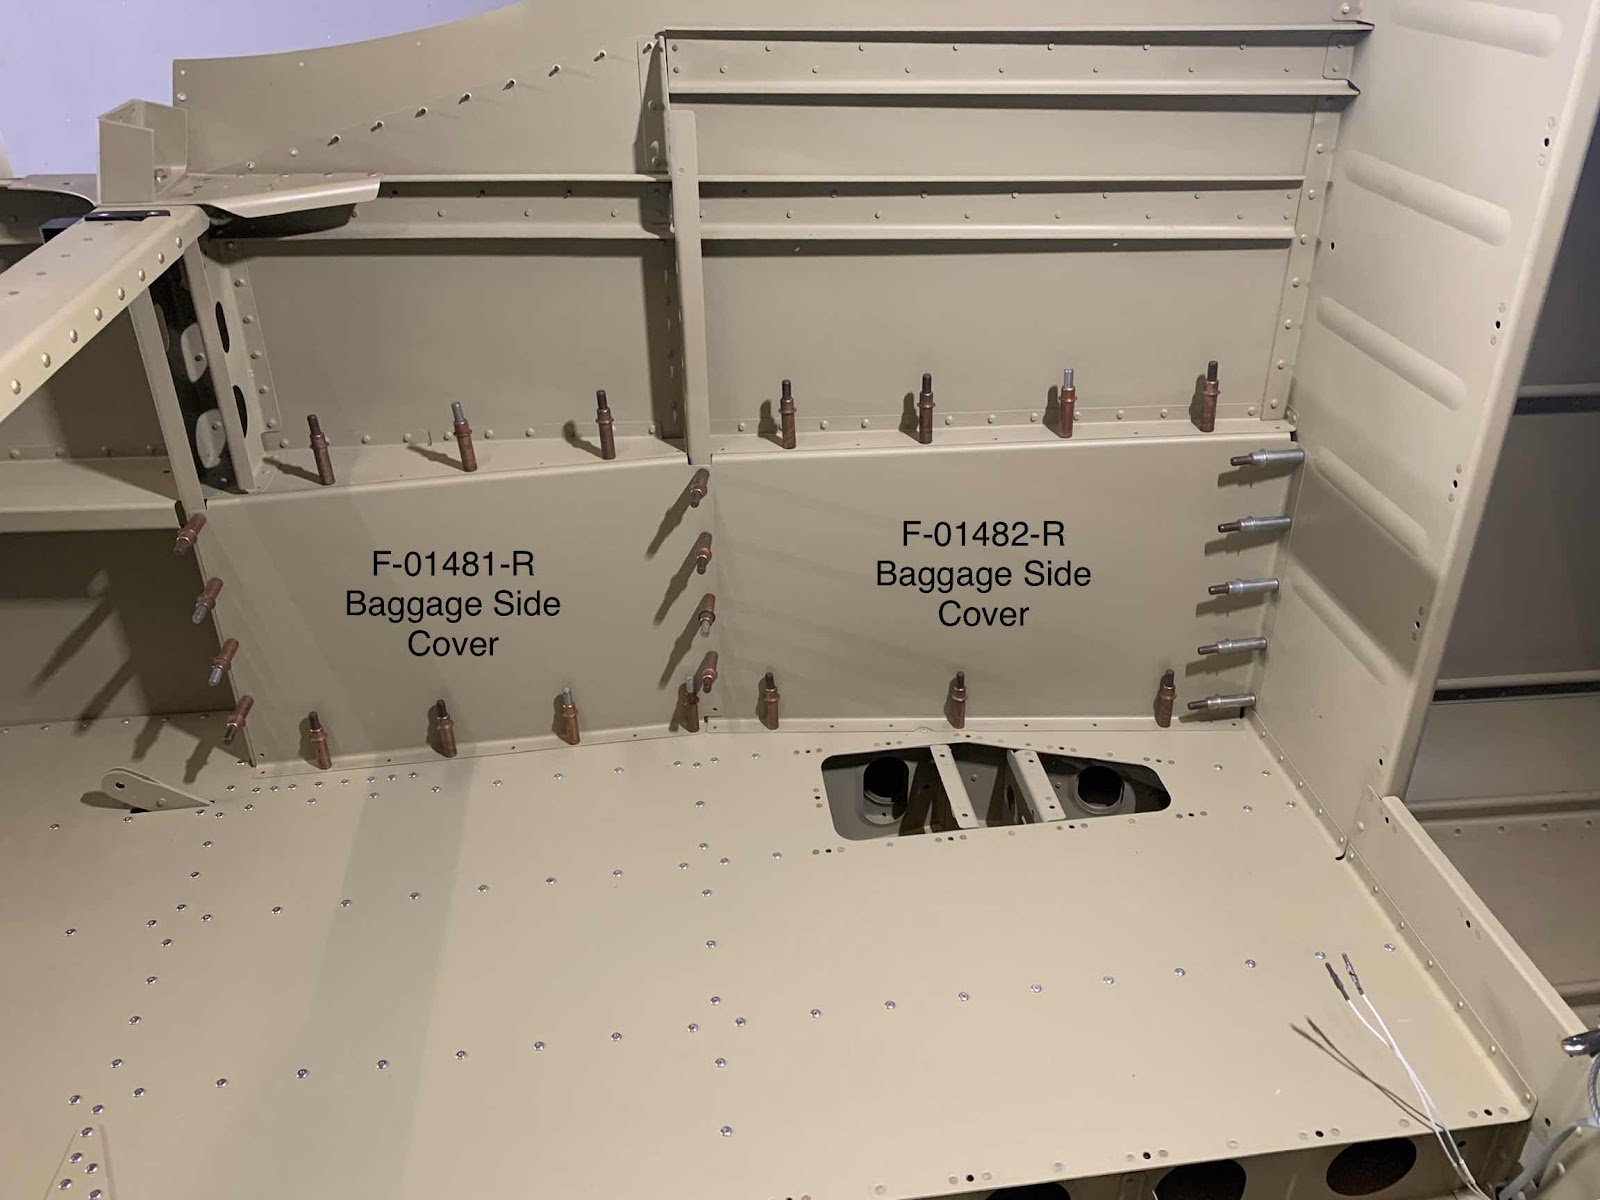
.....and the left Baggage Side Covers.  All of the copper clecos will receive LP4-3 blind rivets and the silver clecos will receive AN470AD3-3.5 solid rivets.  (The plans call for AN470AD3-3 rivets, but measured short.  The AD3-3.5 rivets measured perfectly, so I used those instead).

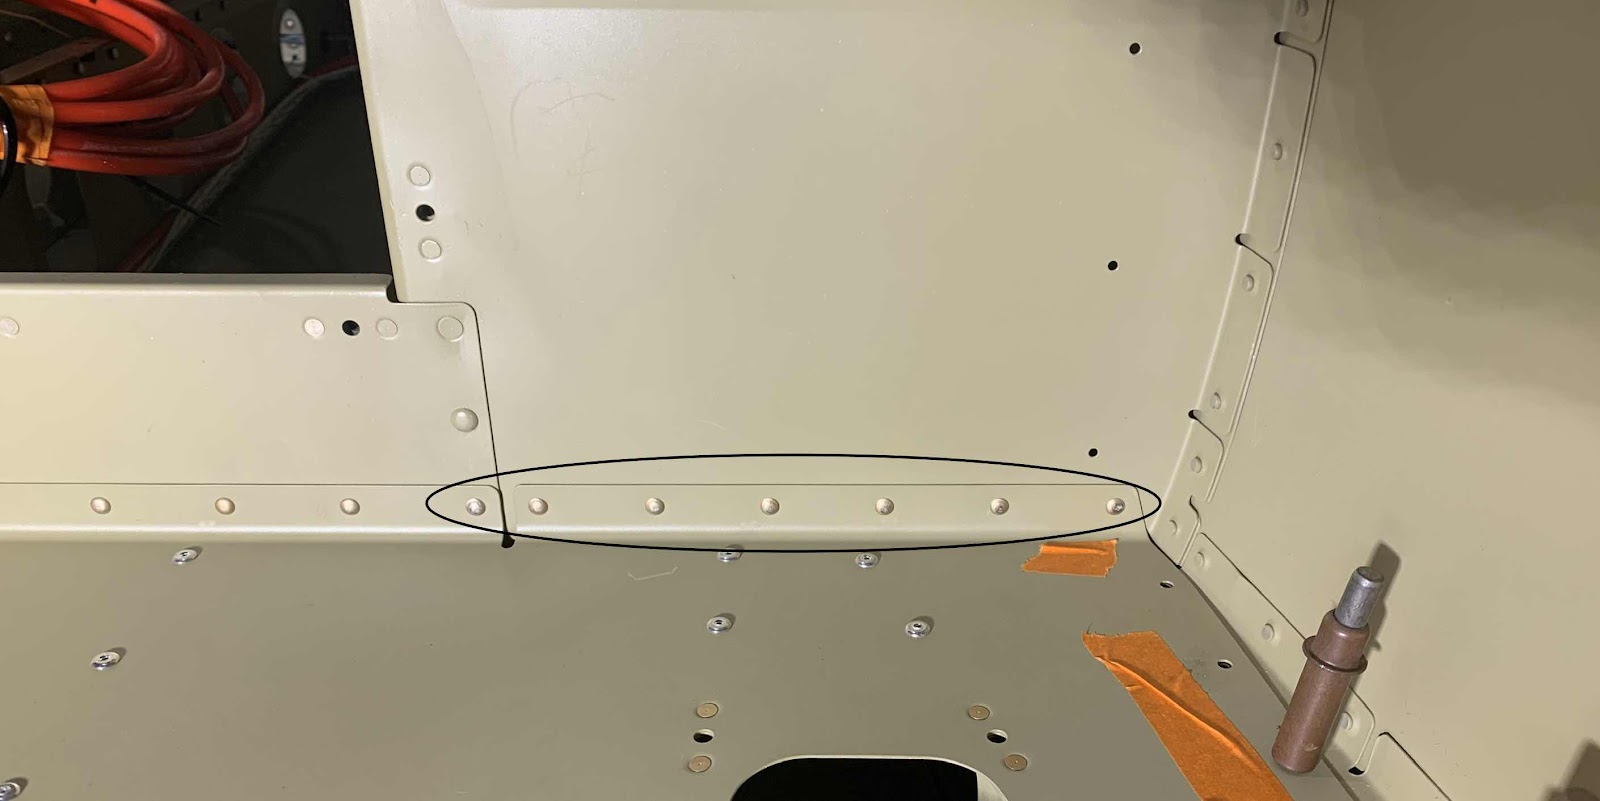
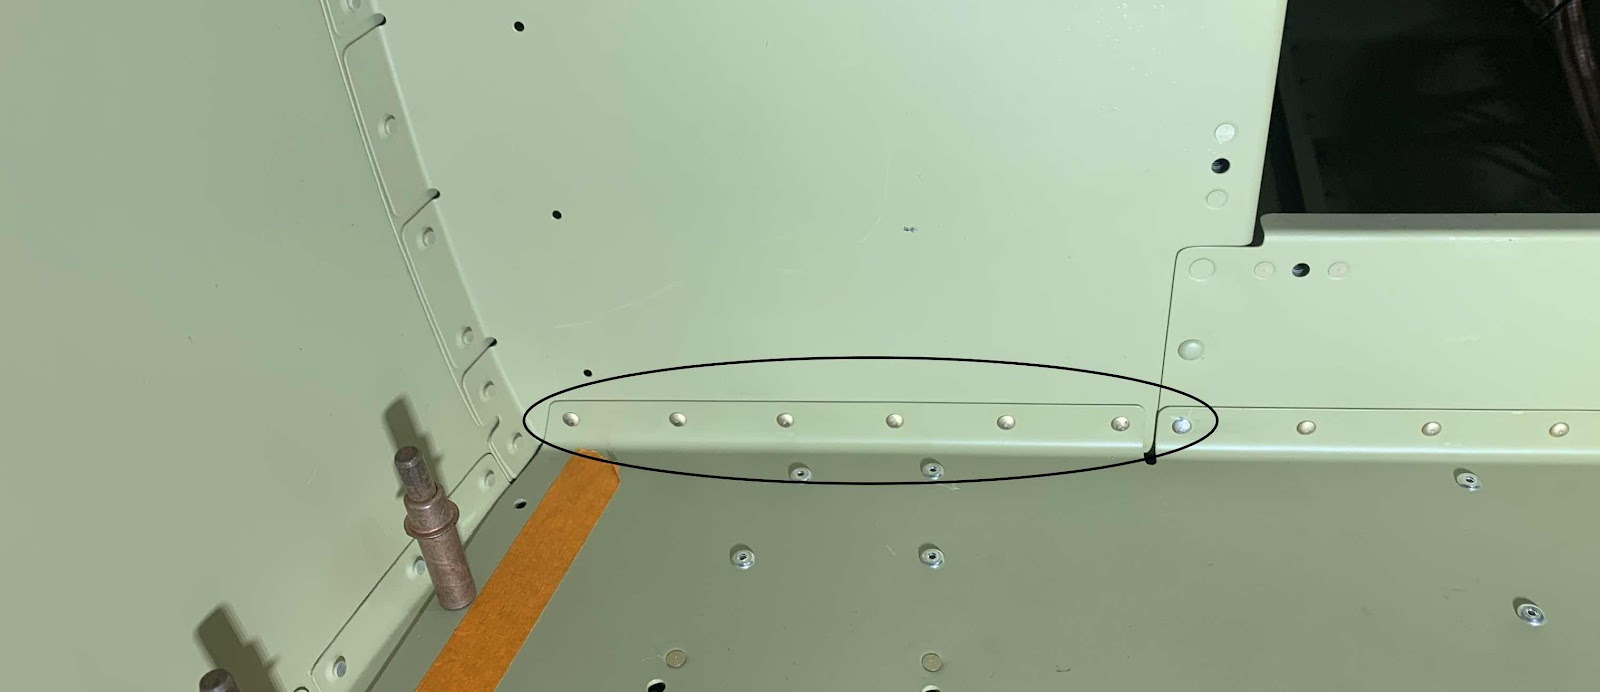
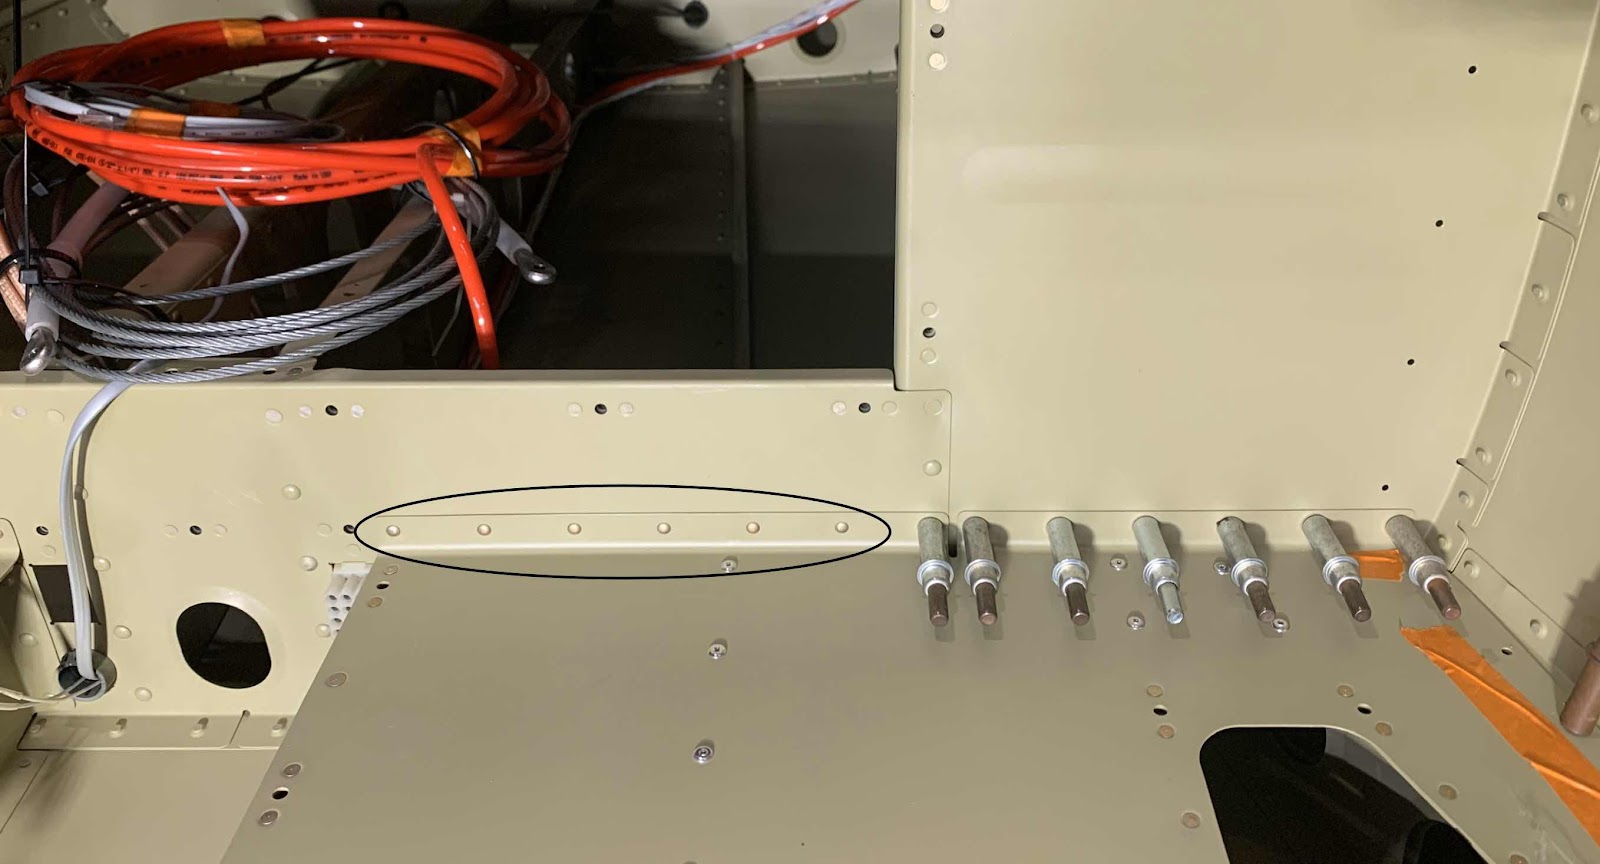
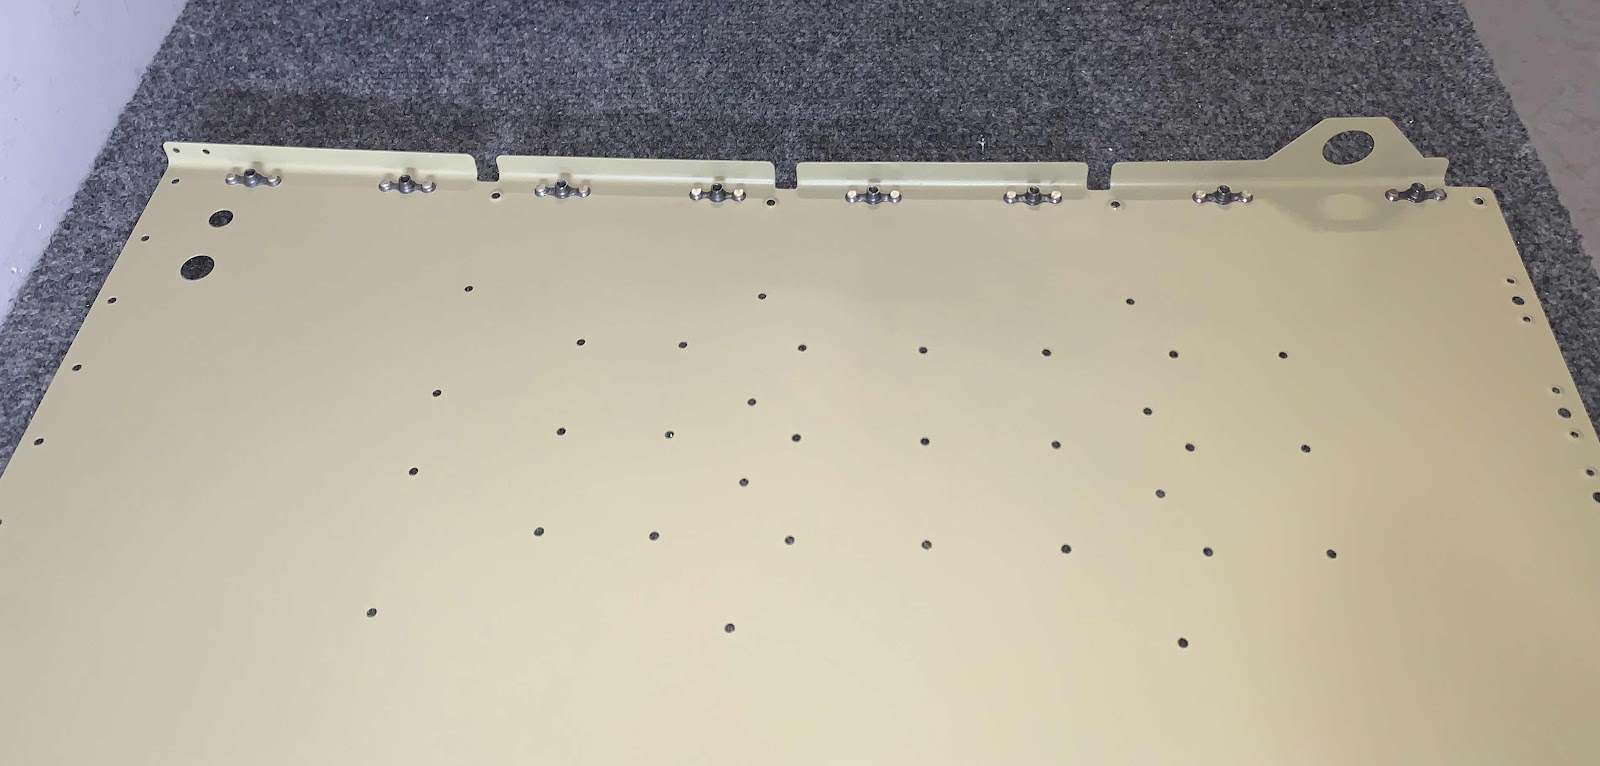
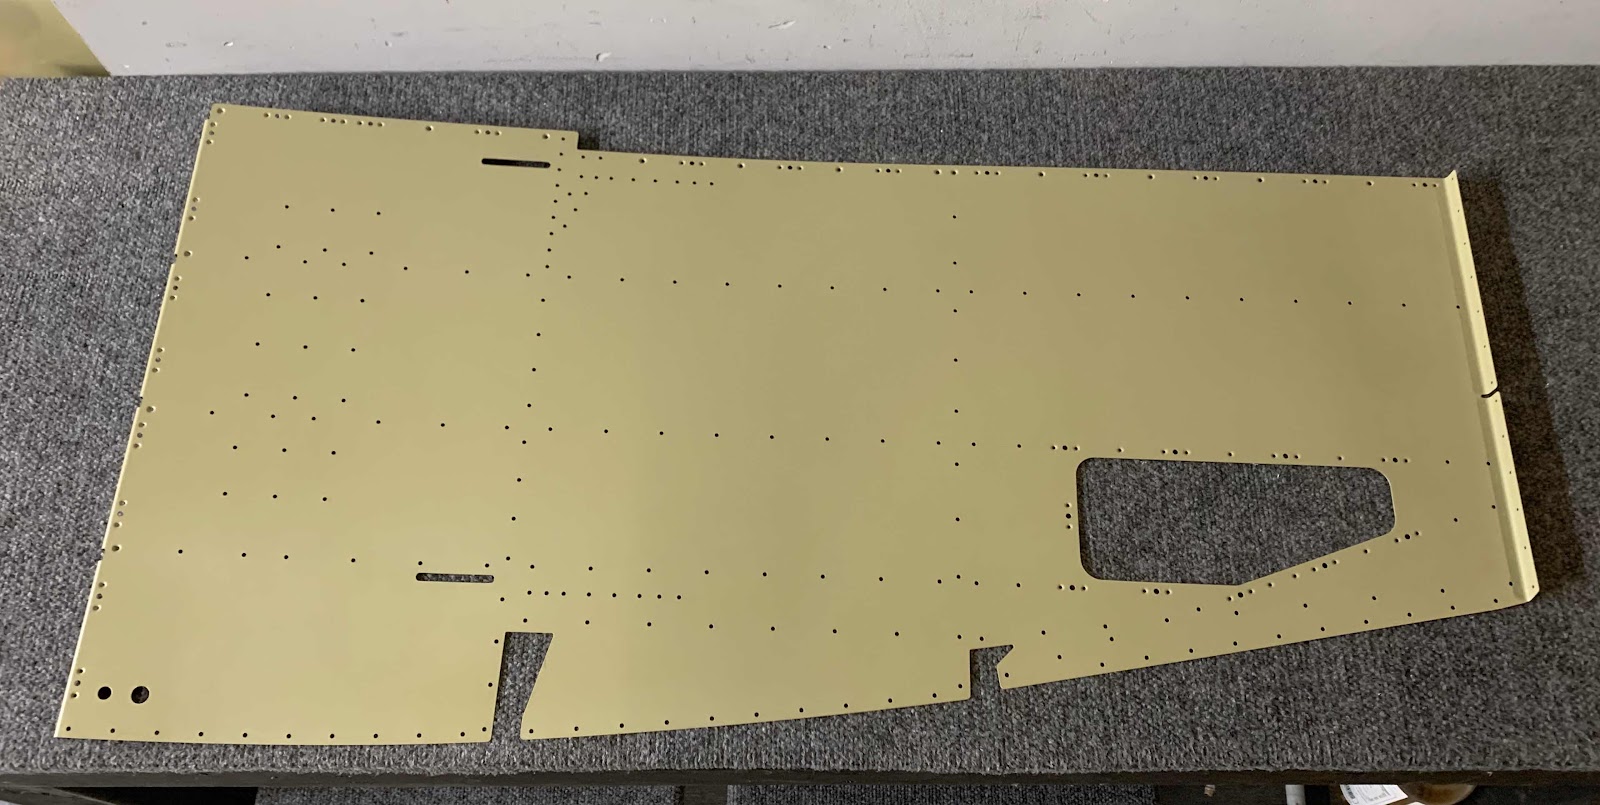
Once all the Baggage Side Covers were clecoed into place, we started installing the LP4-3 rivets.  Here are all the LP4-3 rivets set on the right Side Covers.  The only rivets left are the five AN426AD3-3.5 rivets in the aft flange of the rear Side Cover attaching to the Bulkhead.

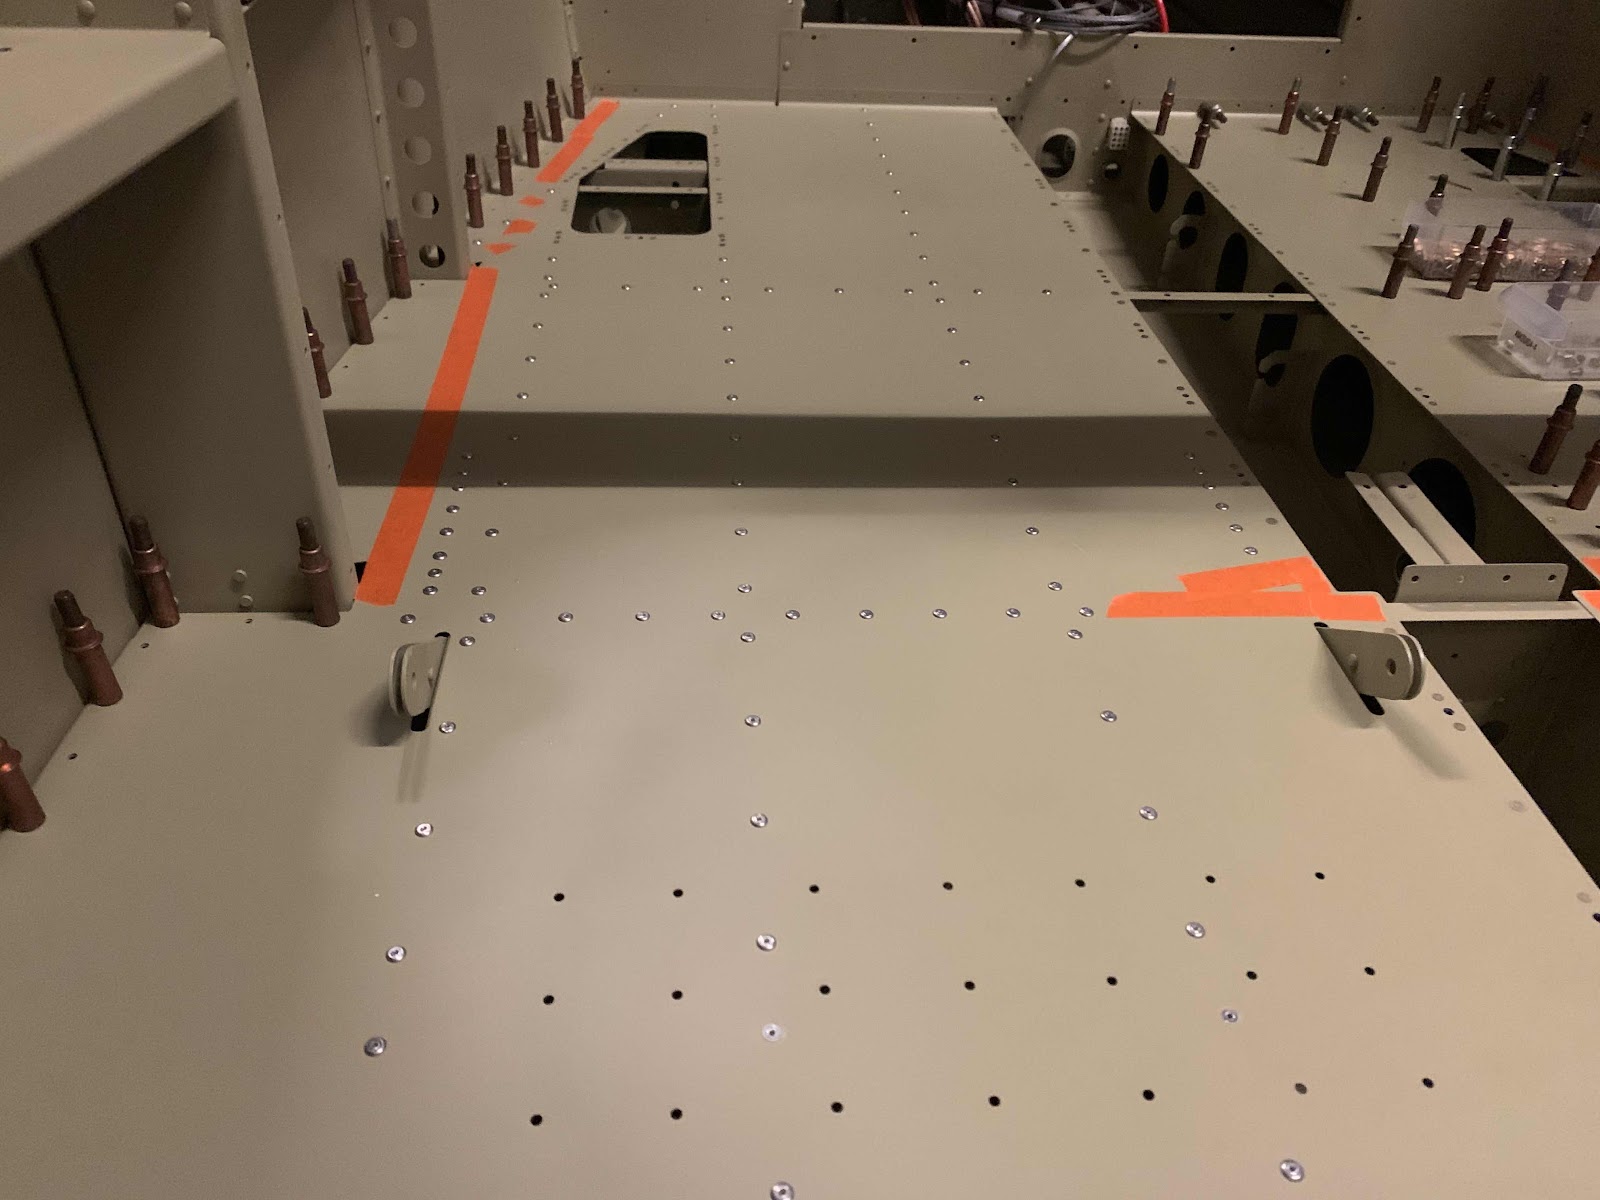
Then, we moved on to the right Side Covers.  The picture below shows about every other rivet removed and ready to receive the LP4-3 rivets.

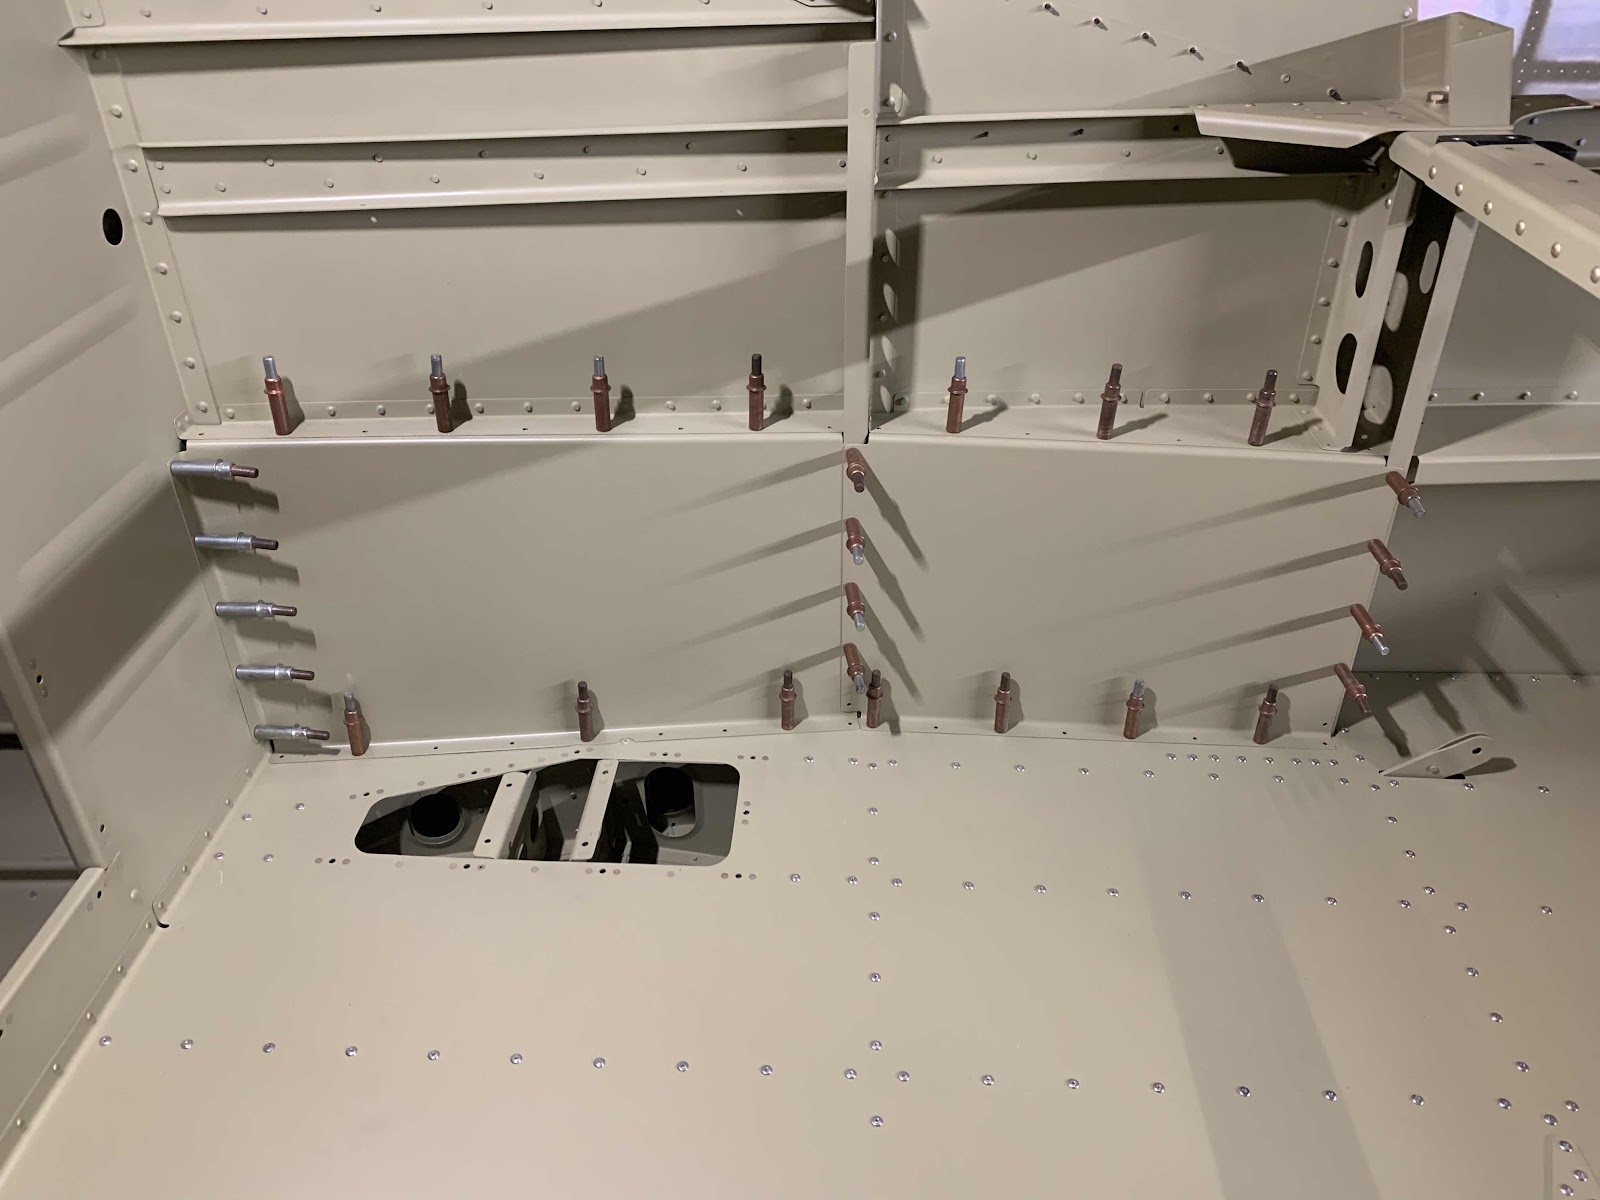
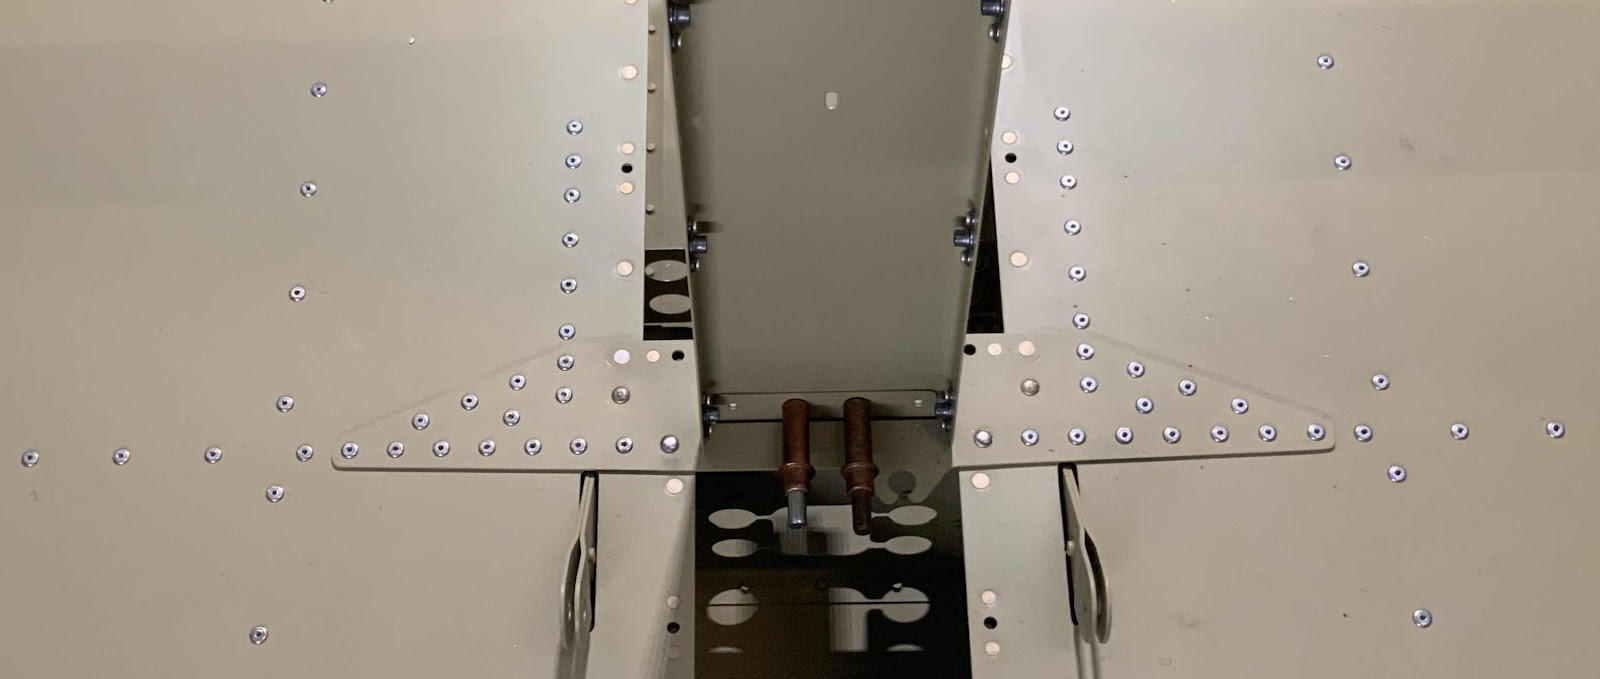
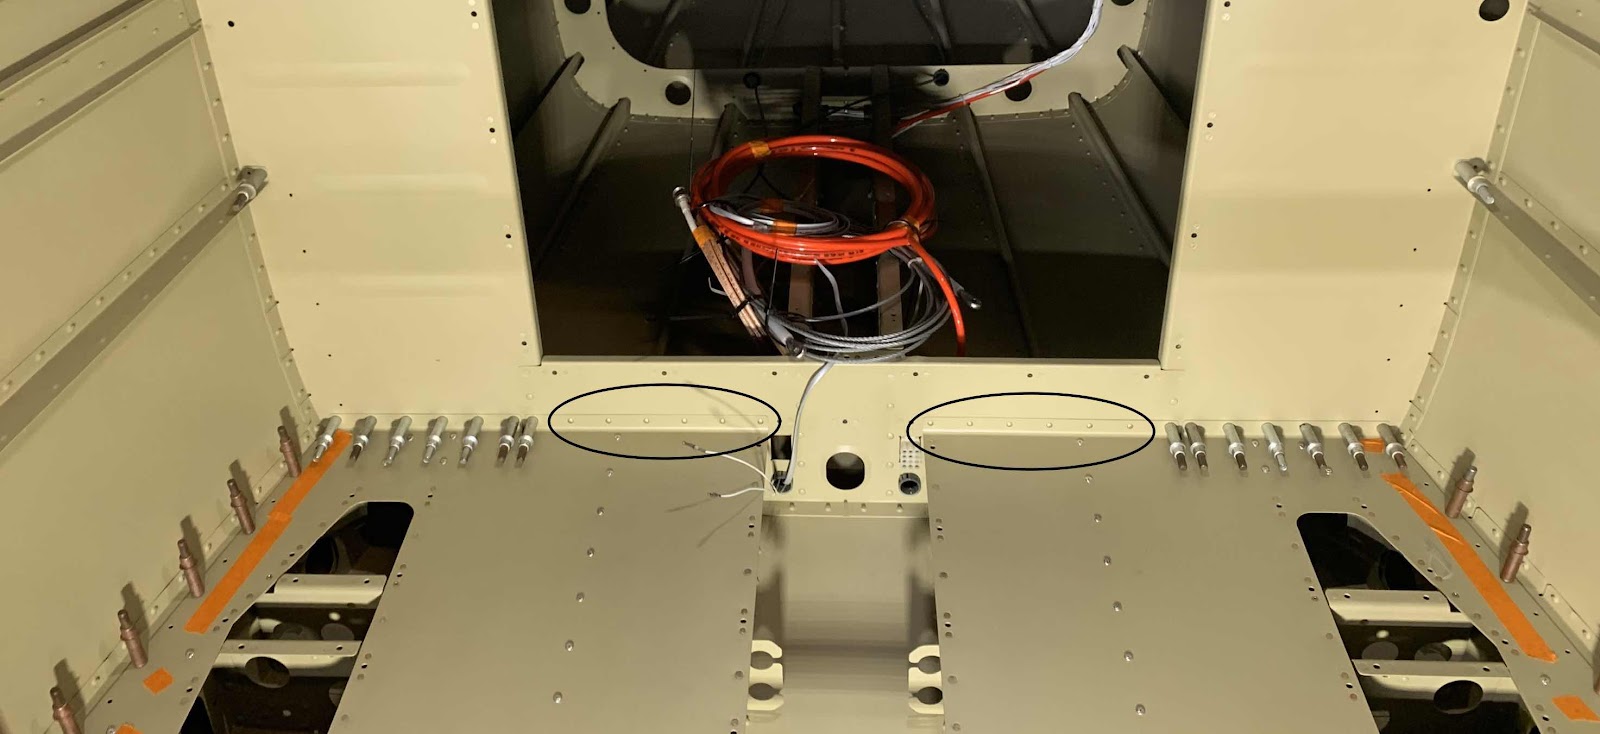
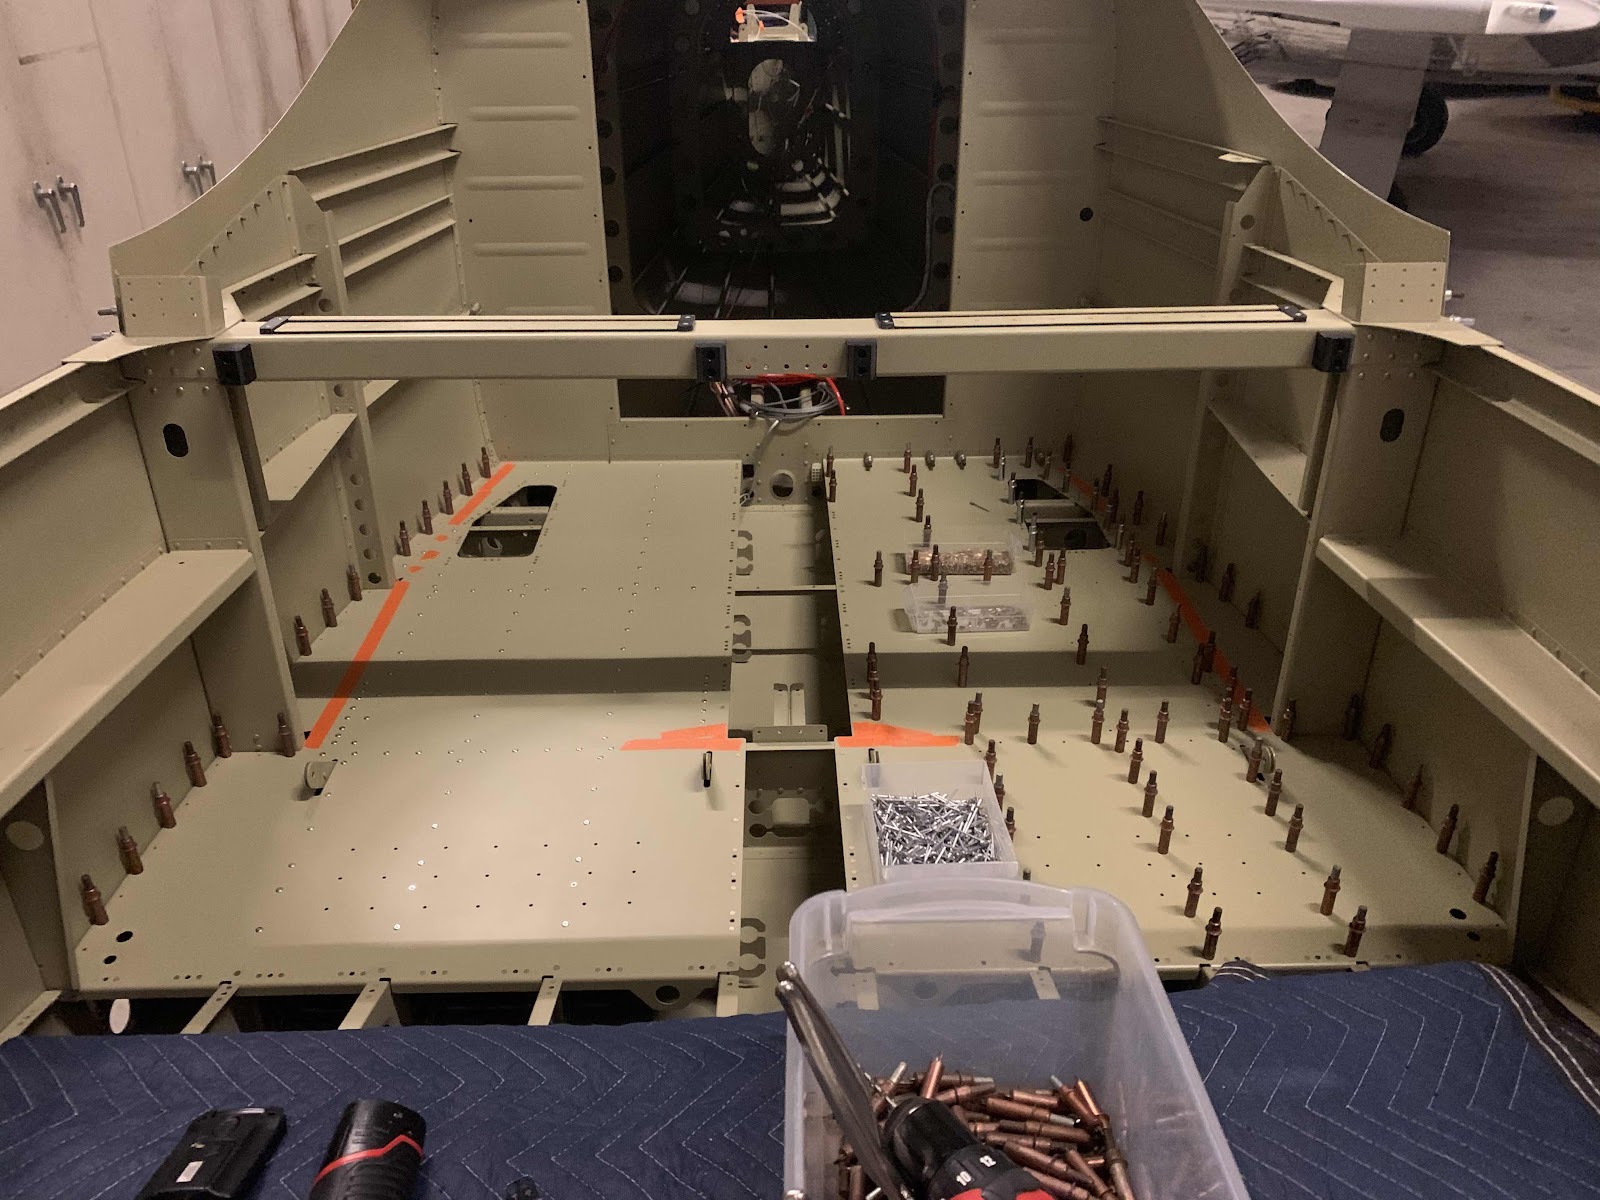
Here is an overview of the Baggage Area looking aft.


We will pick it up from here during the next work session.

Thursday, February 20, 2020

Fuselage, Baggage Area (Part 9)

During the last session, I set the “inside” six AN470AD3-3.5 rivets with my hand squeezer.  Today, I shot the seven “outside” rivets circled below.  These rivets connect the F-01447-L & -R Baggage Floors and F-01406A-L & -R Bulkheads.

This is the left side (the rivet to the far left also goes through the F-01406B Bulkhead).....

.....and the right side (also with the far right rivet going through the F-01406B Bulkhead).

The next part to get installed is the F-14141 Baggage Floor Splice.  Here is the plans excerpt showing the install.....


.....and here is the finished install of the Splice.  This is the forward side.....


.....and the aft side.  Once the Splice was installed, the F-01405G Flap Motor Channel was installed and riveted to the F-01405F Mid Fuselage Brace (the four rivets boxed in below) and the F-01405L Bulkhead Doubler (clecoed at the bottom, second picture ).


Moving on to the F-01466-L & -R Flap Motor Brackets.  The two Brackets get riveted to the F-01405F Mid Fuselage Brace and F-01405G Flap Motor Channel.  Pictured below is the forward side of the Brackets riveted to the forward portion of the Brace.....

.....and the aft side of the Brackets riveted to the Channel.

Tuesday, February 18, 2020

Fuselage, Baggage Area (Part 8)

During the last session, we installed the F-01447-R Baggage Floor (minus the most outboard row of LP4-3 rivets).  Tonight, we installed the F-01447-L Baggage Floor (minus the same LP4-3 rivets).  Those outboard rivet locations will be completed in a future step.  The orange tape on both Baggage Floors mark the locations that DO NOT get riveted at this time.

Once the left Baggage Floor was installed, the next step was to rivet the rear flanges of the Baggage Floors to the F-01406A-L & -R and F-01406B Bulkheads in the areas circled below.....as well as, the locations of the #40 silver clecos.  The picture below shows the inside 12 rivets (6 on each side) installed in the flanges and Bulkheads.   The plans called for AN470AD3-3 rivets, but measured a little short.  I used AN470AD3-3.5 rivets as they measured the perfect length.

Fortunately, I was able to use my hand squeezer with a 3” yoke to set the 12 rivets discussed above.  Here are a couple of angles showing how the squeezer was able to access the rivets.


These are the six rivets set on the right side.....

.....and the six rivets installed on the left side.  The remaining six rivets on each Baggage Floor flange will have to be shot.....can’t squeeze those ones!

Lastly, here is an overview of the Baggage Area.

Monday, February 17, 2020

Fuselage, Baggage Area (Part 7)

While I was waiting for riveting help with the Aft Fuselage Attachment, I started some of the initial parts prep on a couple of additional Sections.....including the Baggage area.  Those initial steps for the Baggage Area are covered in part 1 - 6 in this section.  Now that the Aft Fuselage Attachment is complete, I turned my attention back to the Baggage Area.  

To begin, prior to installing the F-01447-L & -R Baggage Floors, I prepared the area that would be under the Baggage Floors.  I vacuumed any/all debris, wiped/cleaned with MEK, and let the area dry.  After a few minutes, I took a small airbrush and touched up with Akzo Primer all the areas that the original primer might have been removed....scratched from the bucking bar, parts scratching each other, etc.  Then, ultimately, I decided to just got ahead and Akzo prime ALL the areas that were not previously primed.....mostly the shop head side of rows of rivets.  Anyway, now that all that is complete, it’s time to put down the Baggage Floors.  Both Floors were clecoed into place and for no particular reason, we started on the right side.

A couple of the center holes for nutplates had to be final drilled to #19, but no other preparation was needed (previously completed in Parts 1 - 6).  The Access Panel opening and outside edges of each Baggage Floor contained a total of 30 K1000-08D nutplates, 15 AN426AN4-4 rivets, and four CCR-264SS-3-2 rivets.   All the remaining holes (many of them) received LP4-3 Blind Rivets.  Here is the almost completed right Baggage Floor.....

.....and a close up of the right Baggage Floor.

This is a view showing the right and left Baggage Floors.  The Floor on the left (right Baggage Floor) is almost complete.  The Floor on the right (left Baggage Floor) is clecoed into place and will be completed next.

More to follow during the next session.

Monday, January 20, 2020

Fuselage, Baggage Area (Part 6)

In Part 5, I prepared the two Outboard Bushings.....during today’s session, I completed the two Inboard Bushings.  Here is an excerpt from the plans showing how the two Bushings should be trimmed.....


.....and what mine looked like after being trimmed.  They actually came out pretty close to the template.  I also put them next to each other and sanded all the sides and angles of each piece the same.....just like the Outboard Bushings.

Next, the Bushings were attached to the F-01417-L & -R Seat Ribs as shown in the picture below.

Here is a close up of the -R Bushing (-L is in the background).  The following hardware was used to install each of the Bushings....
- AN3-11A bolts (x2)
- NAS1149F0332P washers (x4)
- MS21042-3 nuts (x2)
As with the Outboard Bushings, the plans stated to NOT torque the bolts/nuts to normal torque values.  So, I got them very snug and “just a little more”.....somewhere in the neighborhood of 25 in/lbs.

Here is a close up of the -L Bushing (-R is in the background).  The same hardware was used to install this Bushing.

That completes the installation of both Outboard and both Inboard Bushings.  These Bushings will be used in a later session for the Flaps actuation.

Saturday, January 18, 2020

Fuselage, Baggage Area (Part 5)

The fabrication of the two F-1030 Outboard Bushings from two of the F-1030 UHMW Bushings (shown below) are actually the first steps listed in the plans for Section 32..  All four of the Bushings are the same, but I will use the top two for the fabrication.

So, essentially, we will need to make those two blocks look like this....


I have been working on these pieces a little bit at a time, so the session total shown at the bottom of the post will reflect the total time for the several sessions I’ve worked on the two pieces.  Below is one of the two completed bushings.  The largest part of the material was removed with a bandsaw and the final shape was made using 220 grit sandpaper.

Here are the two completed blocks showing the before and after.....

.....and the two completed Outboard Bushings side by side.

Once the two blocks were completed, they were installed on the plane.  Here is the excerpt from the plans that describe how.....


This is the Bushing installed to the Flap Block Bracket on the right side side exterior....

.....and the right side interior.  I seemed to have gotten a little excited with the torque seal again.  (NOTE: The plans warn against over tightening the hardware.  It states, “tighten the nuts and bolts just enough to increase the turning friction of the bolts in the blocks. DO NOT use standard torque”.  If you were using standard torque values for this combination of nut and bolt (AN3-12A bolt and MS21042-3 nut) it would be torqued to 42 in/lbs (28 +14).  With this in mind, I “torqued” the nuts to 30 in/lbs so I could get all four nuts consistent and the same.

Here is the Bushing installed to the Flap Block Bracket on the on the left side exterior.....

.....and the right side interior.

Sunday, January 12, 2020

Fuselage, Baggage Area (Part 4)

After preparing all parts in the previous session, today’s session would be treating them with Alumiprep and Alodine and spraying them with Akzo primer.  Here are all the parts after the Akzo primer has dried.

Here are the F-01482-L &-R Aft Baggage Side Covers.....

.....F-01481-L & -R Forward Baggage Side Covers.....

.....F-01466-L & -R Flap Motor Brackets.....

.....F-14141 Baggage Floor Splice.....

.....F-01405G Flap Motor Channel (with the 10 K1000-08D nutplates installed).....


.....F-01447-R Baggage Floor.....

.....the forward edge of the -R Baggage Floor with the eight K-1000-08D nutplates installed.....

.....the single K1000-08D nutplate installed on the forward edge of the -R Access Hole.....


.....the F-01447-L Baggage Floor.....

.....the forward edge of the -L Baggage Floor with the eight K1000-08D nutplates installed.....

.....and the single K1000-08D nutplate installed on the forward edge of the -L Access Hole.

And there you have it.....all the parts primed with nutplates installed (where required).