Wednesday, October 31, 2018

Wings, Flaps (Part 1)


On to Section 21:  Flaps.  
The work accomplished on this post was completed between October 24th and 31st.

As with every section that has a left and right, the plans only provide building instructions for the Left (unless otherwise noted).....in this case the Left Flap only.  Additionally, as with every section, the plans start with preparing the parts and pieces that make up whatever you are building.....and this section is no exception.

Below are the six FL-1007-L and FL-1007-R Hinge Brackets.  The plans state to adjust the flanges to be parallel with the part body if/as required.  I found that none of the 12 Hinge Brackets required any adjustment and were all parallel.

The picture below looks a little...weird, but I can explain.  If you look at the FL-1007-L Flange with the two clamps on it, you can see the blue line running horizontally.  This blue line, and four hole pattern, was drawn following the dimension called for in the plans.  Once the holes were marked, they were drilled with a #40 and deburred.  After all four holes were drilled, a second FL-1007-L Hinge Bracket was clamped to it.  (Since the FL-1007-L Hinge Brackets are the “same” piece, in to clamp them together, I had to revers the piece as shown below).  Lastly, the four holes were match-drilled to the additional Hinge Bracket.  This process was repeated for the remaining FL-1007-L Hinge Brackets.
*****The FL-1007-R Hinge Brackets DO NOT get drilled at this time*****

Clecos installed after all four holes were match-drilled.

All six FL-1007-L Hinge Brackets after being match-drilled and deburred.  The Bracket on the far left was used as the “template” for the other five Brackets.

All the FL-1004-L & -R Nose Ribs were straightened and fluted as necessary and deburred.  Next, two of the FL-1004-L, two FL-1004-R Nose Ribs, and four FL-1006 Doublers were clecoed toghether to form the Outboard Rod End Rib Subassemblies.  Here is what it looks like on the plans.....


The four #40 holes (that will attach the nutplate) were match-drilled using the Doubler as a guide.  Additionally, the two 1/4 holes in the Doublers were final-drilled with the corresponding #30 hole in the Nose Rib.  Lastly, the four #40 holes were machined countersunk for a AN426AD3 rivet.  After all the holes were drilled, the Subassemblies were disassembled, deburred, and re-clecoed.  Below is an example of all the competed work listed above. 

The Inboard Robb End Rib Subassemblies were prepared in the same manner as described above with one exception.  The four #40 holes on the FL-1006 Doublers are ignored and not prepared for nutplates.  Here is what it looks like in the plans.....


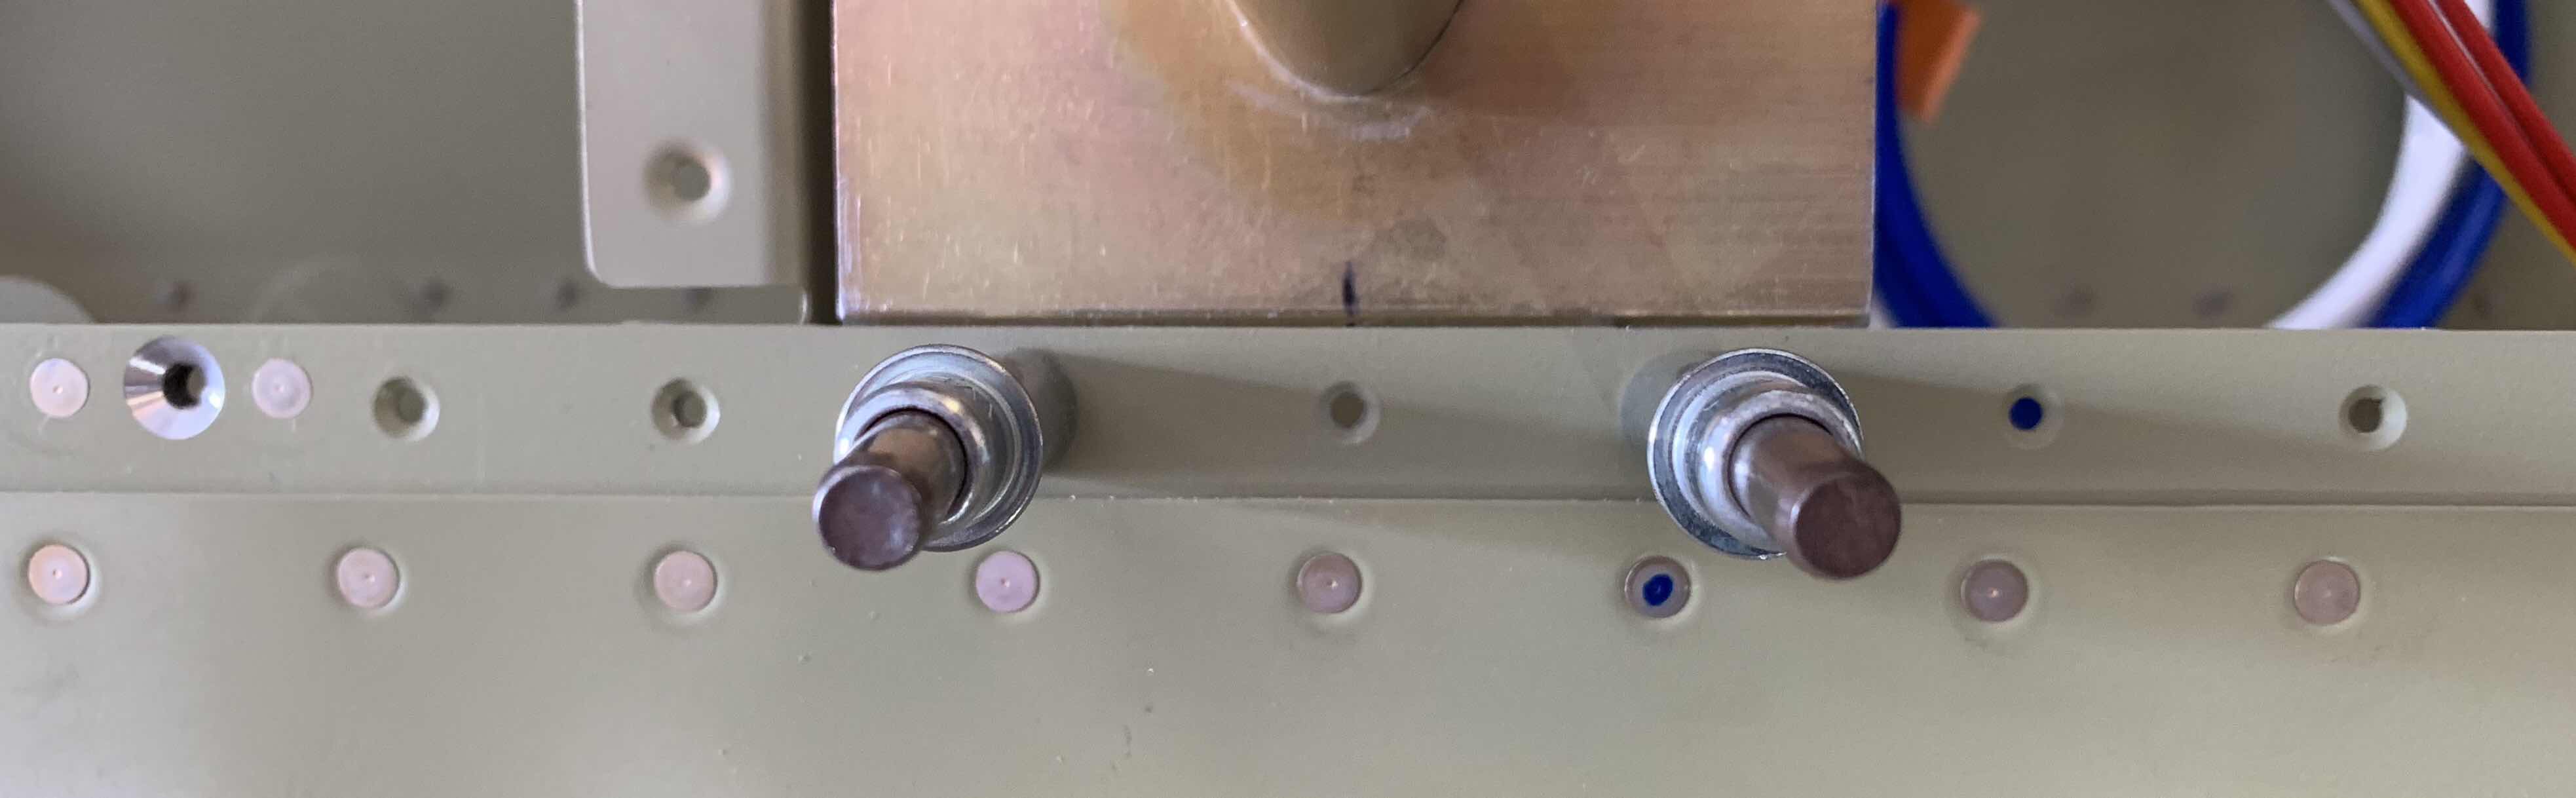
Next, all the #30 holes in the FL-1004-R Nose Ribs and the Inboard and Outboard Rod End Rib Subassemblies were final-drilled.  Lastly, all the edges were cleaned in the parts shown below.

Thursday, October 11, 2018

Wings, Bottom Wing Skins (Part 14)

During today’s session, I installed the remaining 32 K1100-08D nutplates on the Right Wing Outboard Bottom Skin and the Left Wing Inboard and Outboard Bottom Skins.  These nutplates will be used for the screws that will attach the six Wing Access Plates to the bottom of the Wings.

This is the outside of the Left Bottom Inboard Wing Skin showing the manufactured heads of the rivets attaching the eight nutplates.....

.....and on the inside.  AN426AD3-3.5 rivets were used to attach all 48 nutplates.

This is the outside of the Left Bottom Outboard Wing Skin with 16 nutplates attached.  In this picture, you can also see the “hole” that was cut in the Skin for the Pitot Tube Mast, along with the associated mounting/rivet holes.

Here is the nutplates attached on the inside and the opposite side of the Pitot Tube Mast “hole”.

Here is the outside of the Right Bottom Inboard Wing Skin showing the manufactured heads of the rivets attaching the eight nutplates.....

.....and on the inside.

Lastly, pictured below is the outside of the Right Bottom Outboard Wing Skin with 16 nutplates attached.....

.....and on the inside.


Tuesday, October 9, 2018

Wings, Bottom Wing Skins (Part 13)

After all the prep work was completed, it was time to Alumiprep, Alodine, and Akzo prime.  Below shows the seven parts that will make up the ADAHRS or GMU22 Magnetometer Mounting Bracket.

Here are the same seven pieces clecoed together.  This is the “top” view.....

.....and this is the “bottom” view.


After each of the pieces were treated with Alumiprep and Alodine, they were hung up to dry prior to getting primed.  The picture below shows the seven pieces that make up the ADAHRS or GMU 22 Magnetometer Mounting Bracket and the six Access Panels 
(3 for each Wing) used on the Left and Right Bottom Skins.

Here are the seven pieces of the ADAHRS or GMU 22 Mounting Bracket after getting primed.

Shown below is the “top” view of the ADAHRS or GMU 22 Magnetometer Mounting Brackets completely riveted together.  Additionally, the Mounting Bracket has been riveted to the J-Stiffener.  (Not sure why the color difference between the pictures above and below.  I think the one on the bottom was taken at night with the flash on my phone).

Here is the “bottom” (opposite side of the picture above) of the ADAHRS GMU 22 Magnetometer Mounting Bracket.

Here are the Left and Right Inboard and Outboard Bottom Skins and J-Stiffeners after being treated with Alumiprep and Alodine.  The next step for them is to be Akzo primed.  I’m not going to show an “after primer” picture of the Skins.  You will get to see “finished” pictures when the nutplates are installed in the Part 14.

After the Akzo primer was dry, I started installing the 48 K1100-08D nutplates on the Inboard and Outboard Bottom Wing Skins of each Wing.  I began by installing the 16 nutplates on the Left Outboard Wing Skin (completed pictures will be shown in the next post when all four Bottom Skins are finished).  During the next session, I will install the remaining 32 nutplates.


Thursday, October 4, 2018

Wings, Bottom Wing Skins (Part 12)

In the previous post, I showed the Pitot Mast with a mark on it indicating it’s center point.  To get that center point, I measured the width of the “base plate” at 2.994 inches.....

.....and took half (1.497 inches).

Since I am only able to use three holes on the RV-14 to attach the base plate to the Main Spar, I lined up the mark with the center hole to be used for the installation.  Once the center of the base plate was lined up, I clamped/clecoed it into place, match-drilled the center hole, installed a cleco, and repeated the process for the two outside holes.

Here, I used an inspection mirror to show the back side of the base plate against the Spar.  From this angle, you can see a couple of things.  First, the three holes that were match-drilled from the Spar through the base plate (the two outside holes have clecos installed).  Second, the gap I created between the bottom of the base plate and three rivets below it (circled in white).  This area had to be trimmed and filed because the base plate “sat” on top of the rivets and caused the plate to be to far aft.   So, I used a combination of Scotchbrite Wheel, hand file, and 220 grit sand paper to complete the appropriate trimming of the base plate.

I decided I wasn’t the biggest fan of the paper template (it was a very good template, just flimsy) supplied by Dynon, so I used the their paper template to create an aluminum one from some scrap.  First, I used a razor blade to remove the center portion of the paper template to fit around the Pitot Mast.  Then, I marked the three holes I previously match-drilled with the Spar on the paper template, as shown below.

Next, I taped the paper template onto the aluminum, traced the center mast cutout, and drilled the three “Spar” holes and eight Skin holes through the aluminum.  Finally, I removed the center mask cutout (more on that below).

Lastly, I placed the aluminum template on the Pitot Tube mast and clecoed them together using the three Spar holes.  Then, I used a sharpie to mark the eight holes from the template to the base plate.  All three pieces are shown below, including the marked hole locations on the base plate.

I took the “new” aluminum template and clecoed it to the Bottom Skin at the three Spar holes.  Once in place, I traced the center Pitot Mast cutout onto the Bottom Skin and used these two unibits to remove a majority of the material.

Next, I used my angle grinder with a grinding bit to trim up to the traced edge.

And finally used a combination of a fine hand file and 220 grit sandpaper to make the final shape.  I had to put the Pitot Mask in and out several times to get the final fit I wanted with the Skin.

Now, I needed to match-drill the Skin attach holes.  I inserted the Pitot Mast through the Bottom Skin, placed the template over the Mast, and clecoed them together with the three Spar holes.  Lastly, the remaining eight Skin holes were match-drilled.


Here are the eight Skin attach holes after removing the template.....

.....and the holes in he Pitot Mast base plate.

The final step on the Bottom Skin was to dimple the attach holes......

.....and the final step on the base plate was to countersink the Skin attach holes to accept the dimpled holes in the Skin above.  (The three Main Spar attach holes do not get countersunk because they sit flat on the Main Spar).

Wings, Fuel Tanks (Part 31)

The Left Fuel Tank has been sitting for roughly three days.  During this time, I’ve continuously checked for leaks along all the seams.  And.....

NO LEAKS!  Victory!

The Left Fuel Tank is now ready to be installed on the Left Wing.

Monday, October 1, 2018

Wings, Fuel Tanks (Part 30)

During the last session, I applied Proseal to the seams on the Aft Tank Baffle and Zee Attach Brackets.  After several days of letting it cure, now I want to leak check it with avgas.  I put a 2x6 piece of wood on the workbench and stood the Left Fuel Tank up vertically on the Zee Attach Brackets.  This set up is high enough to clear the Skins from the workbench and stable enough to not fall over.

I added enough fuel to only cover the rivets that were not previously leak checked.  I only needed about an inch of or so of fuel, so it didn’t take much.  Here are a couple of pictures looking into the Left Fuel Tank filler hole at the avgas inside the tank.


Now I need to let the Left Tank sit and see if there are any leaks.