
This blog was created to memorialize the building process of my Van's Aircraft RV-14 and to satisfy the requirements for certification in the Experimental Amateur Built Aircraft category. It will also serve as a central location for ME to reference in the future on processes and techniques I used during the build. Additionally, it will allow my family, friends, and other interested builders the opportunity to follow along during my build…..and might be helpful to someone along the way.
Wednesday, January 12, 2022

Flap Position Sensor (Part 1)

The ES MSTS POS-12 Flap Position Sensor from The Ray Allen Company is the position sensor used for flap position input to EFIS displays on the RV-14.
After doing some research and looking at the plans for this section, I decided I wasn’t the biggest fan of this system. The installation seemed easy enough and works for many other builders, but I wanted to research other options for the flap motor/position sensor setup.
During my search, and with a recommendation from Aerotronics, I was turned onto the RV Max Flap Actuator from PH Aviation Services, Inc.
This is ultimately the setup I decided to go with, so I won’t be completing this section of the plans.
Please see the RV Max Flap Actuator installation under the Modifications & Upgrades section on the right.


Panel Design (Part 7)
Well, we have finished our panel design process with Aerotronics. The whole process with them has been great! From initially working with Andre for the panel design….to now working with Jason for the actual panel build. Both of those guys have been awesome to work with. When it’s time to build your panel, I would definitely recommend Aerotronics. I’m kicking around the idea of build an RV-10 after the 14 is complete. If I do, I will definitely use Aerotronics again for the panel.
So, here is the 7th and final iteration of our panel design…..
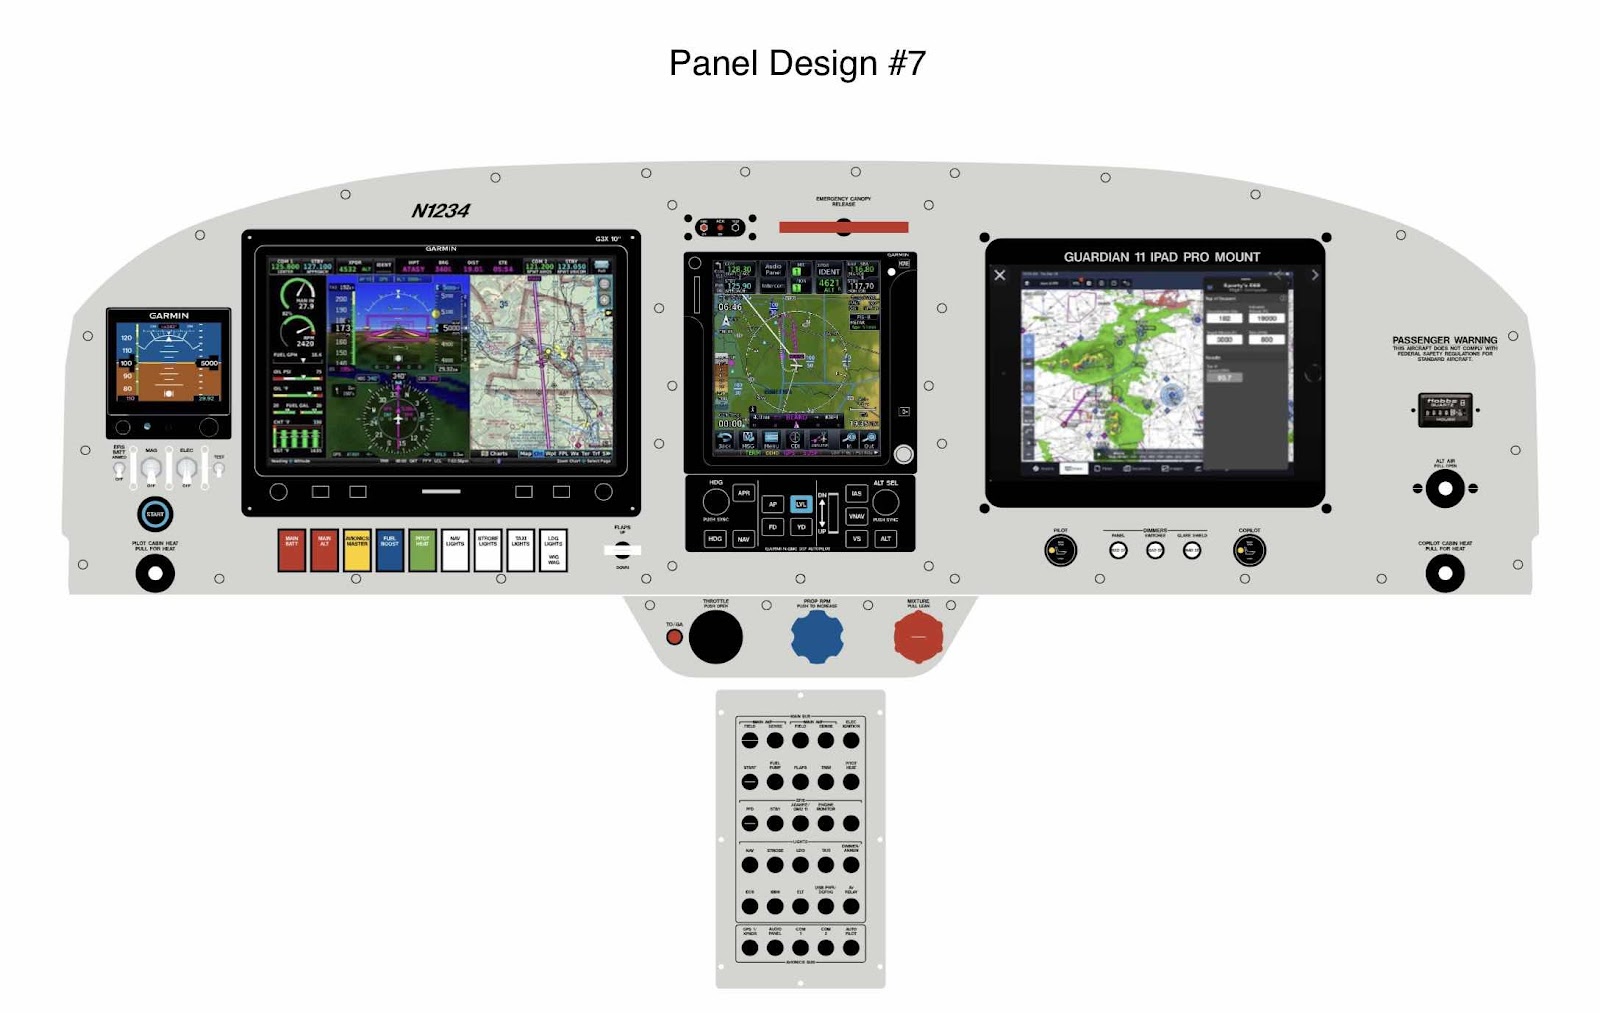
There were only a few changes from the previous #6 design. We decided to swap the location of the HOBBS meter and Passenger Warning. My wife is going to design a personalized Passenger Warning and this gives her more room to work with. We are working on a design and I will post it on the blog when we get it finalized. It won’t be to elaborate, but we just didn’t want the standard warning and something personalized.
We also decided to incorporate a switch for the “Wig Wag” function into a multi-positional switch for the “wig wag’s” and “landing light”. I’m still planning on using the airspeed function on the GAD27 to control the wig wag’s via airspeed, but I still wanted a switch option for any reason I decided to operate the wig wag’s outside of the airspeed parameters.
Lastly, we are going to use the third GAD27 dimmer switch (far right) for the glareshield light.
That’s it. The panel design is complete to our liking and Aerotronics has begun the building it…….
I will update this section as I get pictures/progress updates from Aerotronics.
Friday, January 7, 2022

Finishing, Spinner and Propeller (Part 1)

We started work on this Section back on September 20, 2021, so WAY behind on updating the blog. Anyway, here goes…..
As previously mentioned in the Firewall Forward Kit delivery, the spinner was damaged during the shipment. So, after receiving the new one from Van’s, I started work on this Section. To begin, the S-602-1 Spinner Plate and S-602B Doubler Ring were clecoed together and all the 1/8” holes were match-drill #30. Additionally, the inside perimeter of the Doubler Ring was traced onto the Spinner Plate. I then used my Milwaukee rotary tool with a cut off what to cut as close to the lines as possible. Then, I used a grinding wheel, a file and various grits of sandpaper to remove the rest of the material and sand to the final shape.

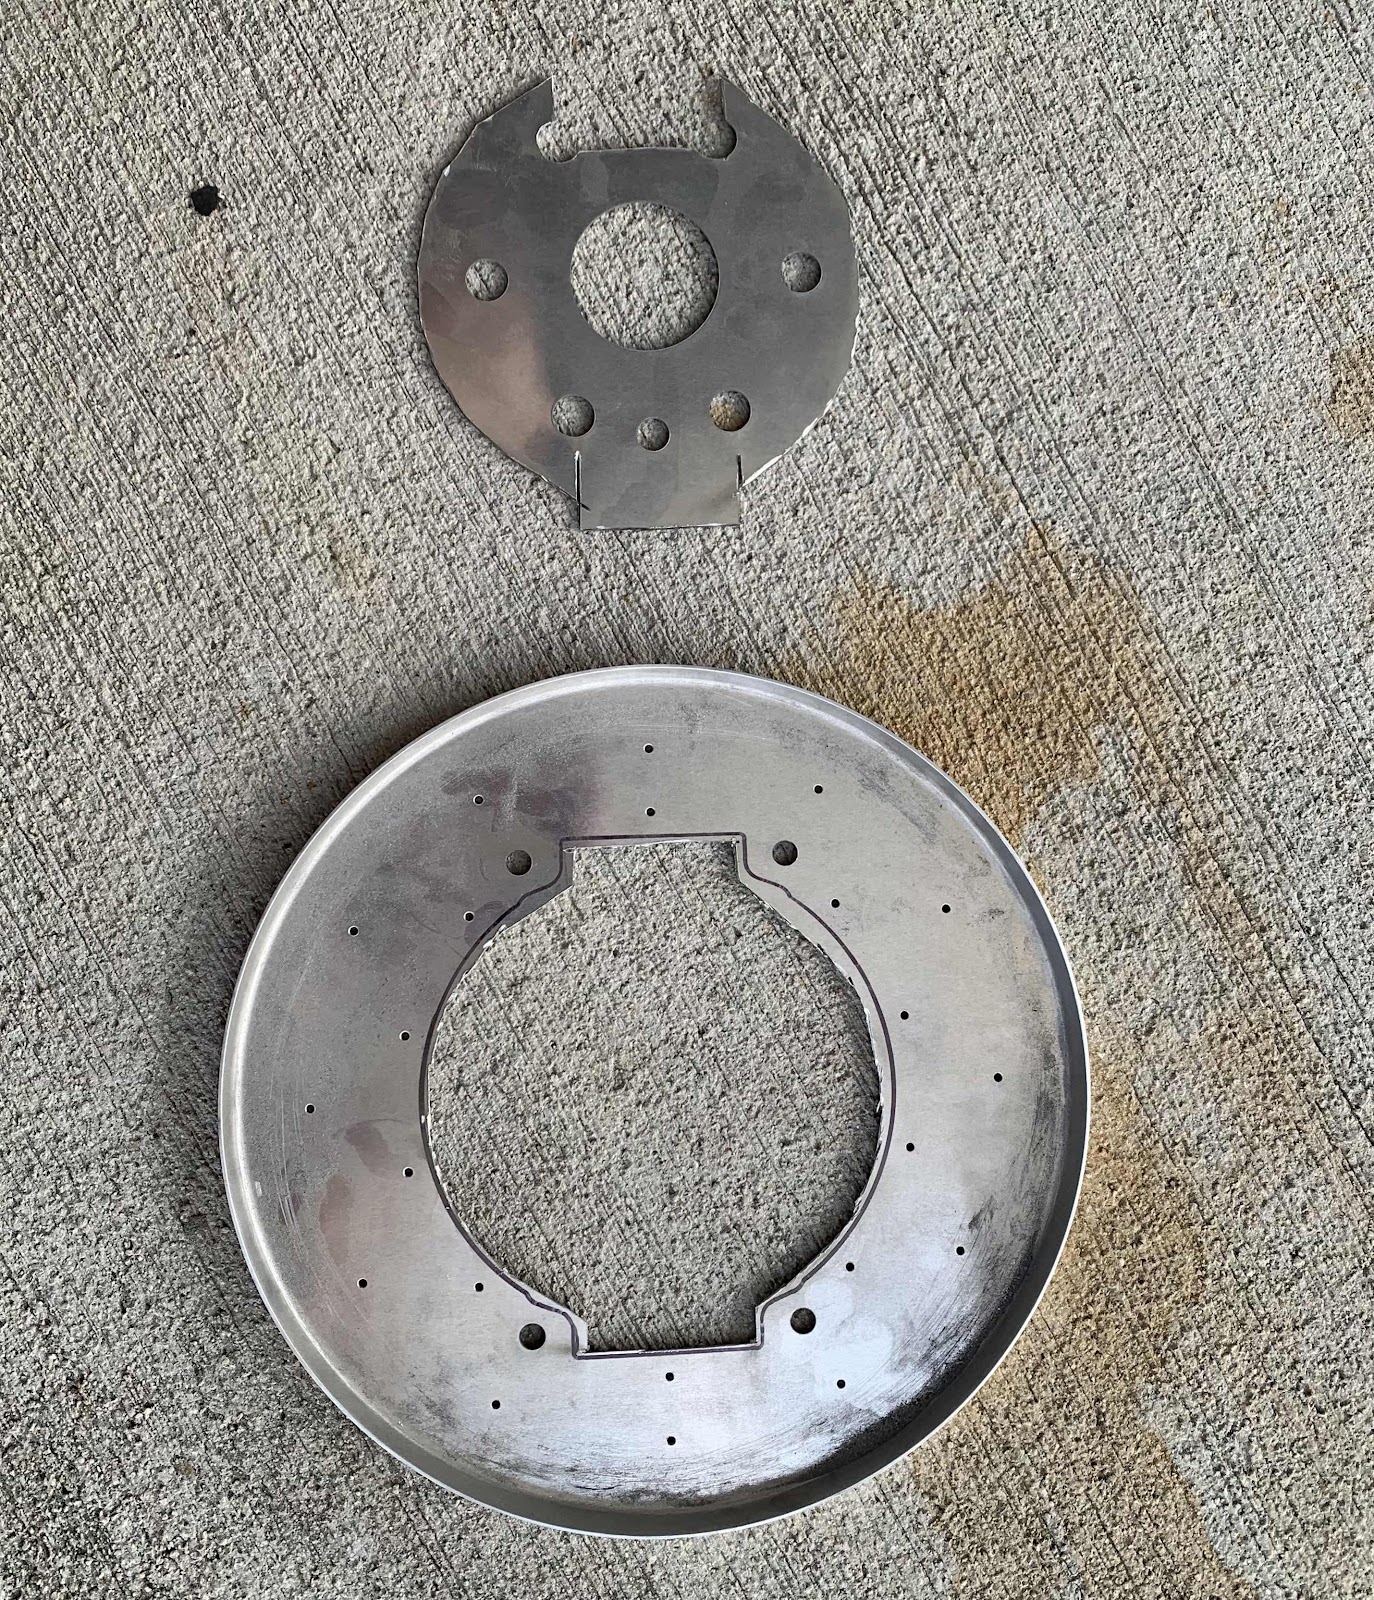
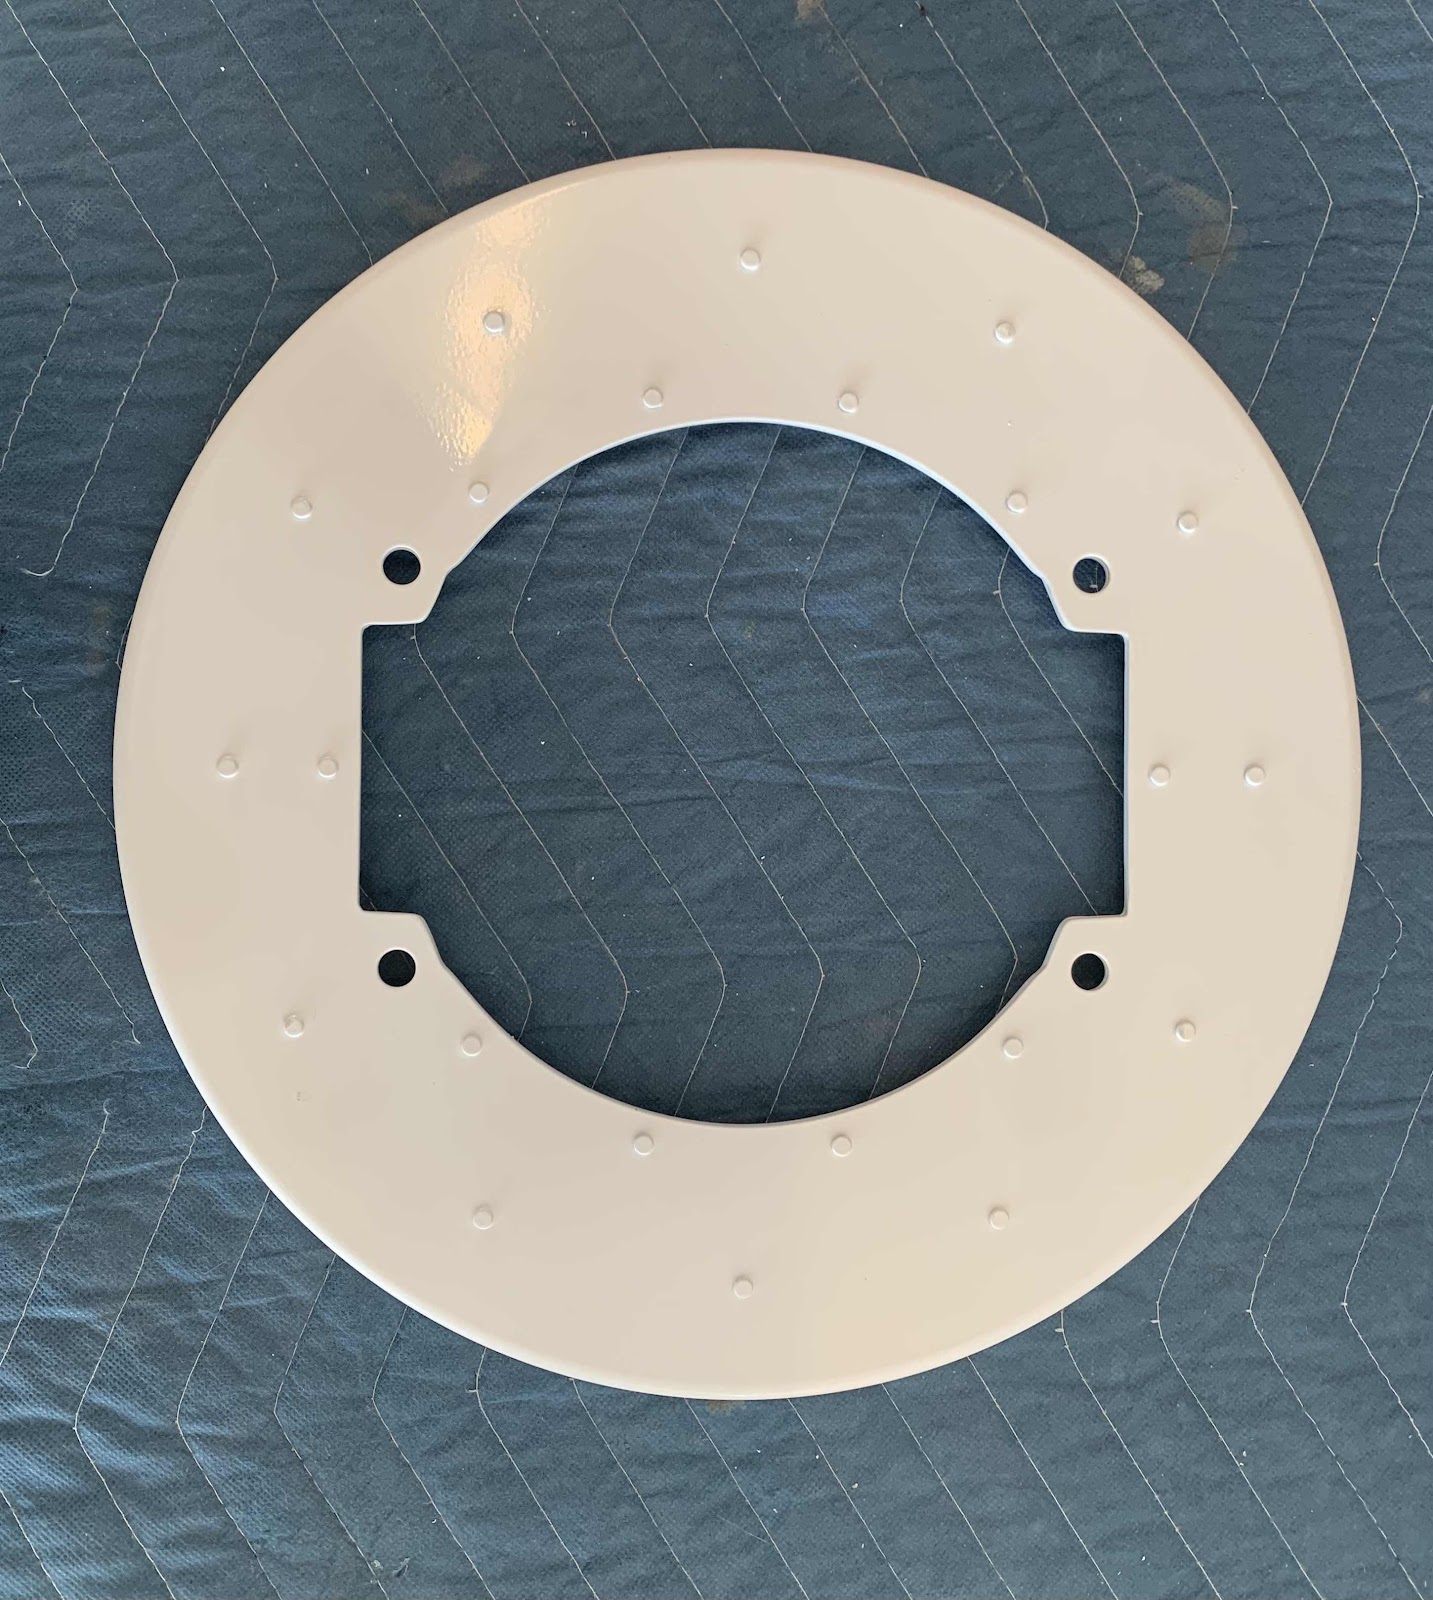
After grinding and sanding to proper final shape, I treated the two Spinner Plate and Doubler with Alumiprep, Alodoine and sprayed them with Akzo primer. After the primer had fully dried, the two pieces were riveted together using AN470AD4-5 universal rivets as shown below.


I know it doesn’t look it in the pictures above, but the Akzo primer is a light green color. That color would not match anything on the airplane and is, well, green! So, I mixed up some paint and sprayed it white. Something on the plane will be white (or some kind of relative of white)….and if not, it still won’t be an eye sore. Here is what it looked like after getting painted.

Subscribe to:
Posts (Atom)