This blog was created to memorialize the building process of my Van's Aircraft RV-14 and to satisfy the requirements for certification in the Experimental Amateur Built Aircraft category. It will also serve as a central location for ME to reference in the future on processes and techniques I used during the build. Additionally, it will allow my family, friends, and other interested builders the opportunity to follow along during my build…..and might be helpful to someone along the way.
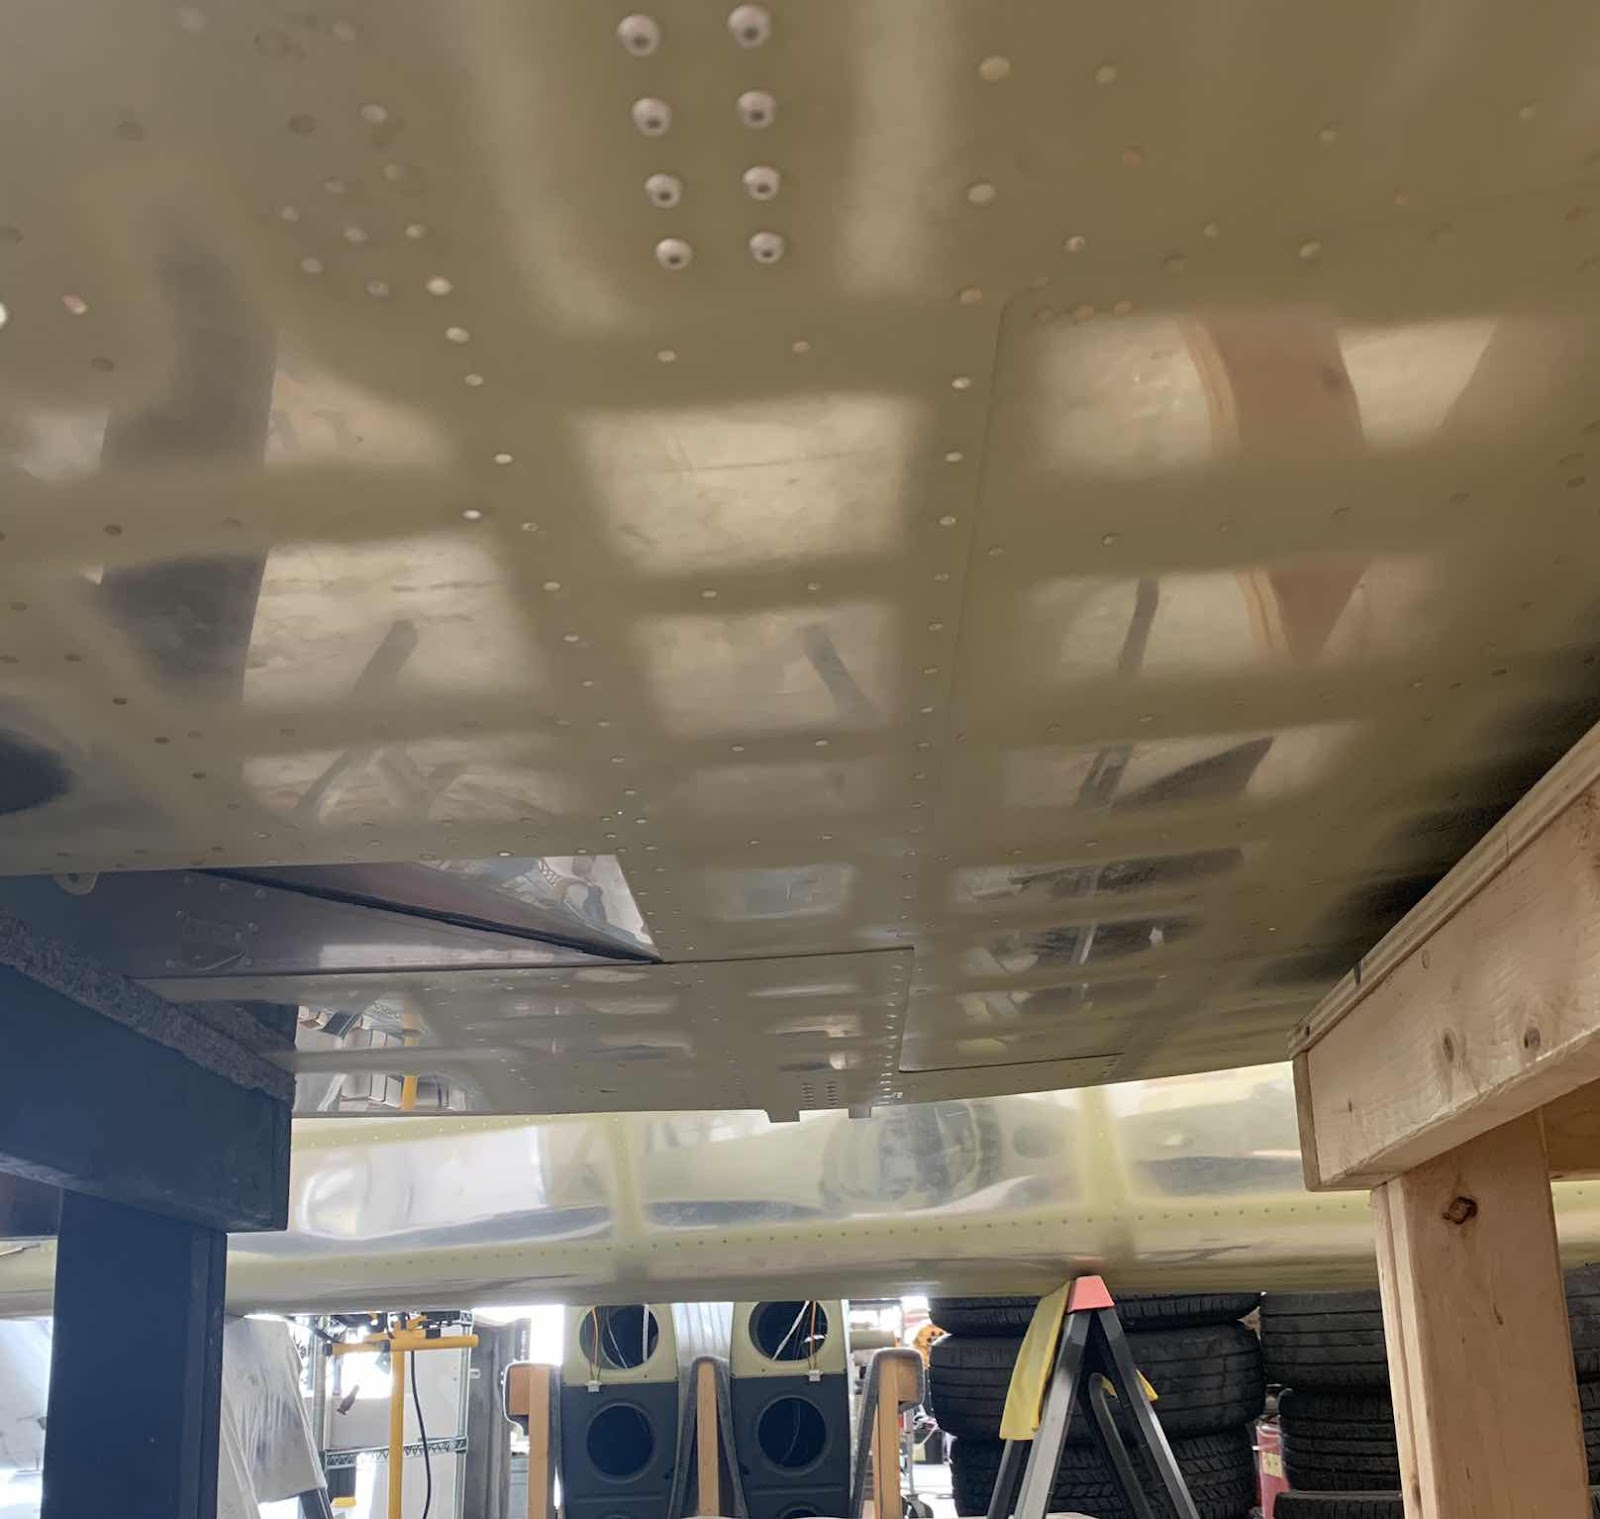
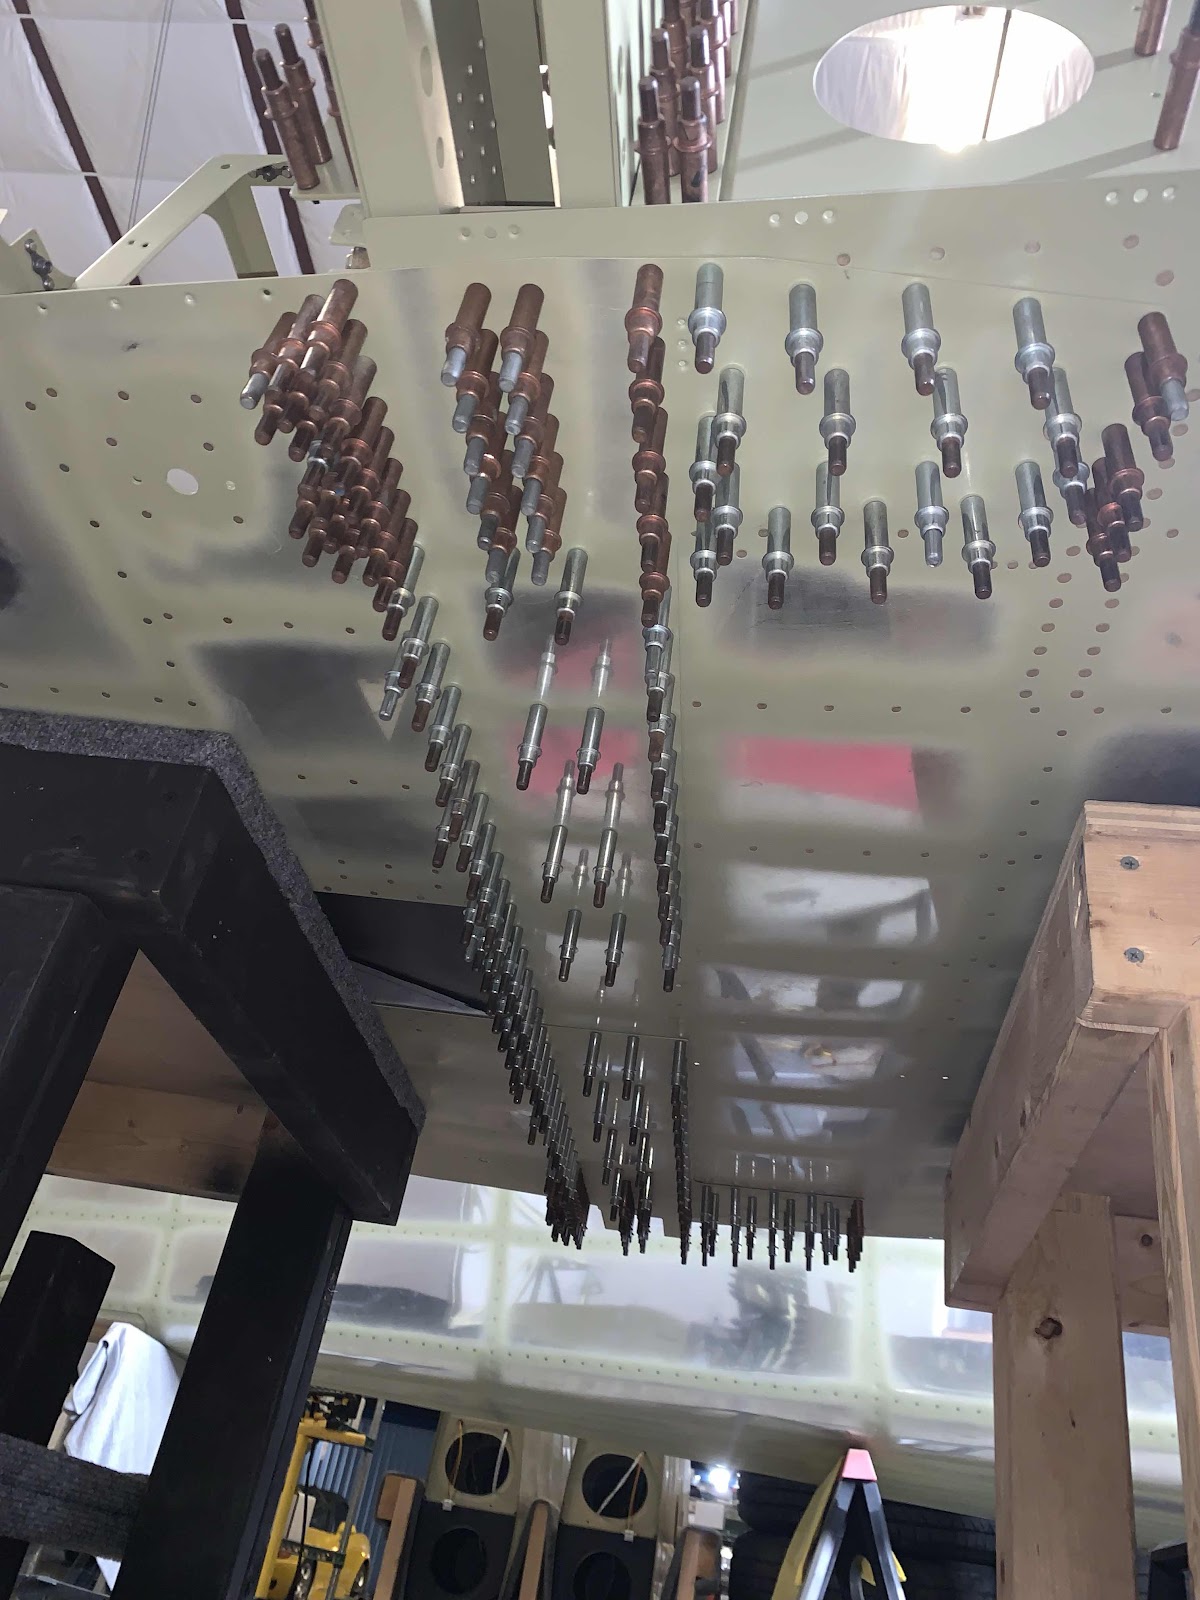
All finished. Today, we installed the final rivets attaching the Center Bottom Skin and Forward Bottom Skins together. Here is all the rivets installed.
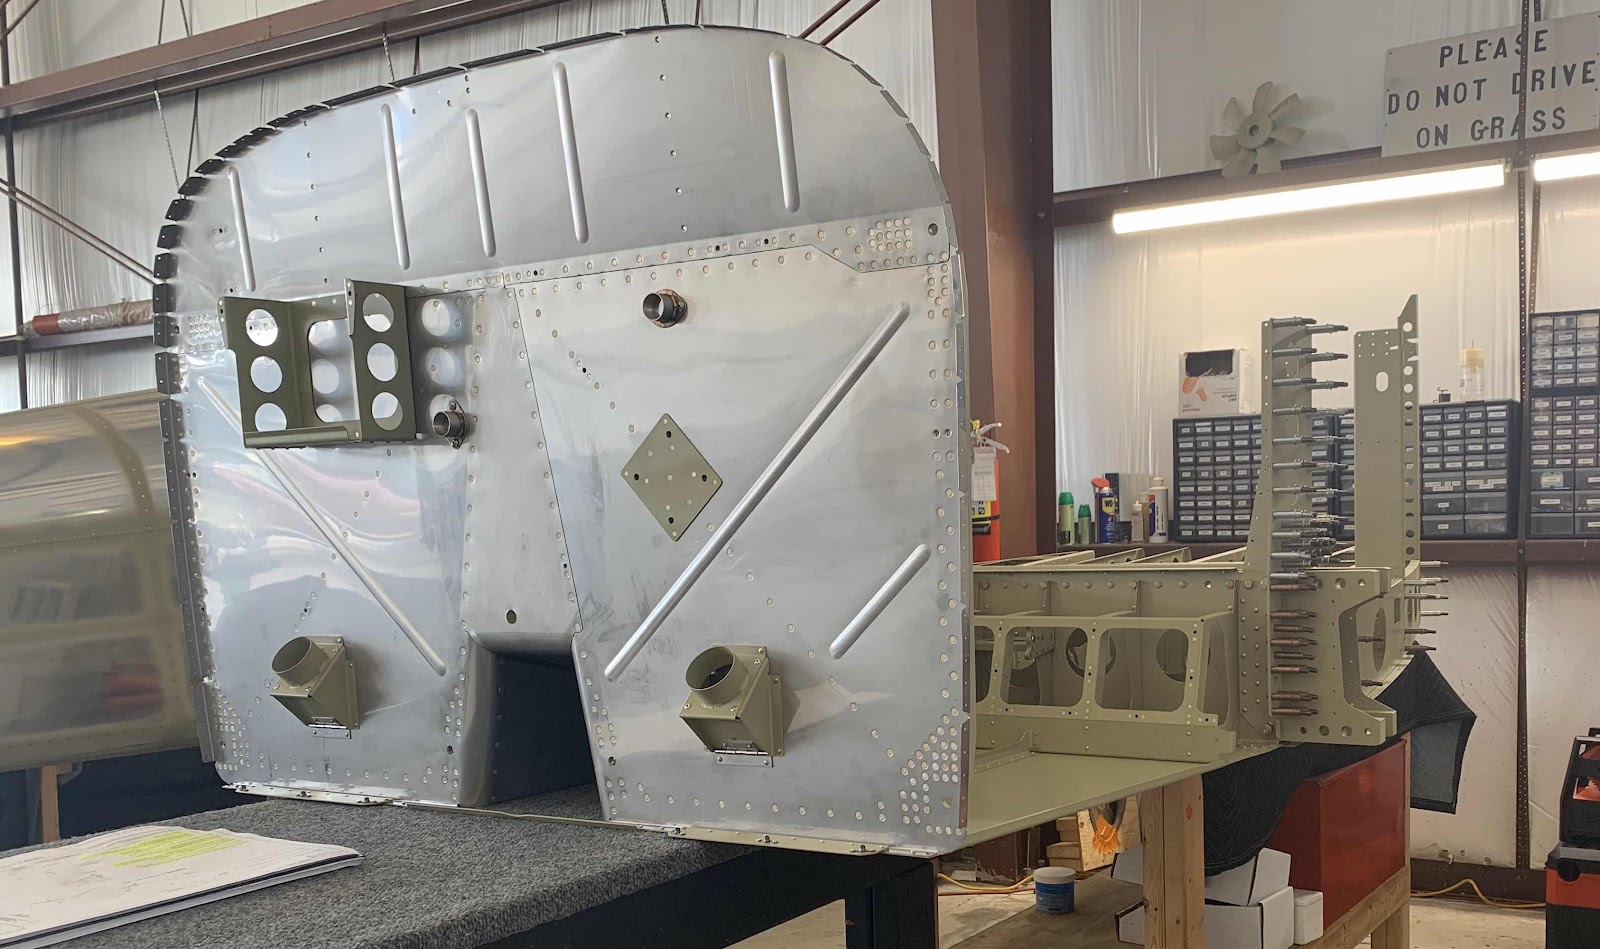
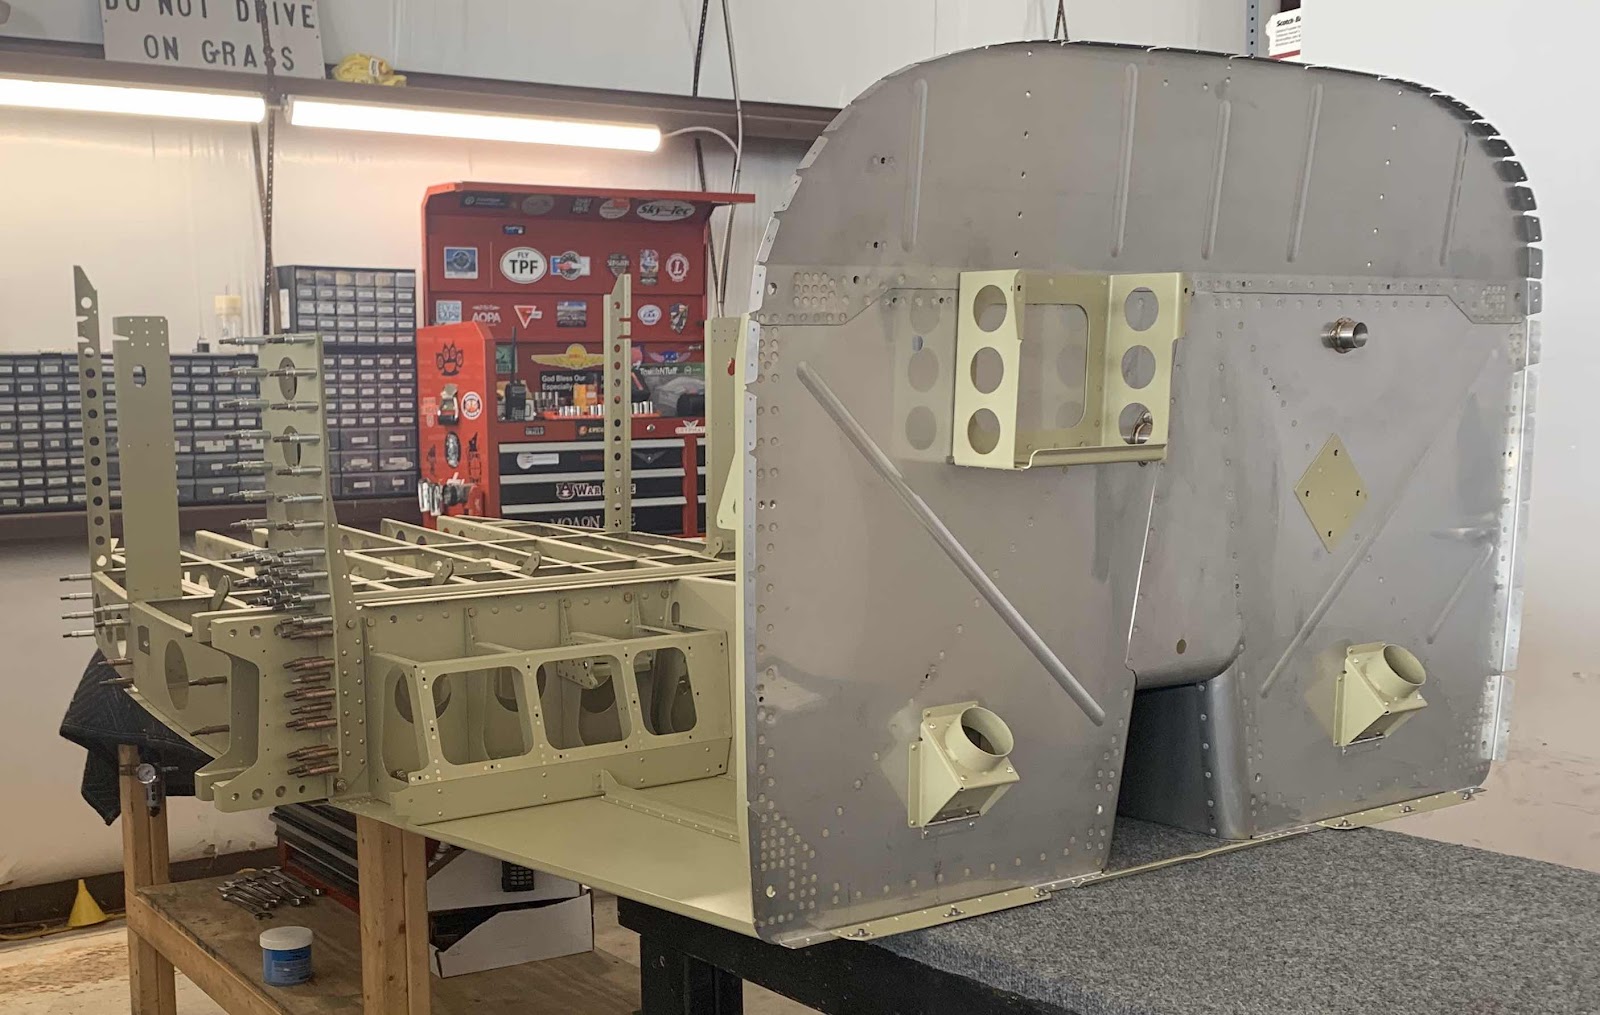
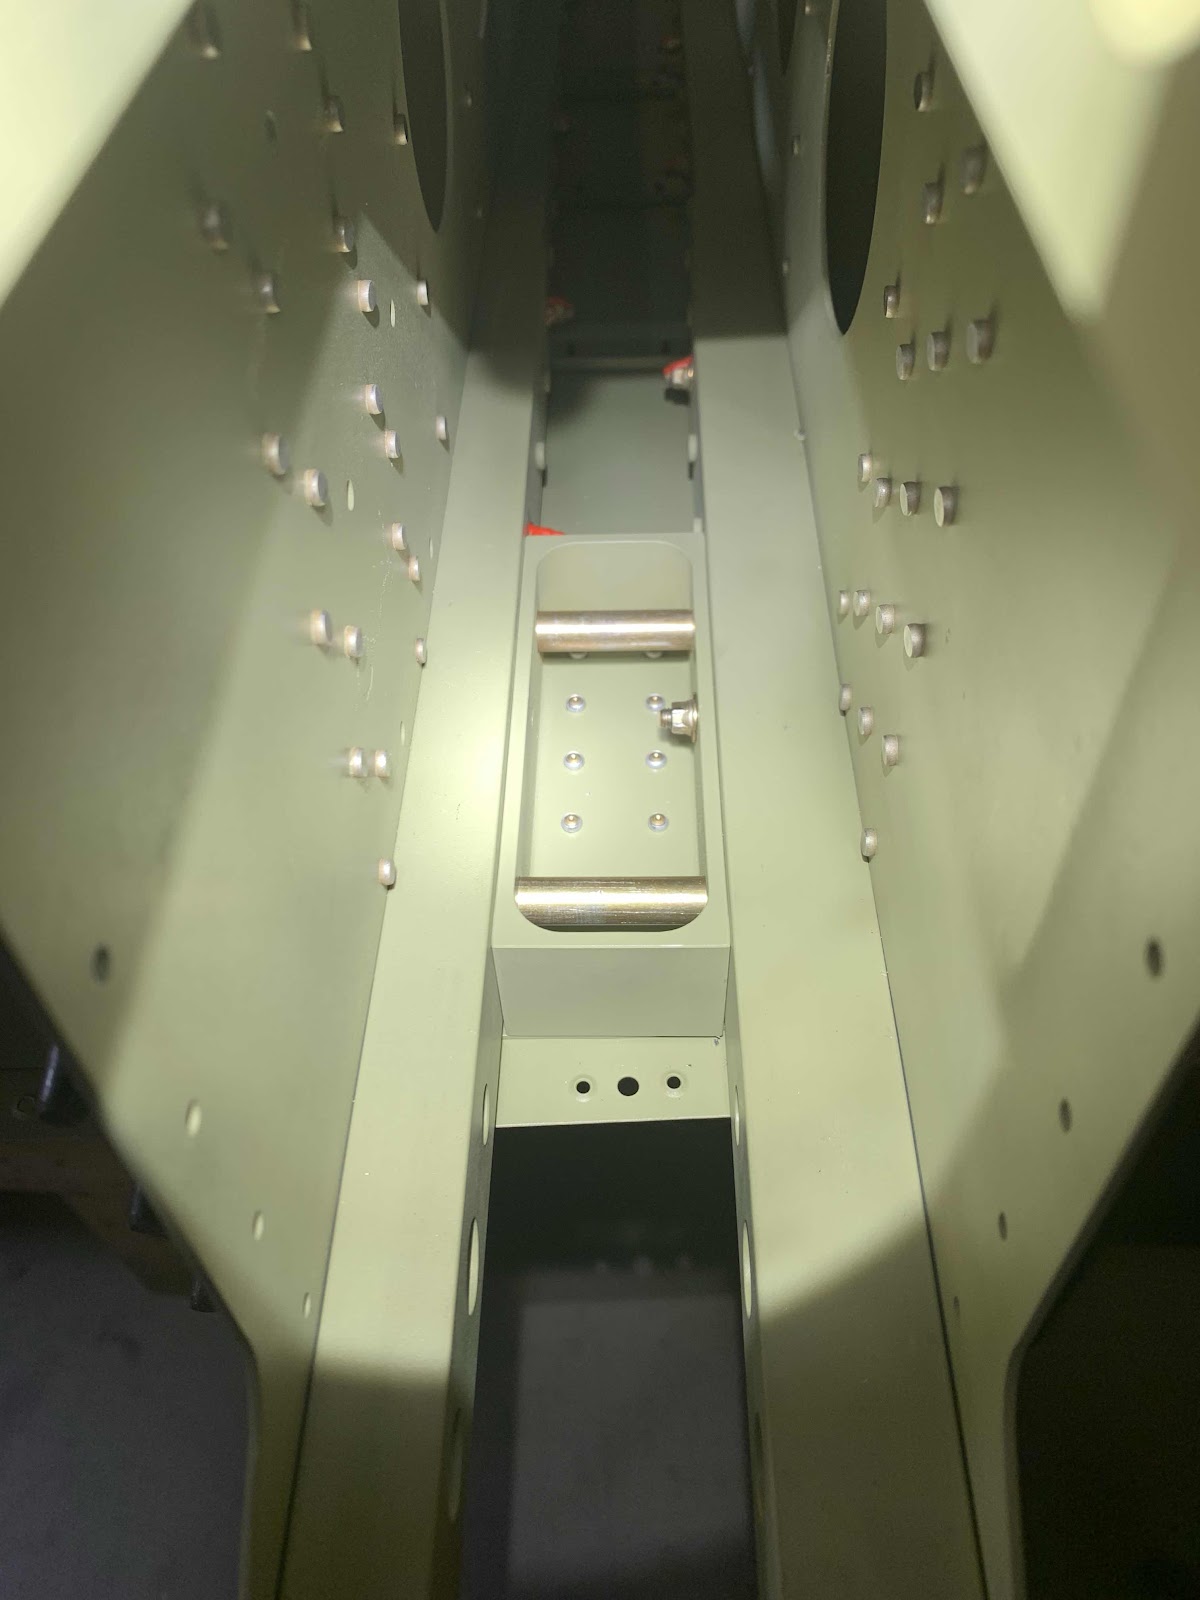
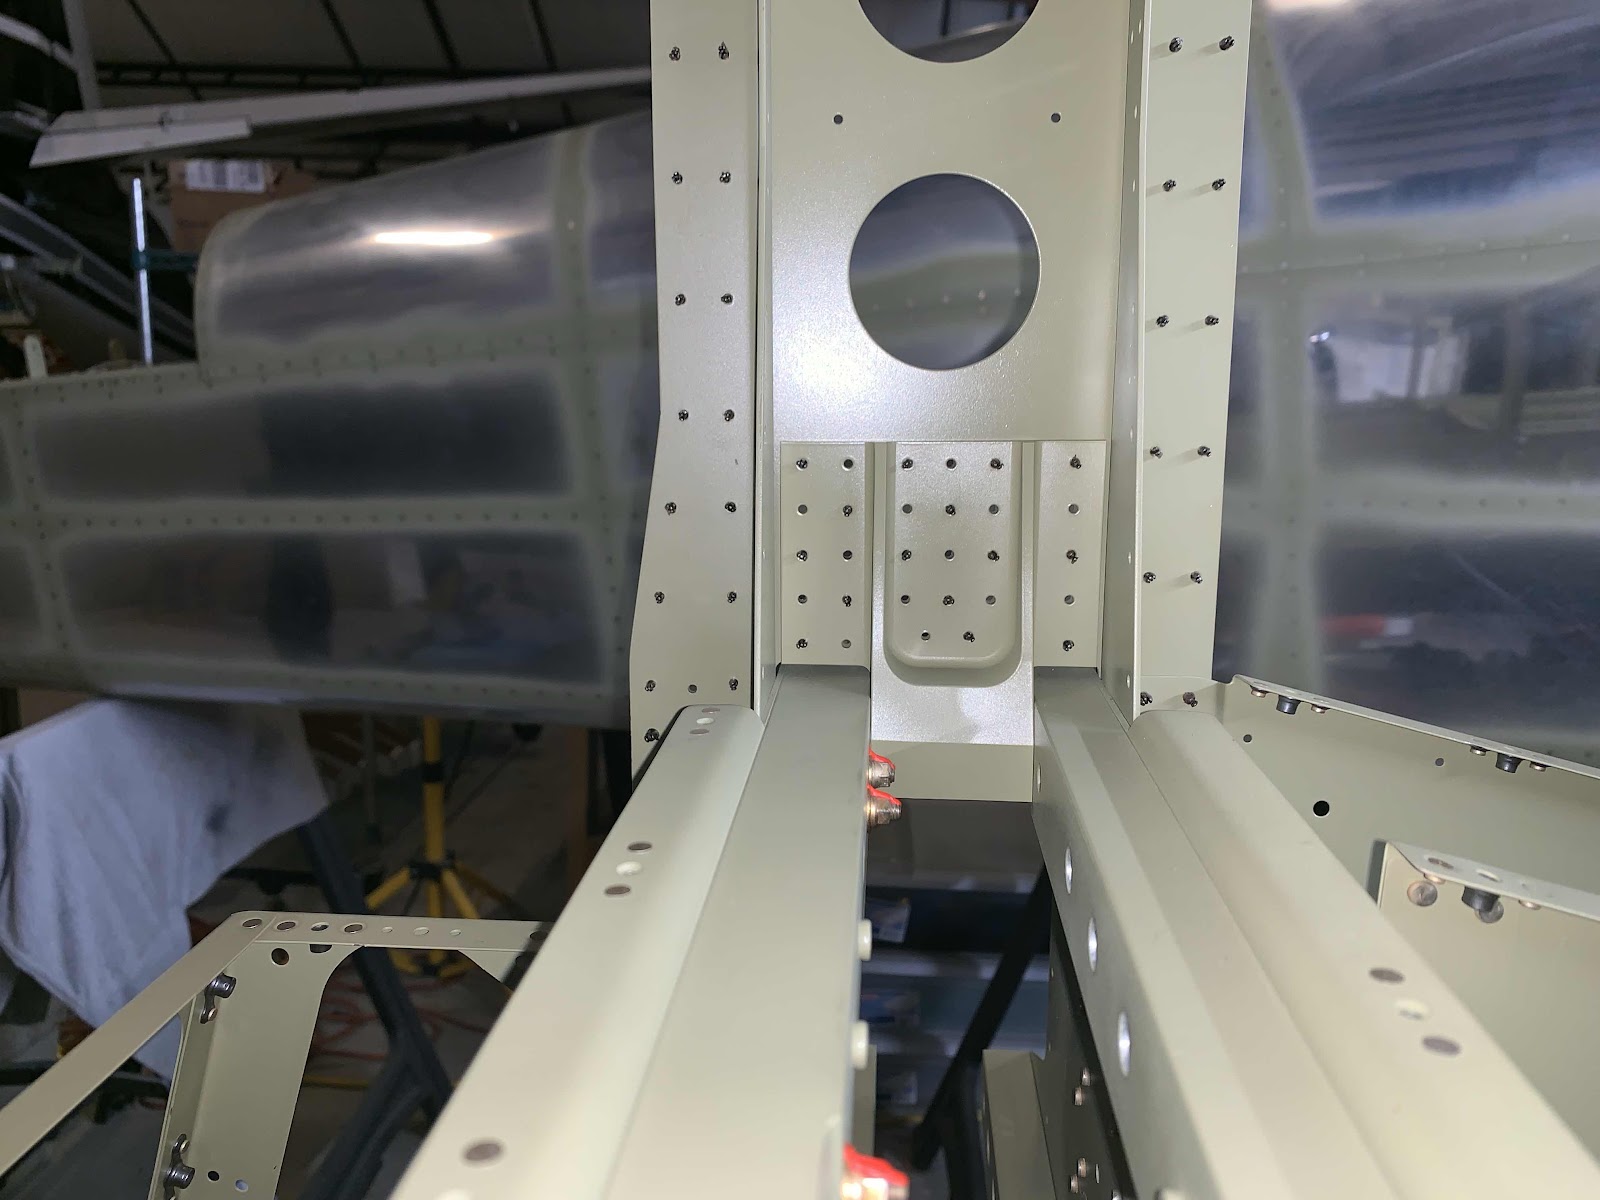
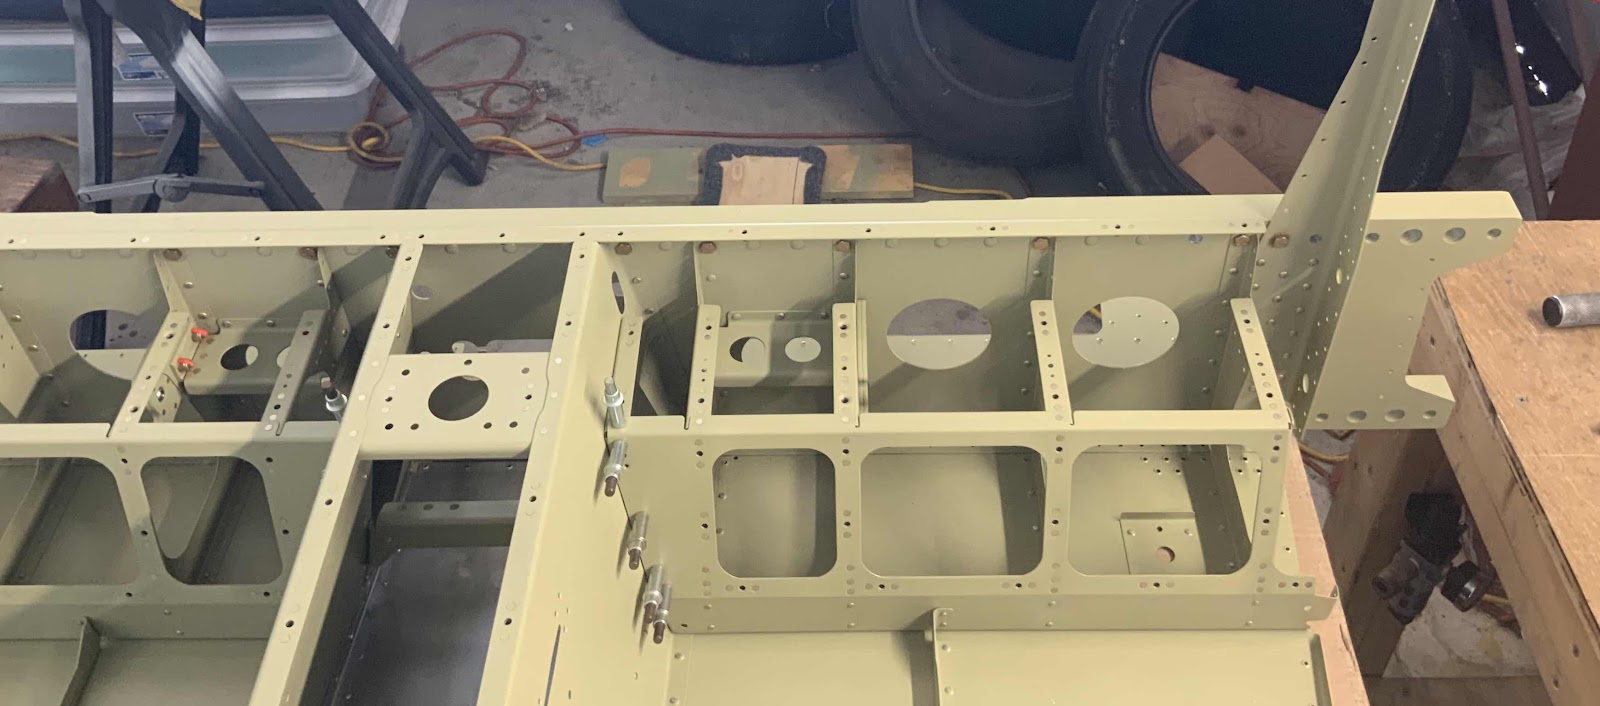
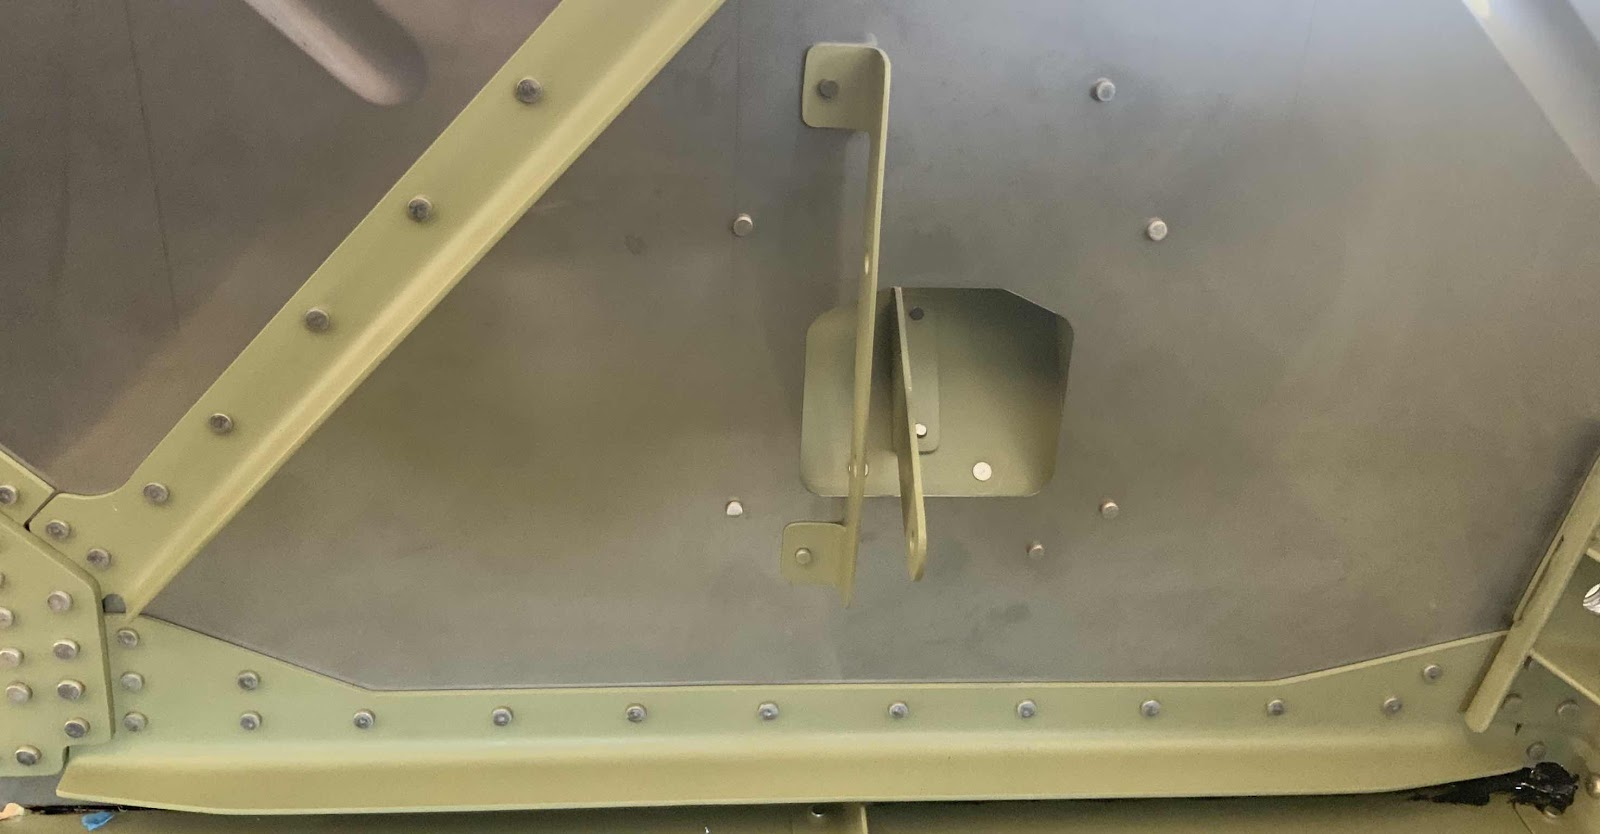
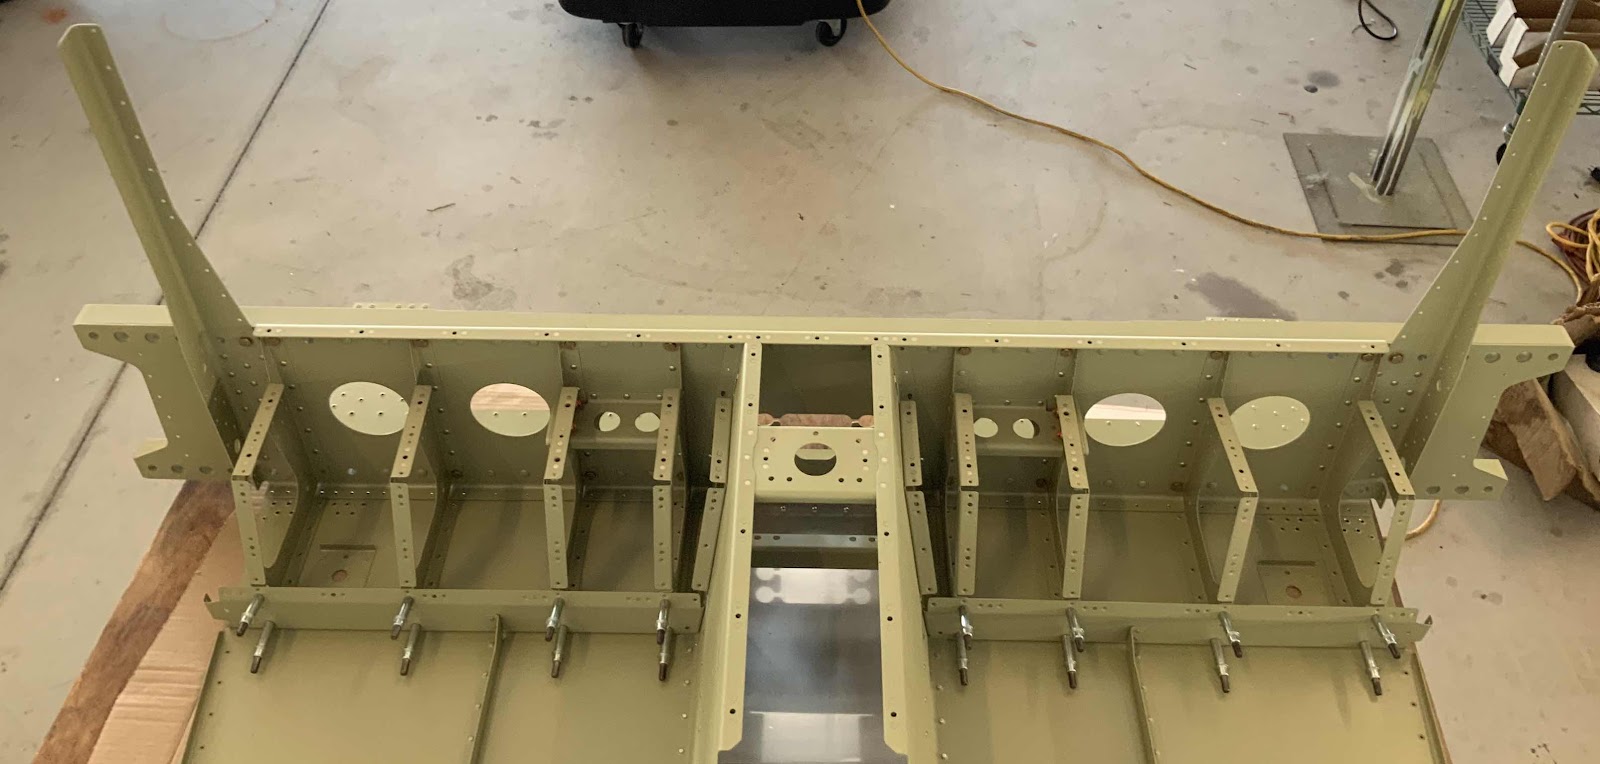
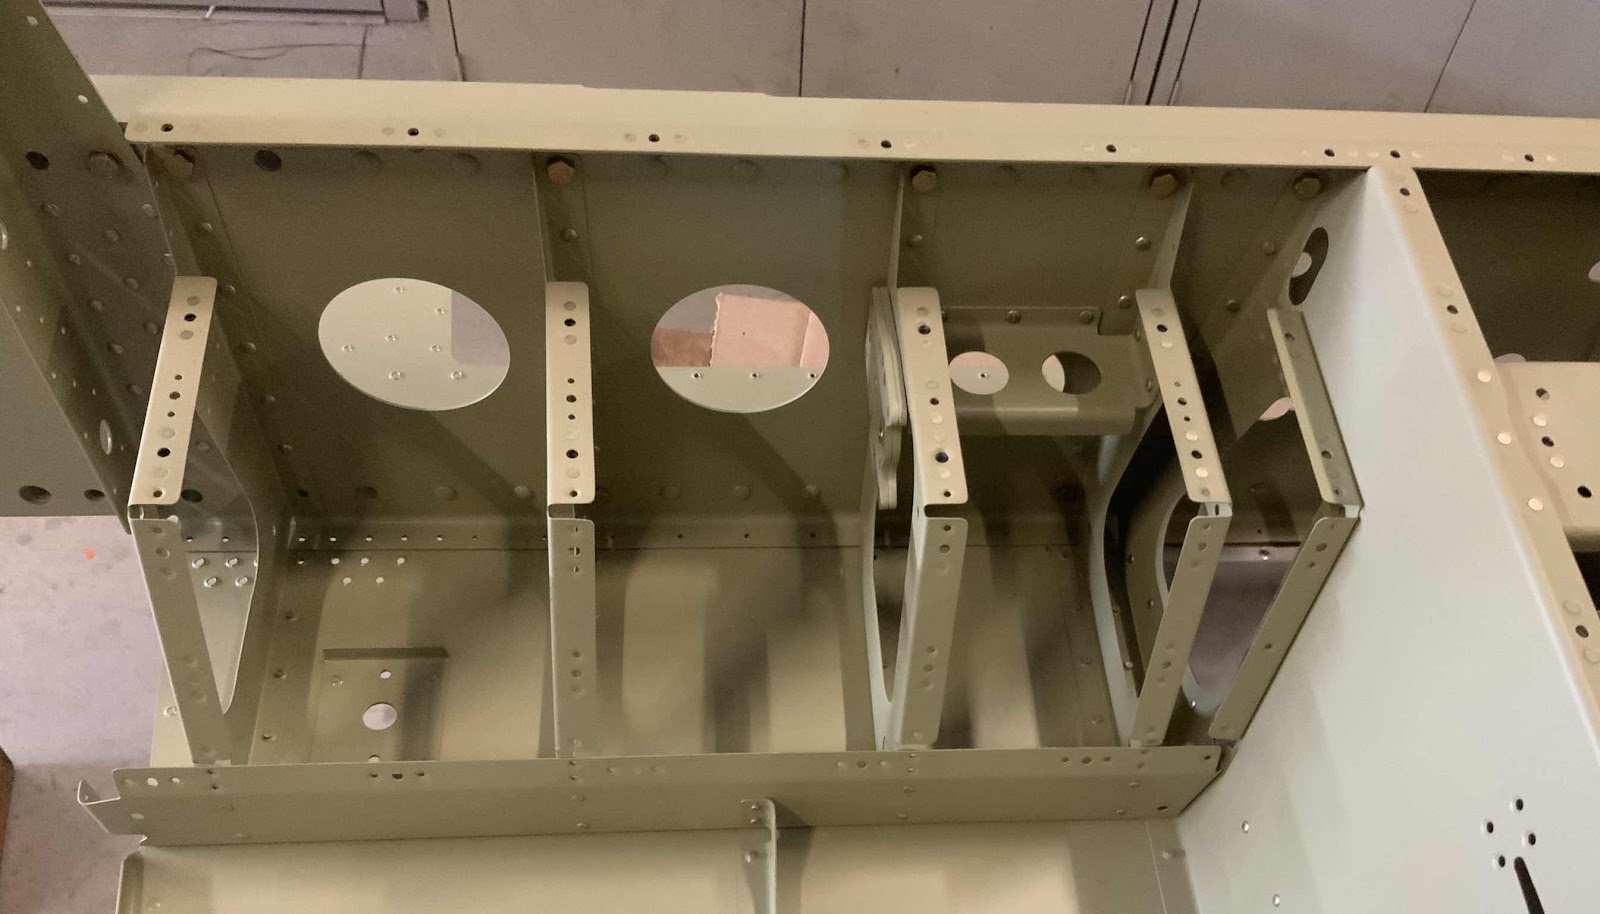
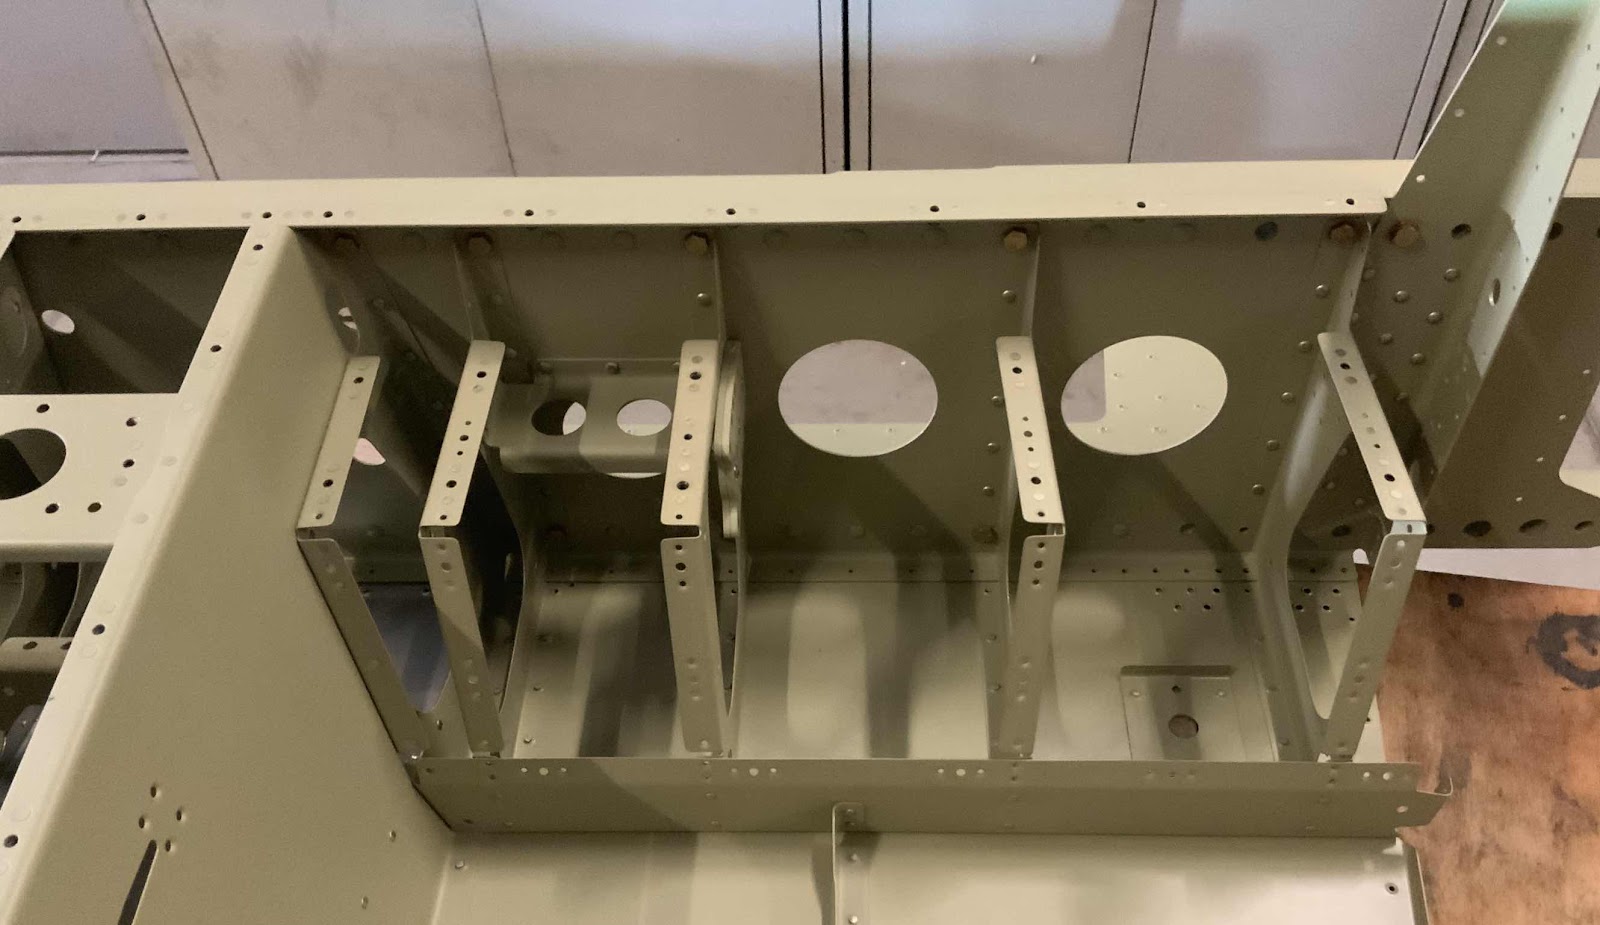
Here is a couple pictures of the overall look at the progress of the Fuselage. This is the left forward side.....
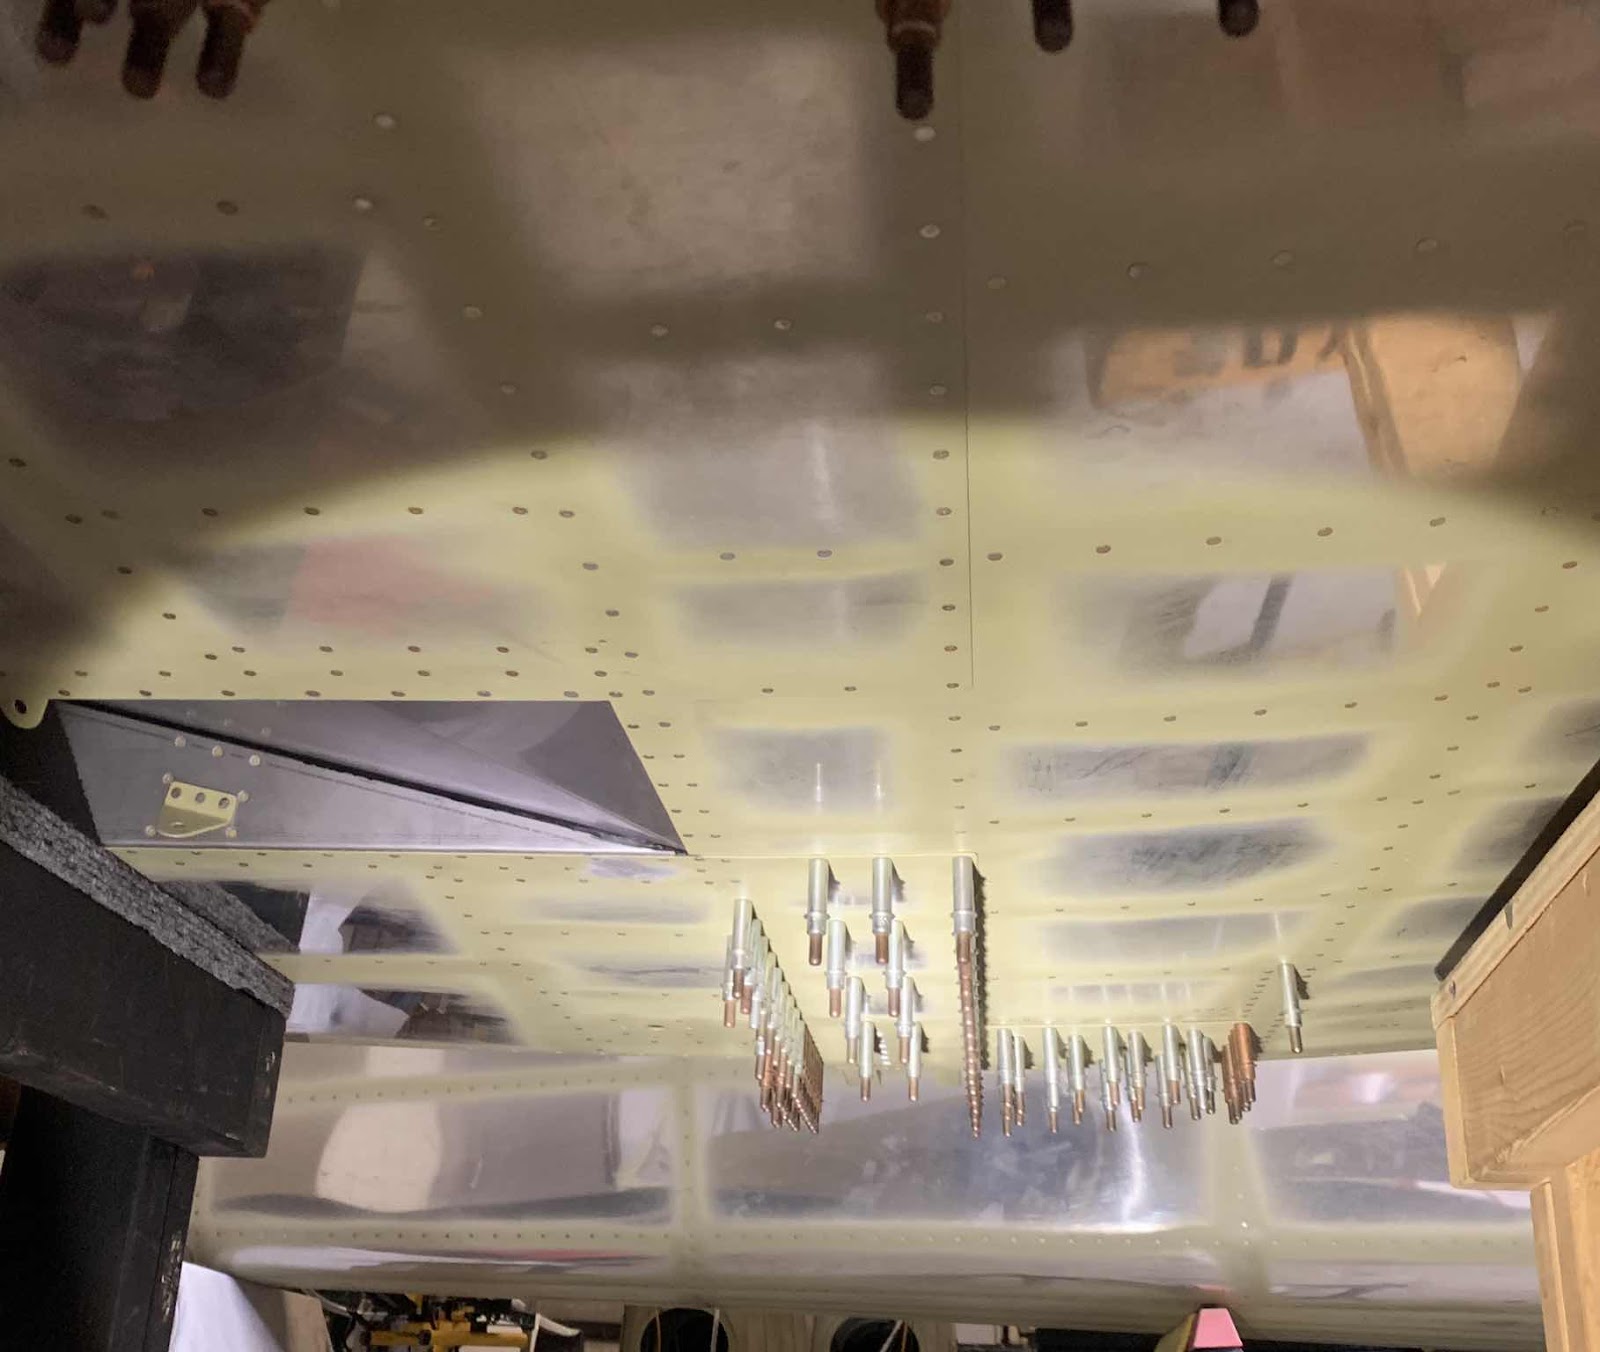
Today, we continued installing the rivets in the Forward Bottom Skins and Center Bottom Skin. You can see the only remaining rivets are where the clecos are installed.
Started the riveting process today for the F-01483-L & -R Forward Bottom Skins and the F-01484 Center Bottom Skin. There is a mixture of AN426AD3-3.5, AN426AD3-4, AN426AD3-4.5, AN426AD4-4, and AN426AD4-5 rivets.
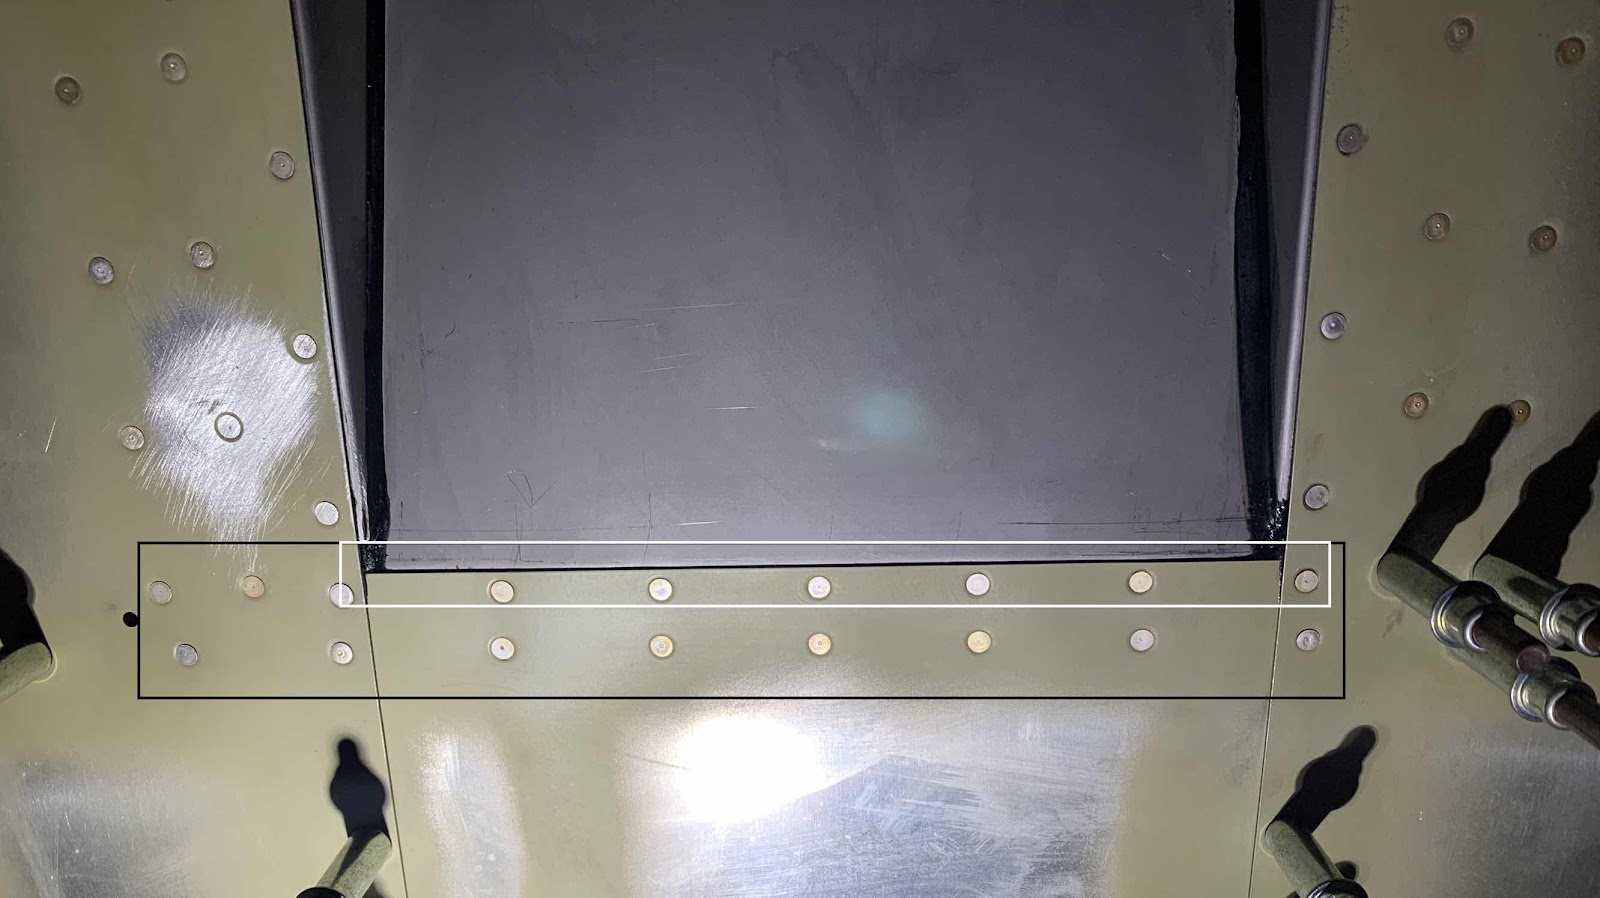
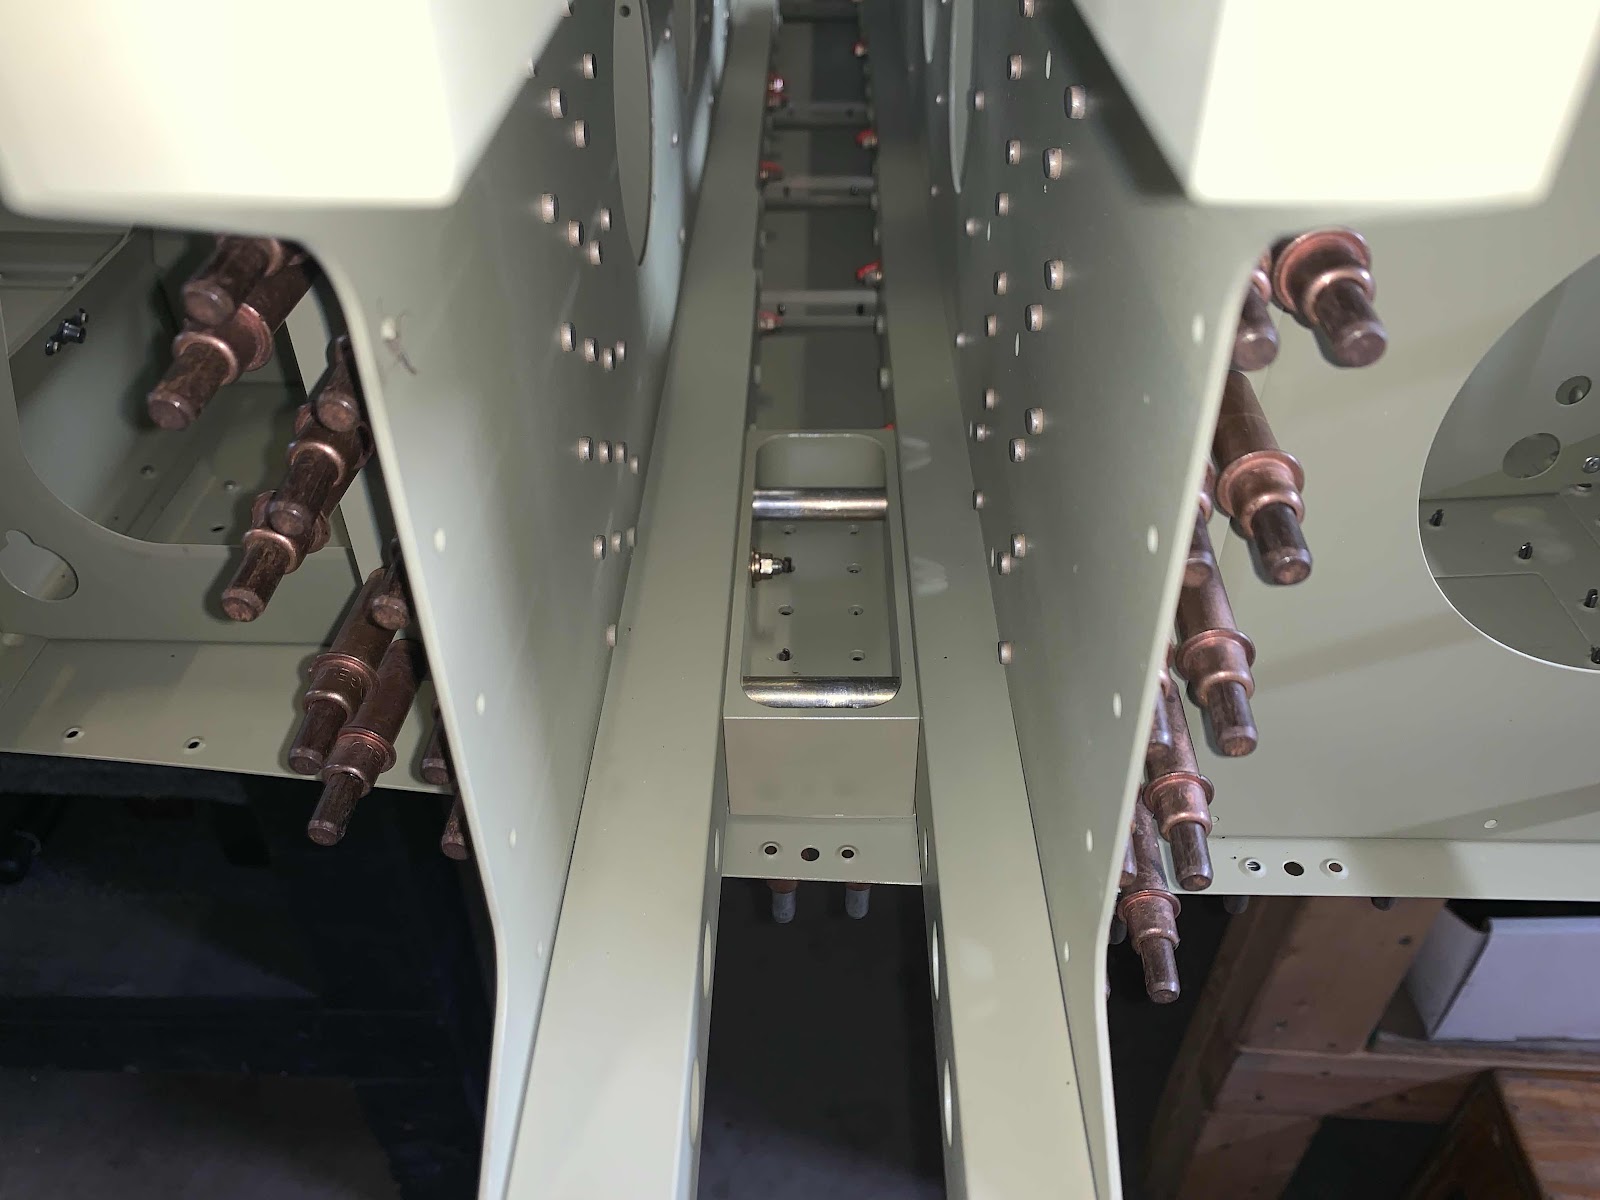
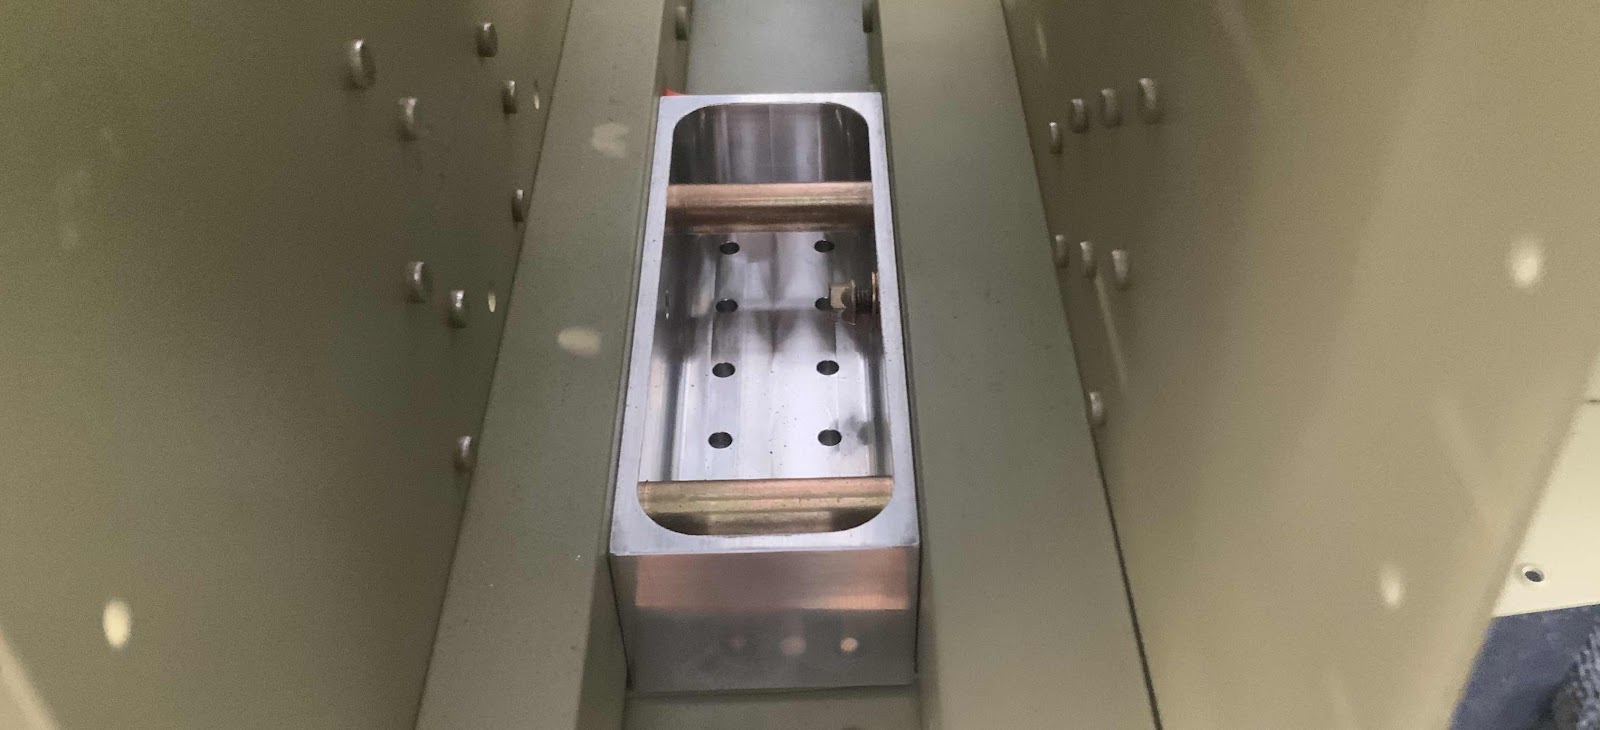
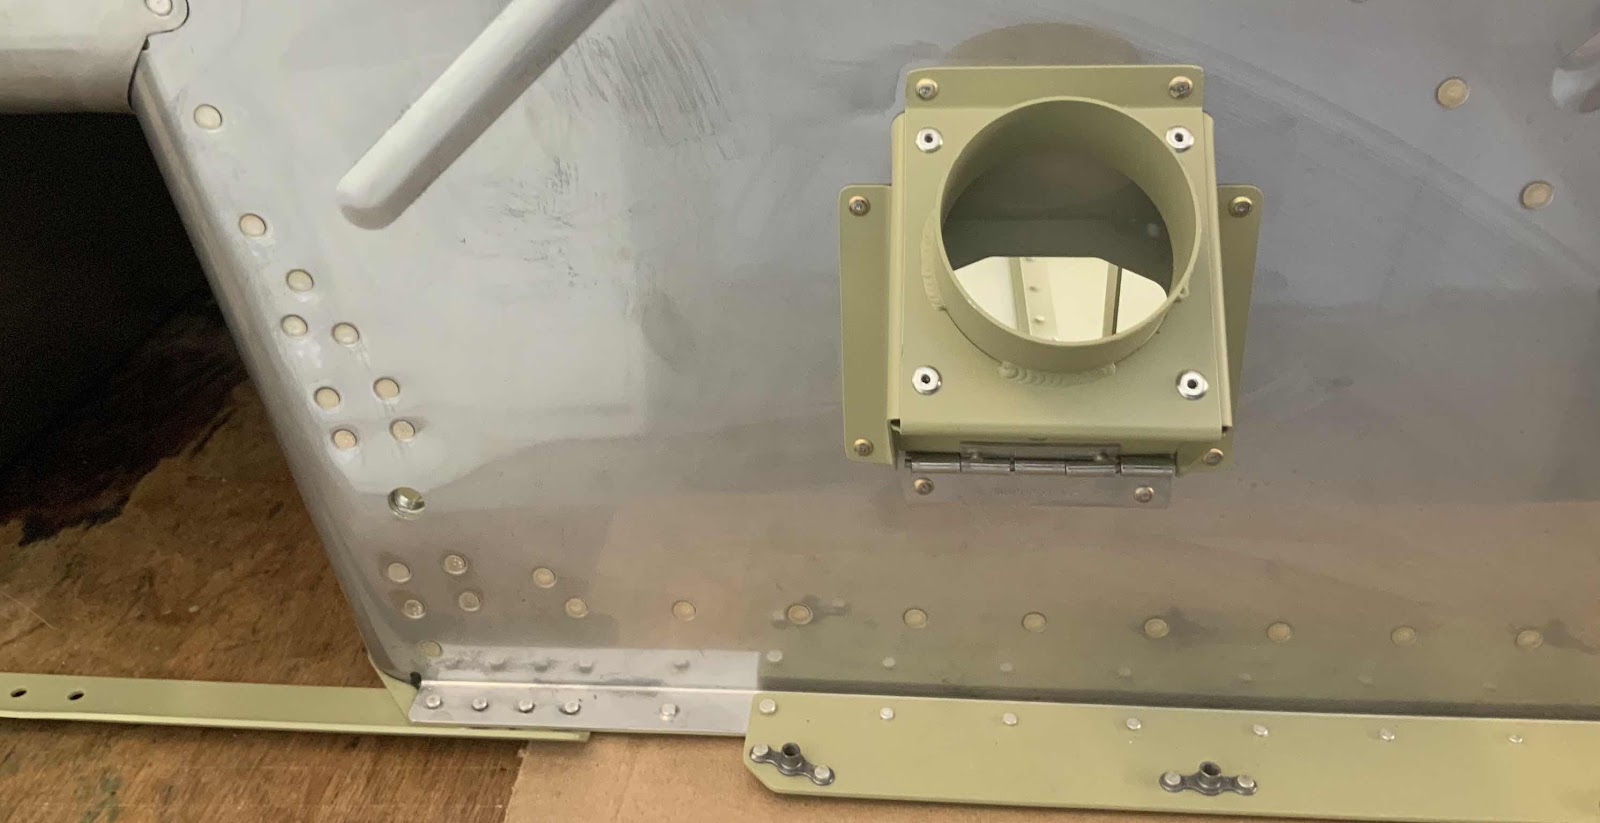
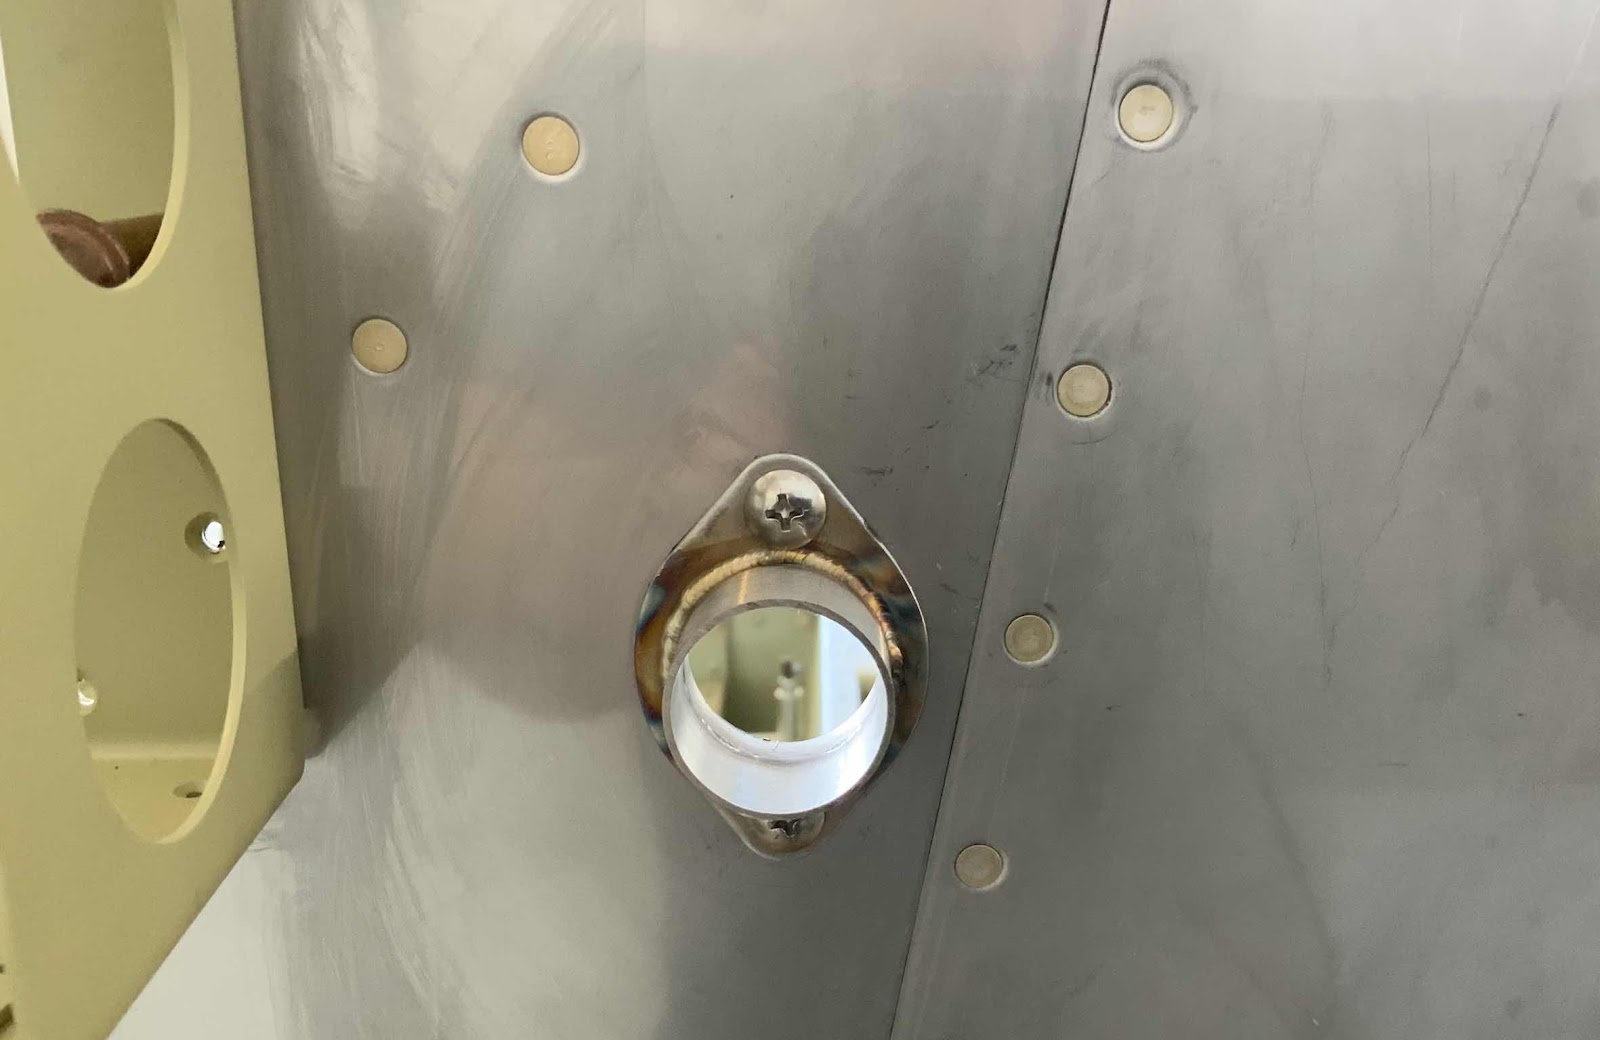
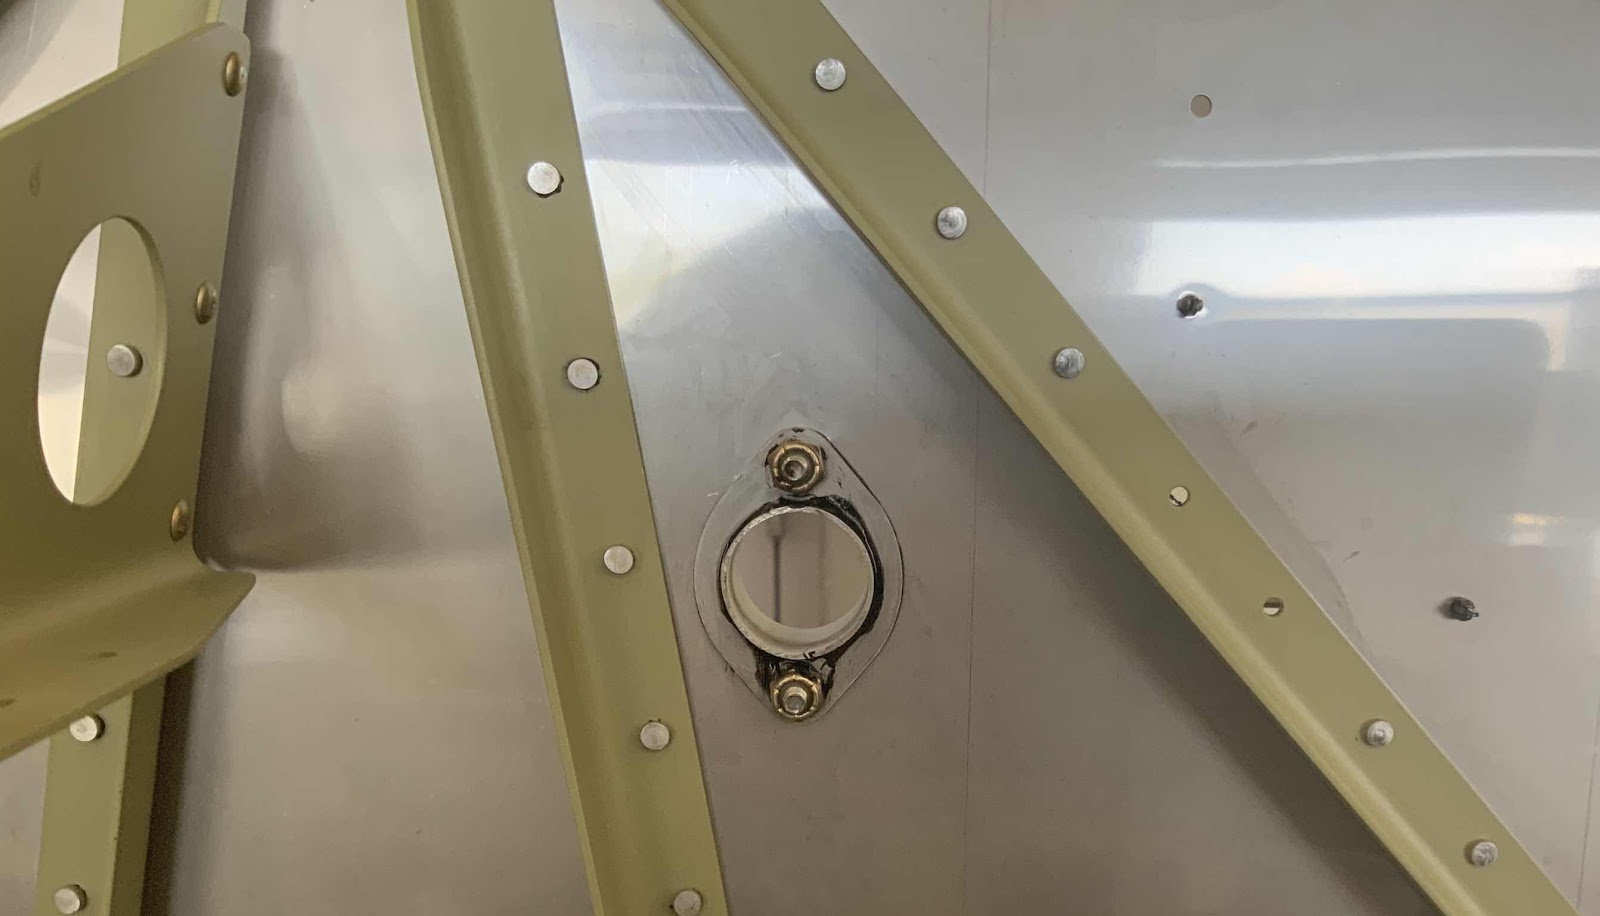
Today’s session was relatively short, but it accomplished a lot. We were able to install the 17 rivets shown in the black box below. These rivets took a little longer than normal because proseal had to be applied between the Muffler Shroud Ramp and the Center Bottom Skin (area shown in the white box). Applying the proseal was not all that difficult, it just took a little time. First, I removed as many clecos in the area around the while box holding the Center and Forward Bottom Skins together. This allowed me to create a space for the proseal application nozzle to get between the two pieces. Once the proseal was applied, I re-installed all the clecos and started shooting rivets. We worked from inside out as the plans directed. After installing all the rivets in the black box, we used rags and MEK to remove the excess proseal.
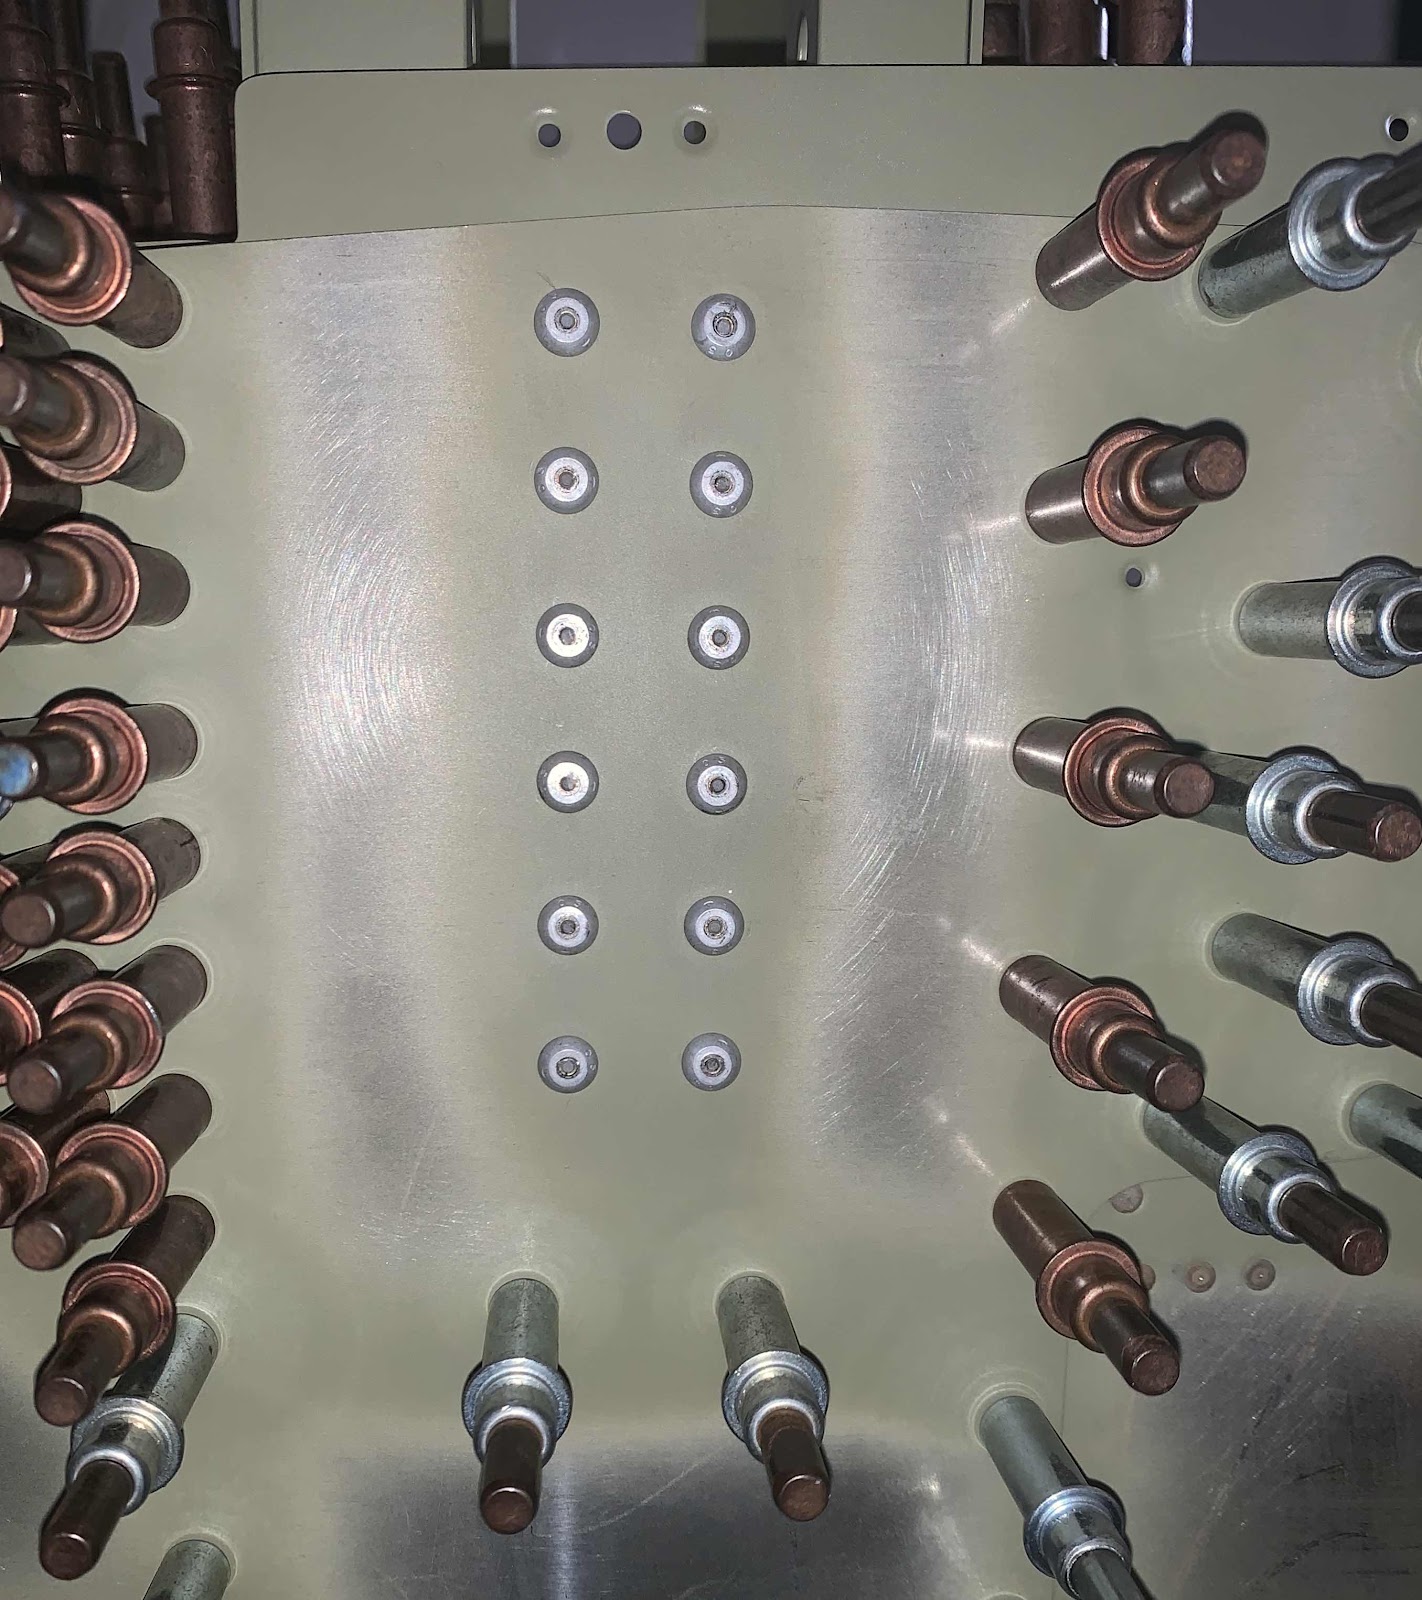
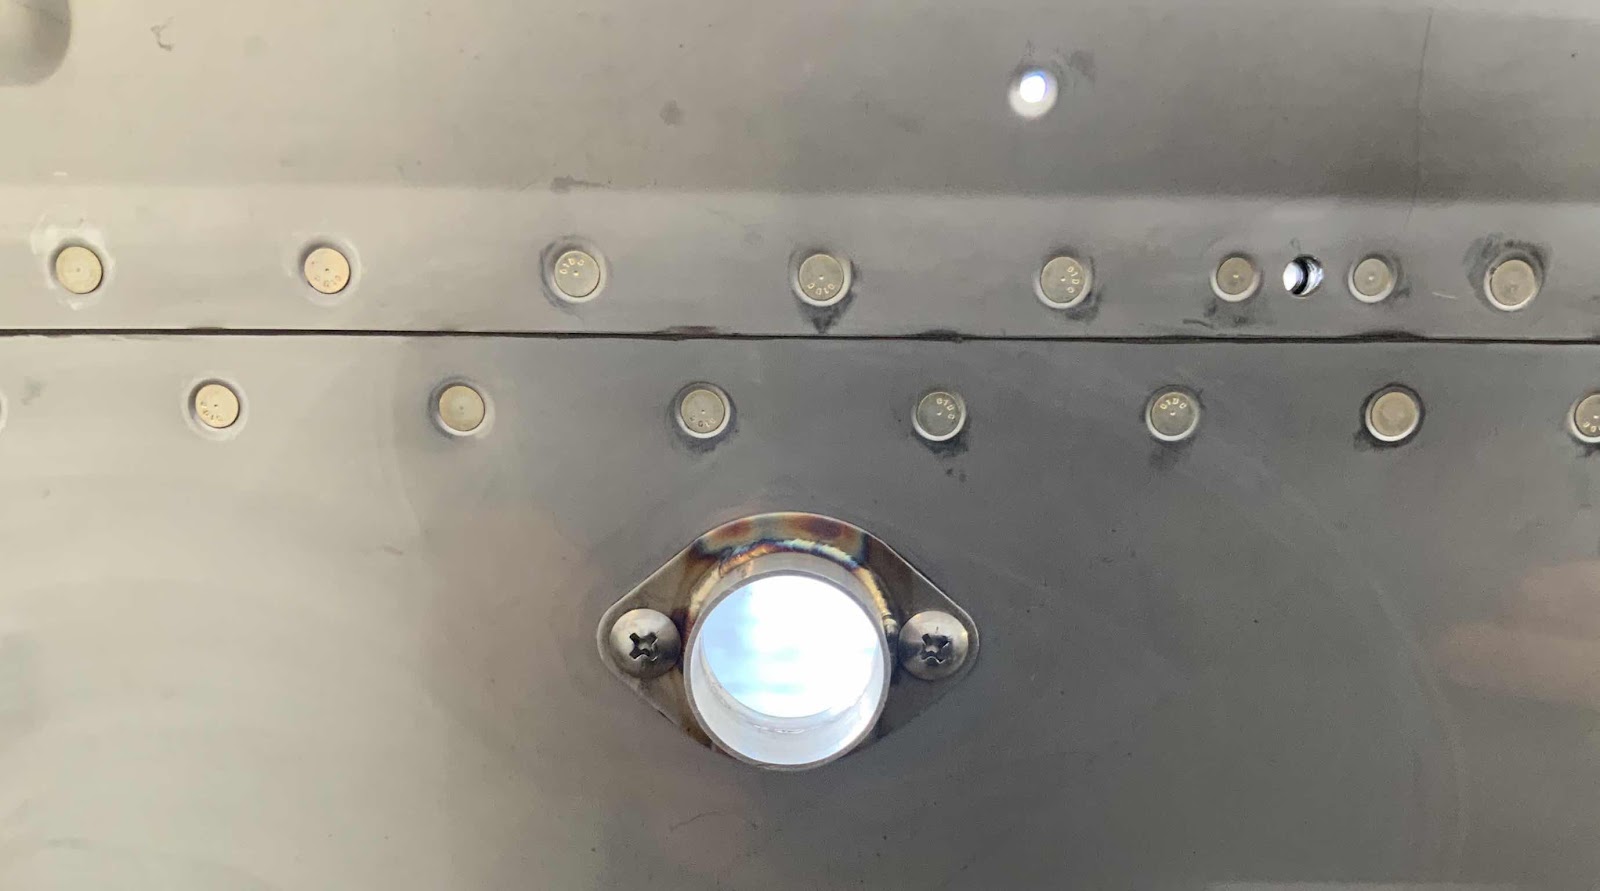
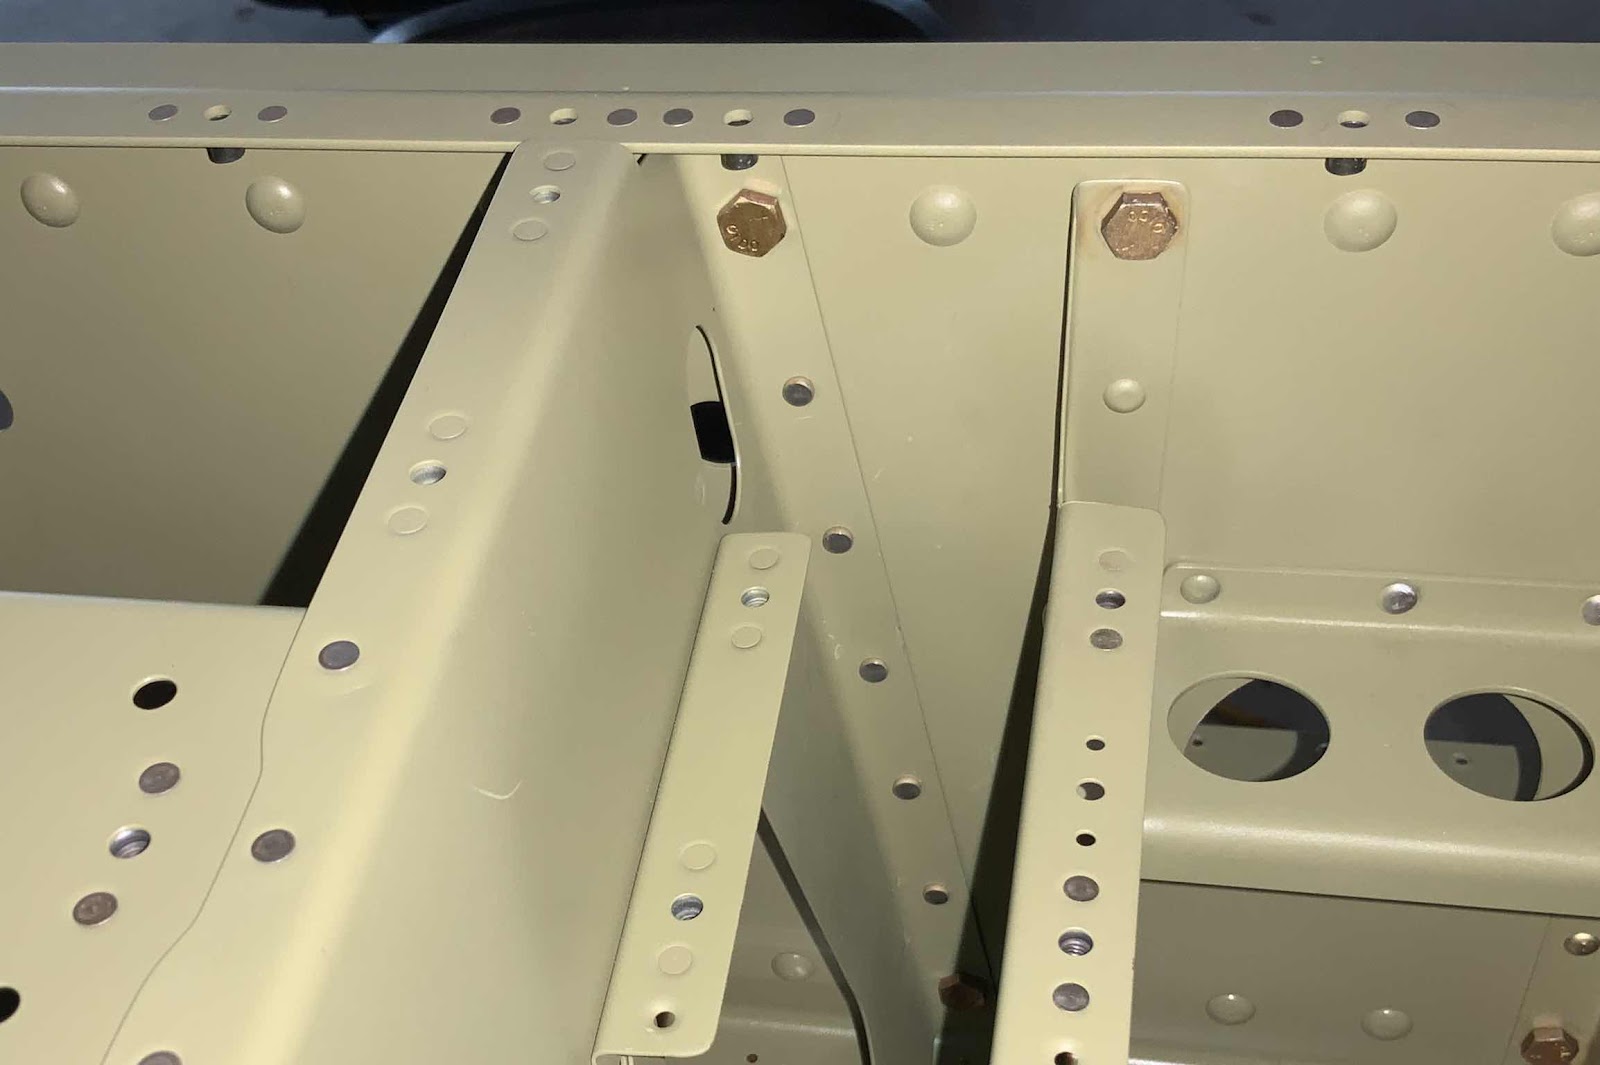
I started (and ended) today by installing the 24 (12 on each side) CR3213-5-5 Cherry Rivets. These rivets were installed in the F-01483-L & -R Forward Bottom Skins, the F-01484 Center Bottom Skin and the F-01442 Lower Drag Fittings. Shown below, you can see six of the shop heads of the cherry rivets between the bolts on the right Lower Drag Fitting.....
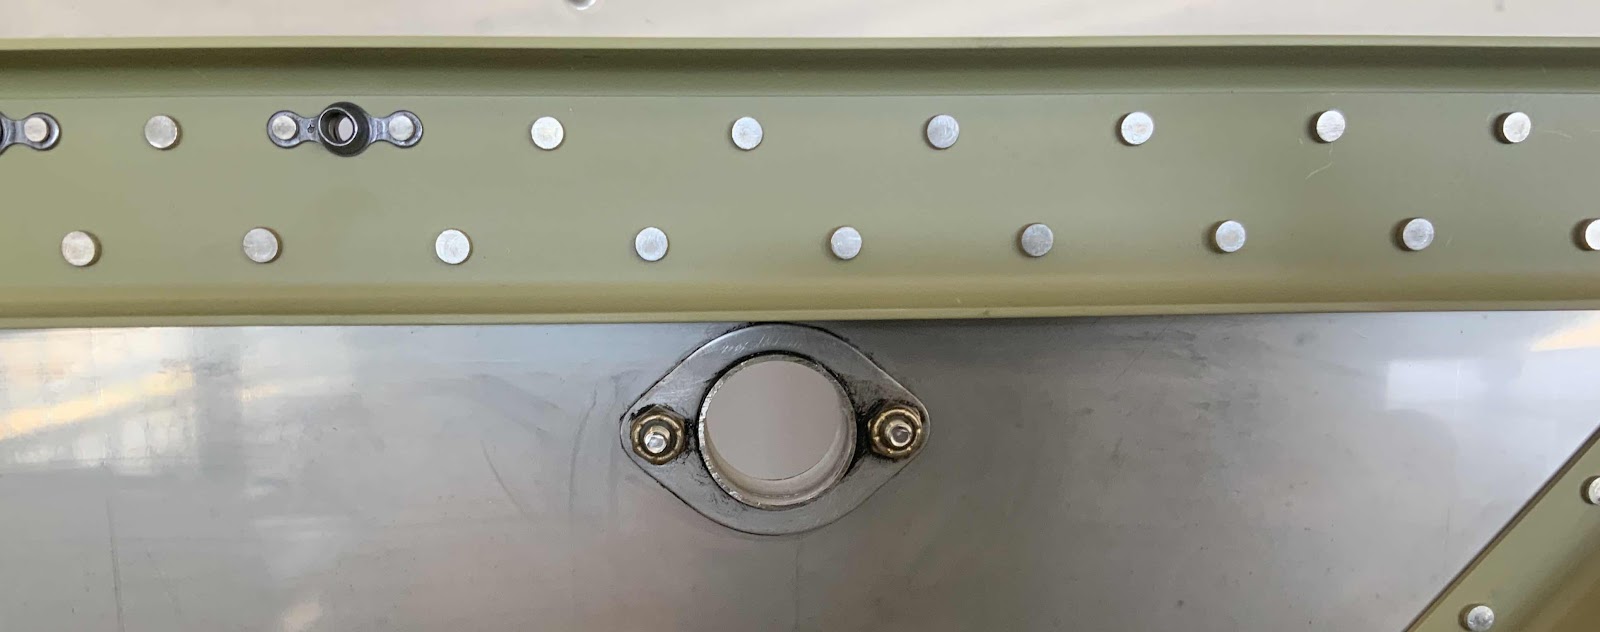
.....and the manufactured heads of the right side cherry rivets.
Here are the shop head side of the cherry rivets installed on the left side Lower Drag Fitting.....
.....and the manufactured head side of the left side cherry rivets.
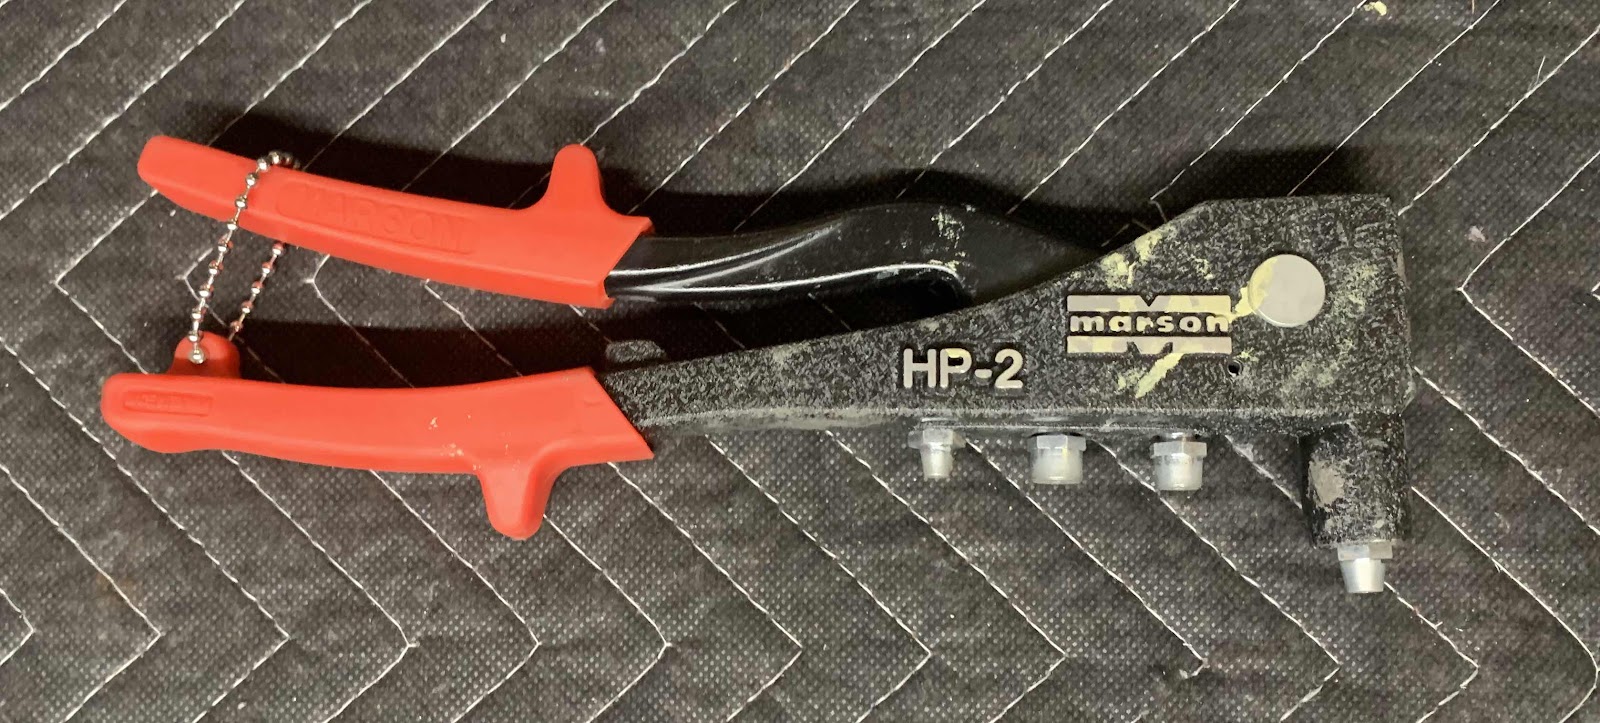
I’m not sure if I have shown or talked about my blind rivet puller, but I use the Marson Klik-Fast HPD-2. It cost a little more than some of the other ones I’ve seen, but I really like the quality and ease of use of the Marson. I used this puller to set some of the cherry rivets shown above.
Additionally, my buddy has (and I occasionally use) the Matco Tools RV14 Heavy-Duty Rivet Puller to pull some of the cherry rivets. (Kind of has a fitting name.....RV14, but nothing to do with a Van’s RV-14)! It worked very well when I got under the fuselage on a creeper and put upward pressure on the rivet puller. This kept positive pressure and ensured a good seat on the Skin with the manufactured head of the rivet.
To start the today’s session, I Akzo primed the two Upper Drag Fittings, two Lower Drag Fittings, and two Center Section Side Panels. I let them dry for a little bit and then installed on them on the Fuselage.
The left and right F-01442 Lower Drag Fittings were installed on the Fuselage using two AN6-42A bolts (large bolts), three NAS1149F0663P washers, and two AN365-624A nuts. The small bolt is an AN3-14A with MS21042-3 nut. The bolts were only installed finger tight and will be final torqued later.
Here is the left Lower Drag Fitting.....
.....F-01485-L Center Section Side Plate.....
.....right Lower Drag Fitting.....
.....F-01485-R Center Section Side Plate.....
.....F-01464-L Upper Drag Fitting.....
.....and F-01464-R Upper Drag Fitting.
Lastly, here is the bottom view of the F-01483-L & -R Forward Bottom Skins and F-01484 Center Bottom Skin all clecoed together.
Tonight was a pretty short session. I started out by cleaning the edges of the Center Section Side Panels. Once that was complete, I treated the Side Panels, Lower Drag Fittings, and Upper Drag Fittings with Alumiprep and Alodine. I will let them dry overnight and Akzo prime them tomorrow.
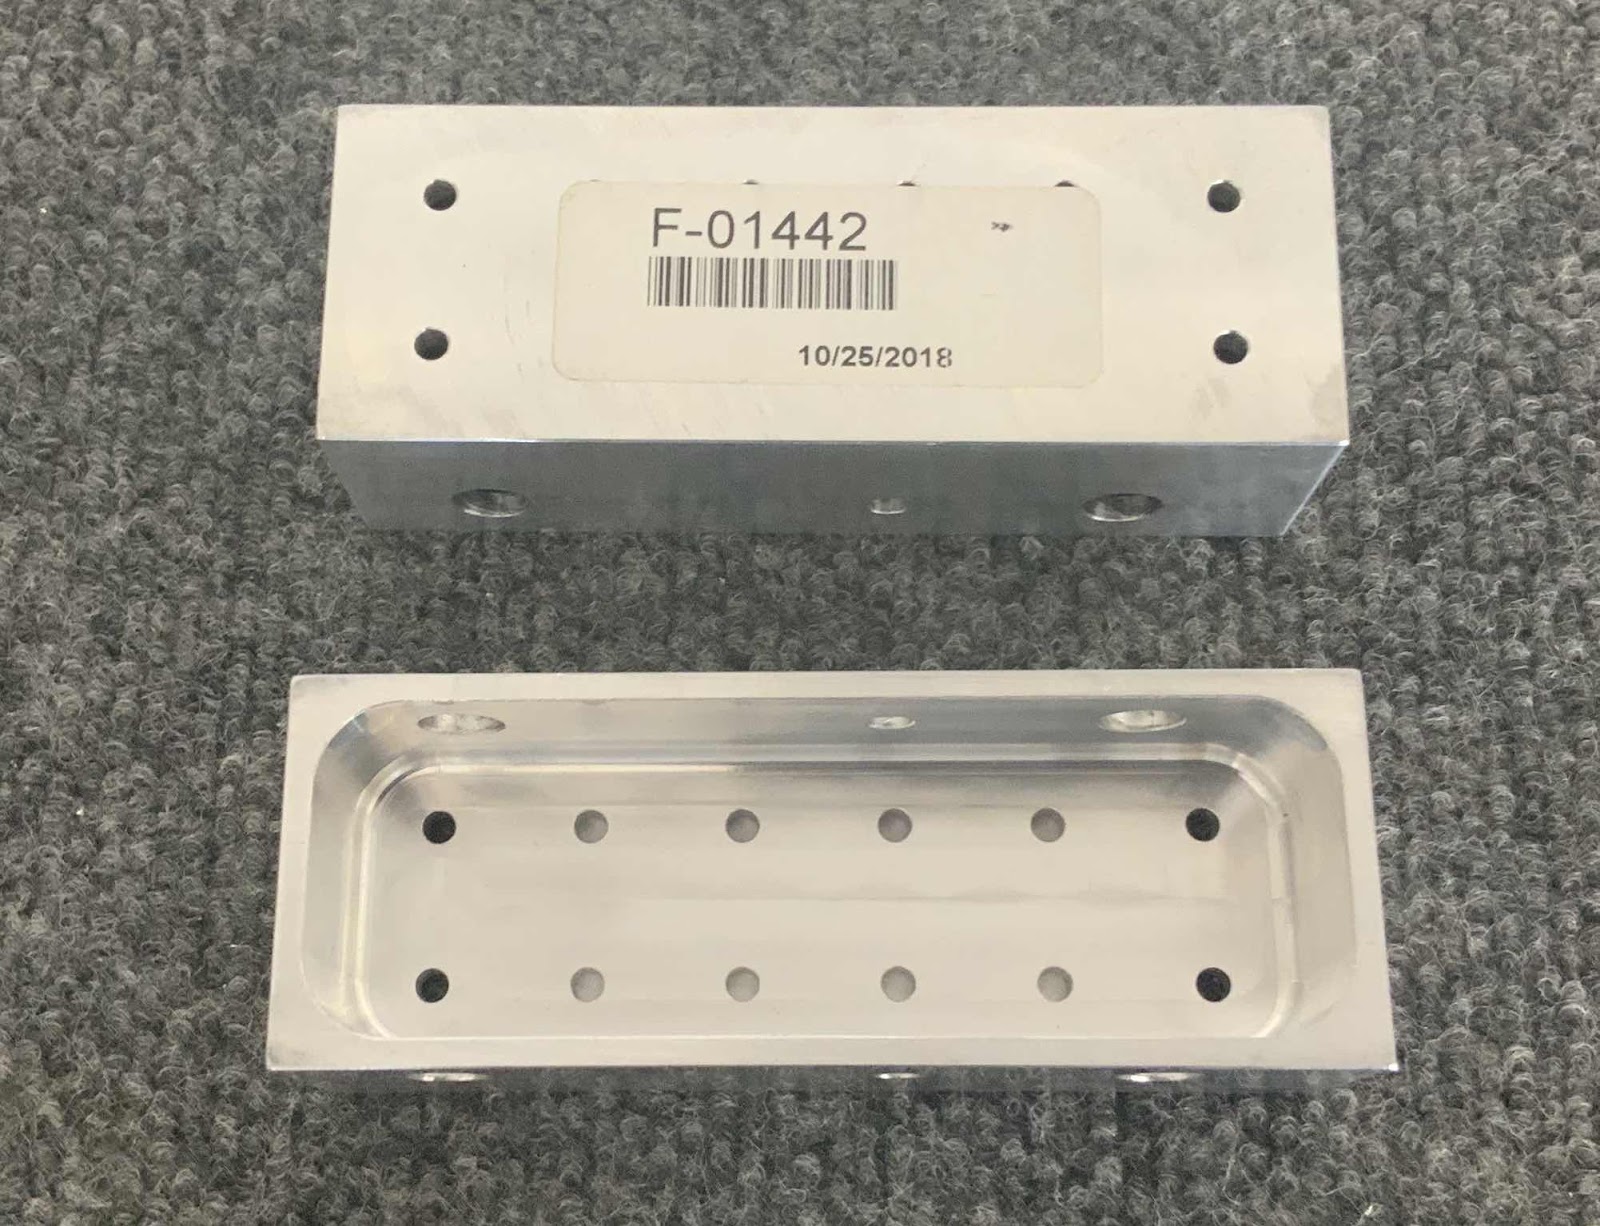
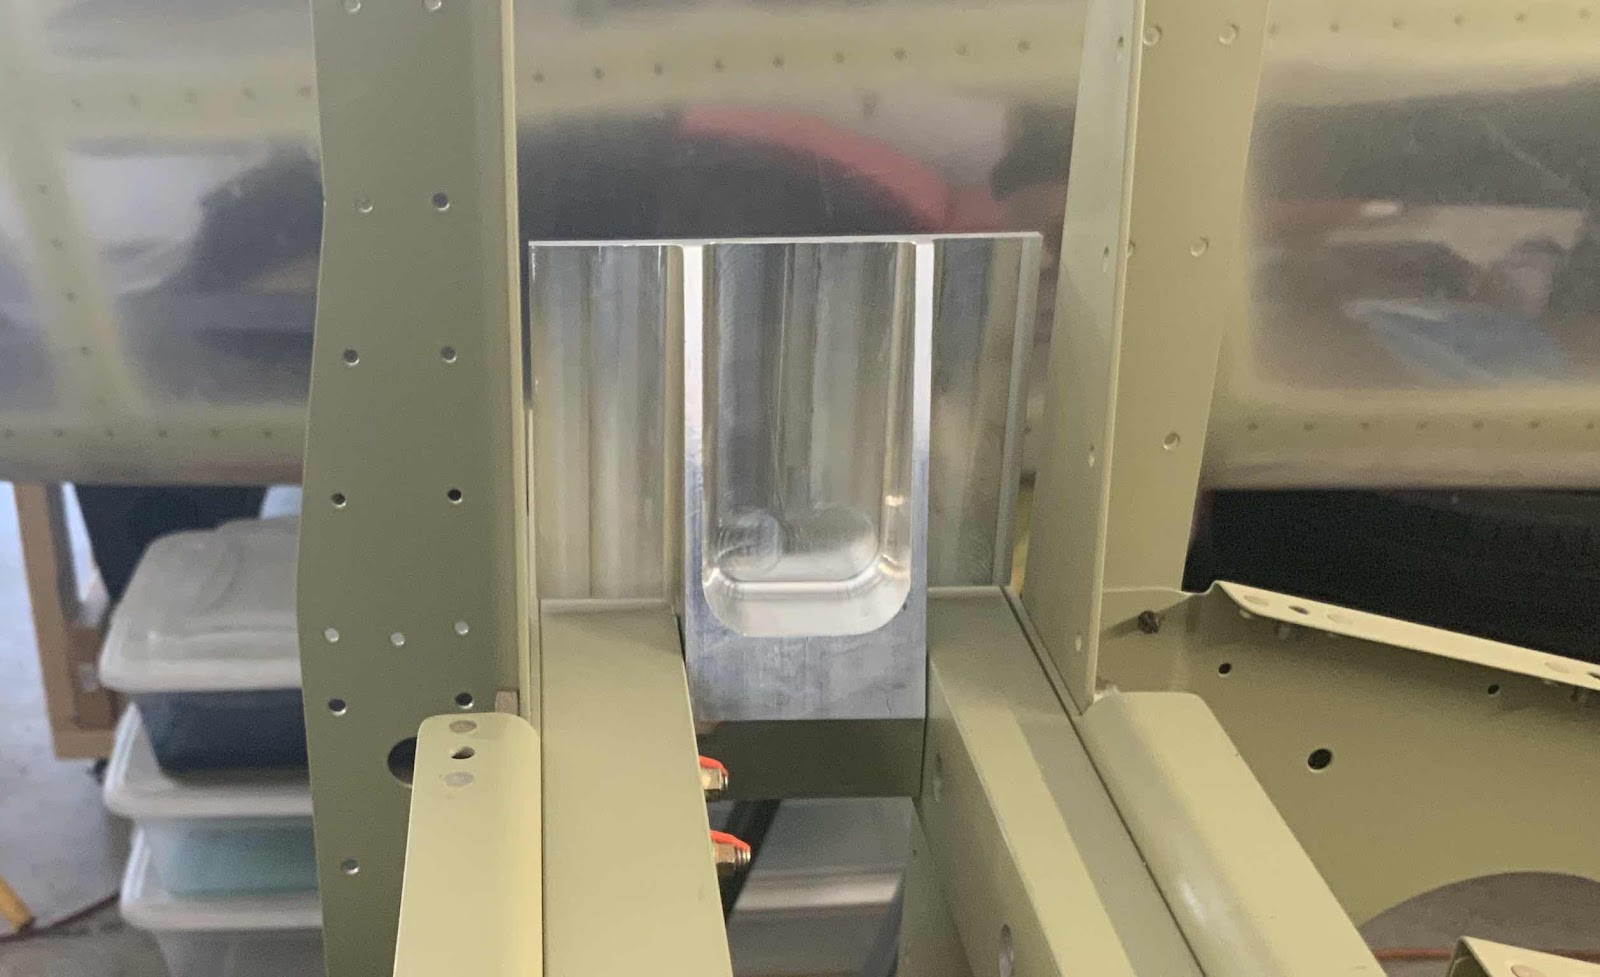
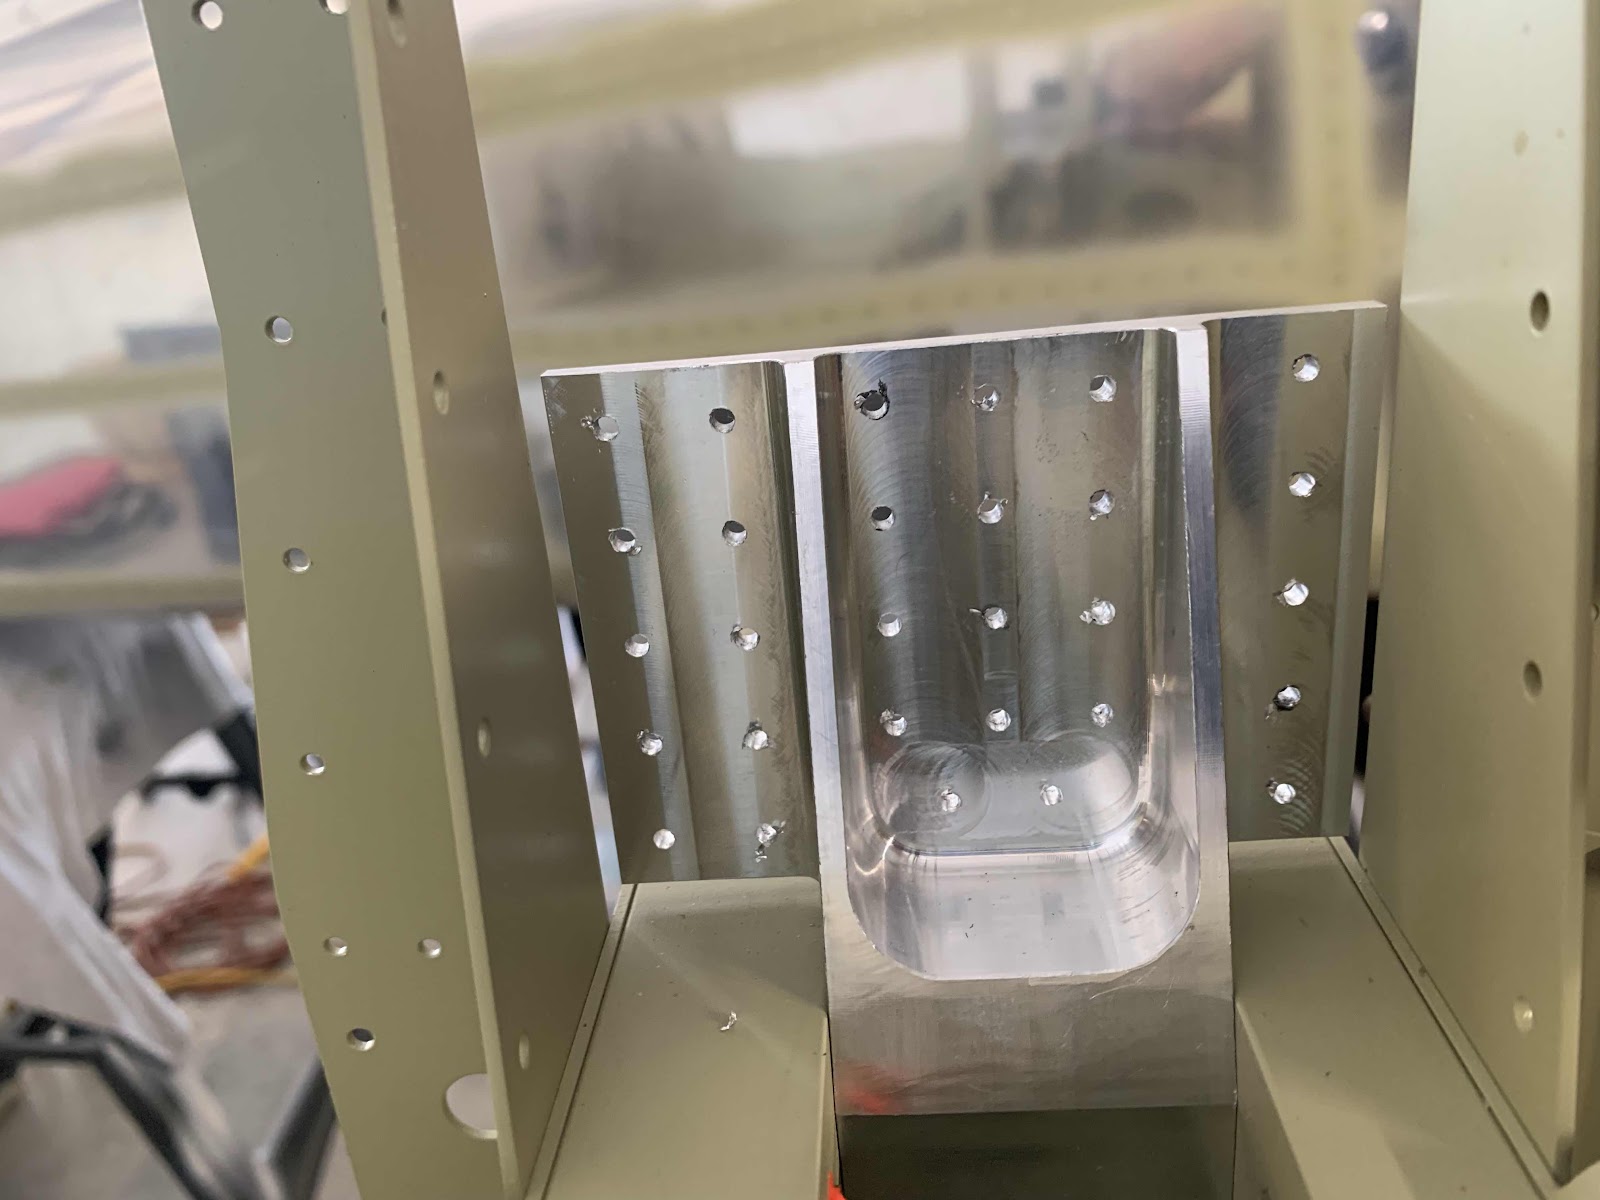
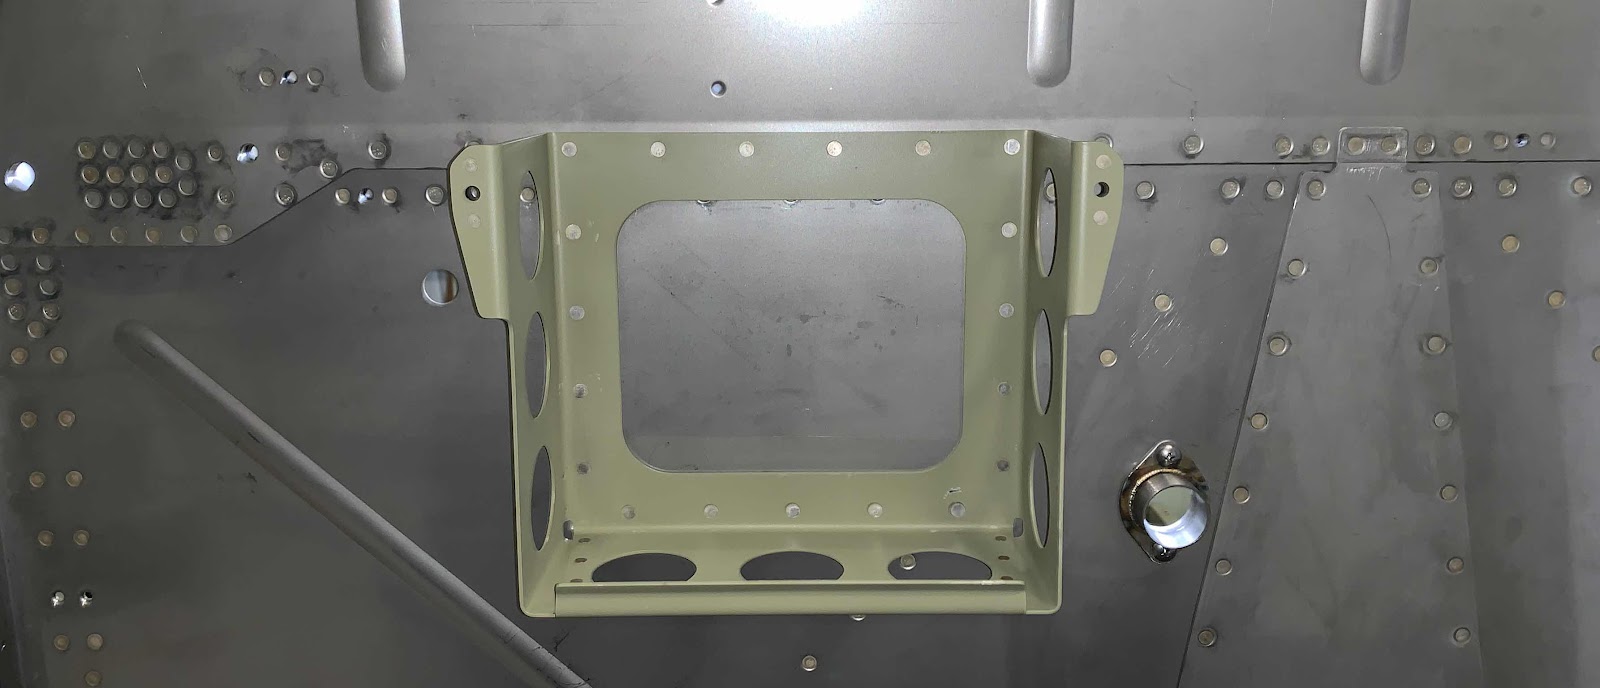
Today’s session looks like it’s “beef” up the area where the Wings attach to the Fuselage. Pictured below is the F-01442 Lower Drag Fittings.
These two pieces get installed in the “lower” area between the Forward Fuselage Lower Structure and the Mid Fuselage Lower Structure as shown below. The first picture is the left side.....
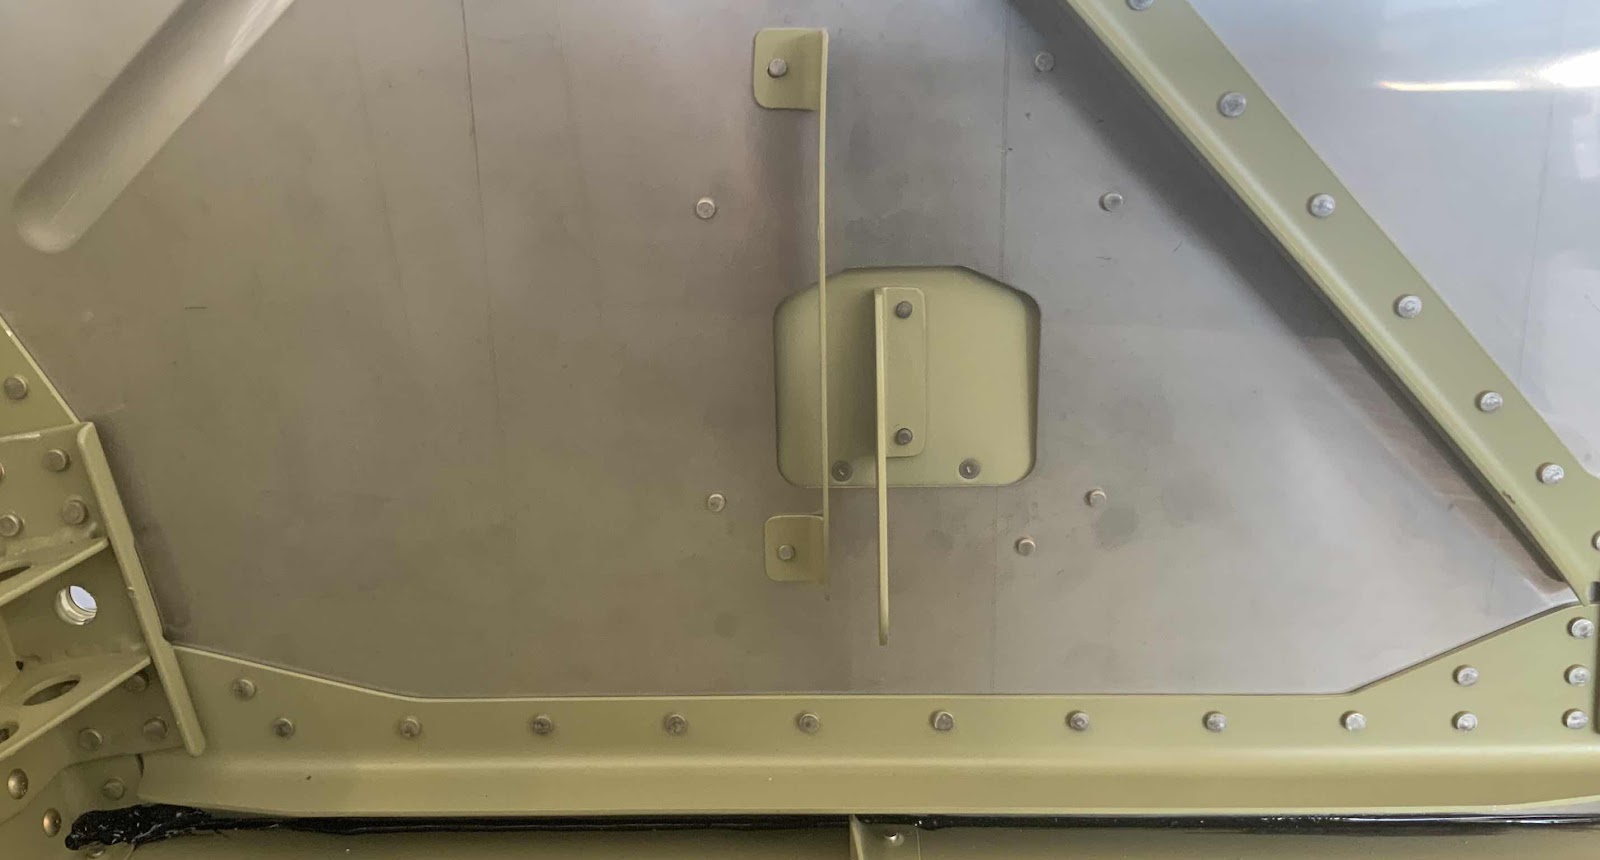
.....and this is the right side. The plans call for the hardware to be installed as shown below.....so, I did. However, I should have read JUST a little further in the plans prior to doing so. NOTE: Very shortly, these Lower Drag Fittings will get riveted with cherry rivets to the Center Bottom Skin and Forward Bottom Skins. I want to prime the Fittings before they get installed. So, now, I have to remove the hardware to prime the Fittings and then re-install the hardware.
These are the F-01464-L and -R Upper Drag Fittings. These will be installed in the “upper” area between the Forward Fuselage Lower Structure and Mid Fuselage Lower Structure.
This is the left side.....
.....and this is the right side. More on these two pieces later in the post.
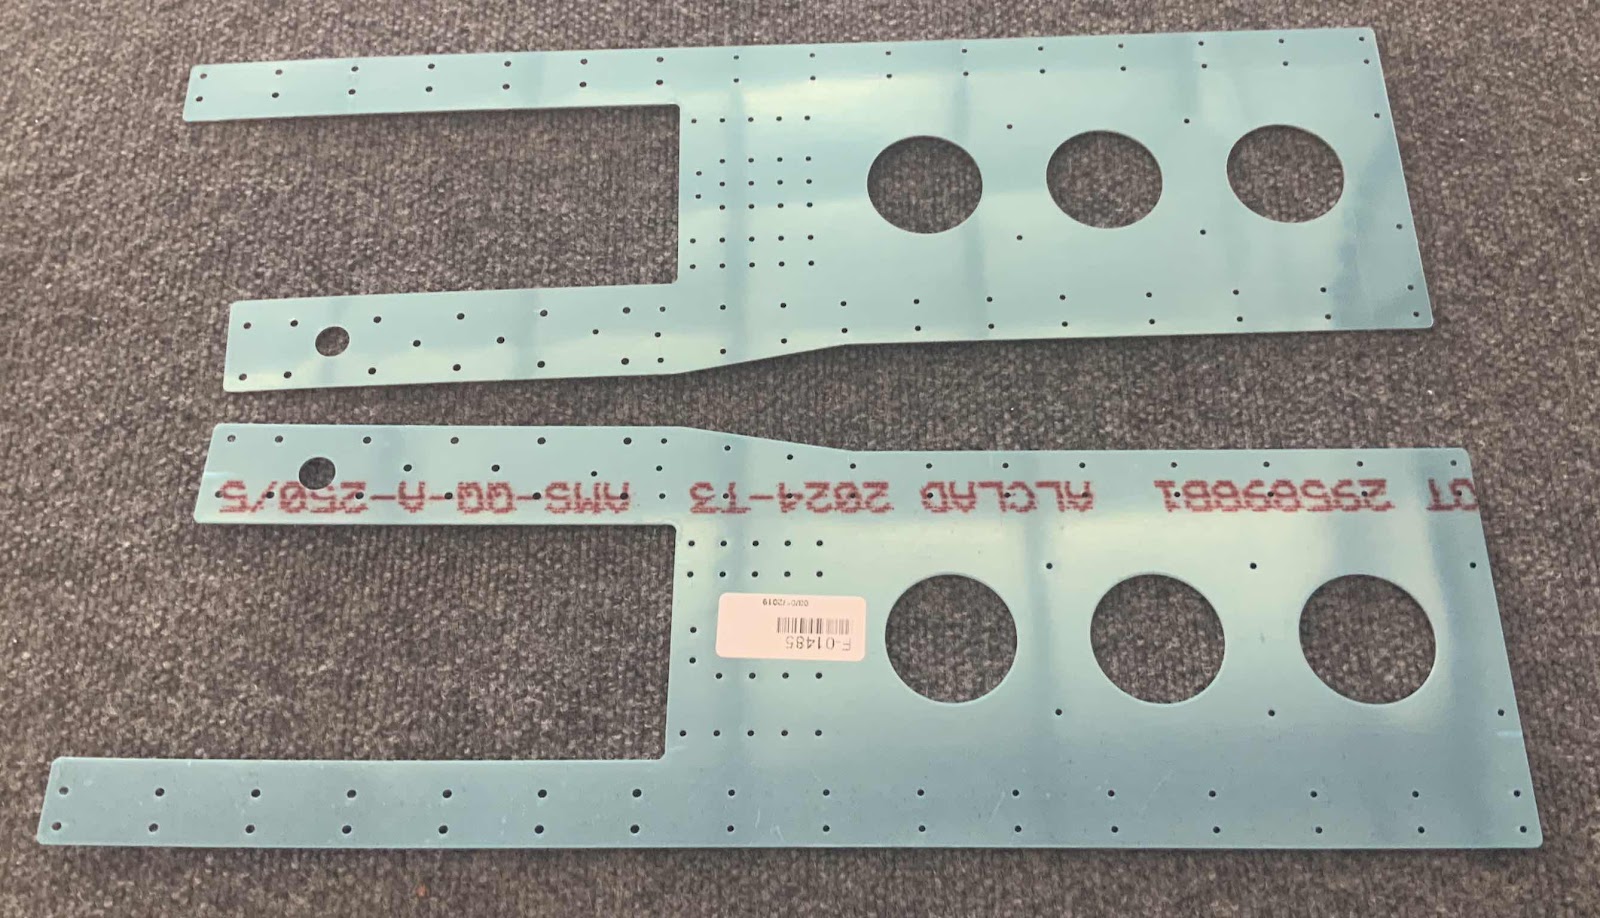
Shown here are the F-01485-L & -R Center Section Side Panels still in their sweet blue plastic.
I removed the plastic and installed them to the Fuselage using as many clecos as possible (plans directed). Here you can see both Side Plates clecoed to the Fuselage. The next step is to firmly clamp the Upper Drag Fittings to the Center Section Side Plates. I used my blue squeeze clamps shown below.
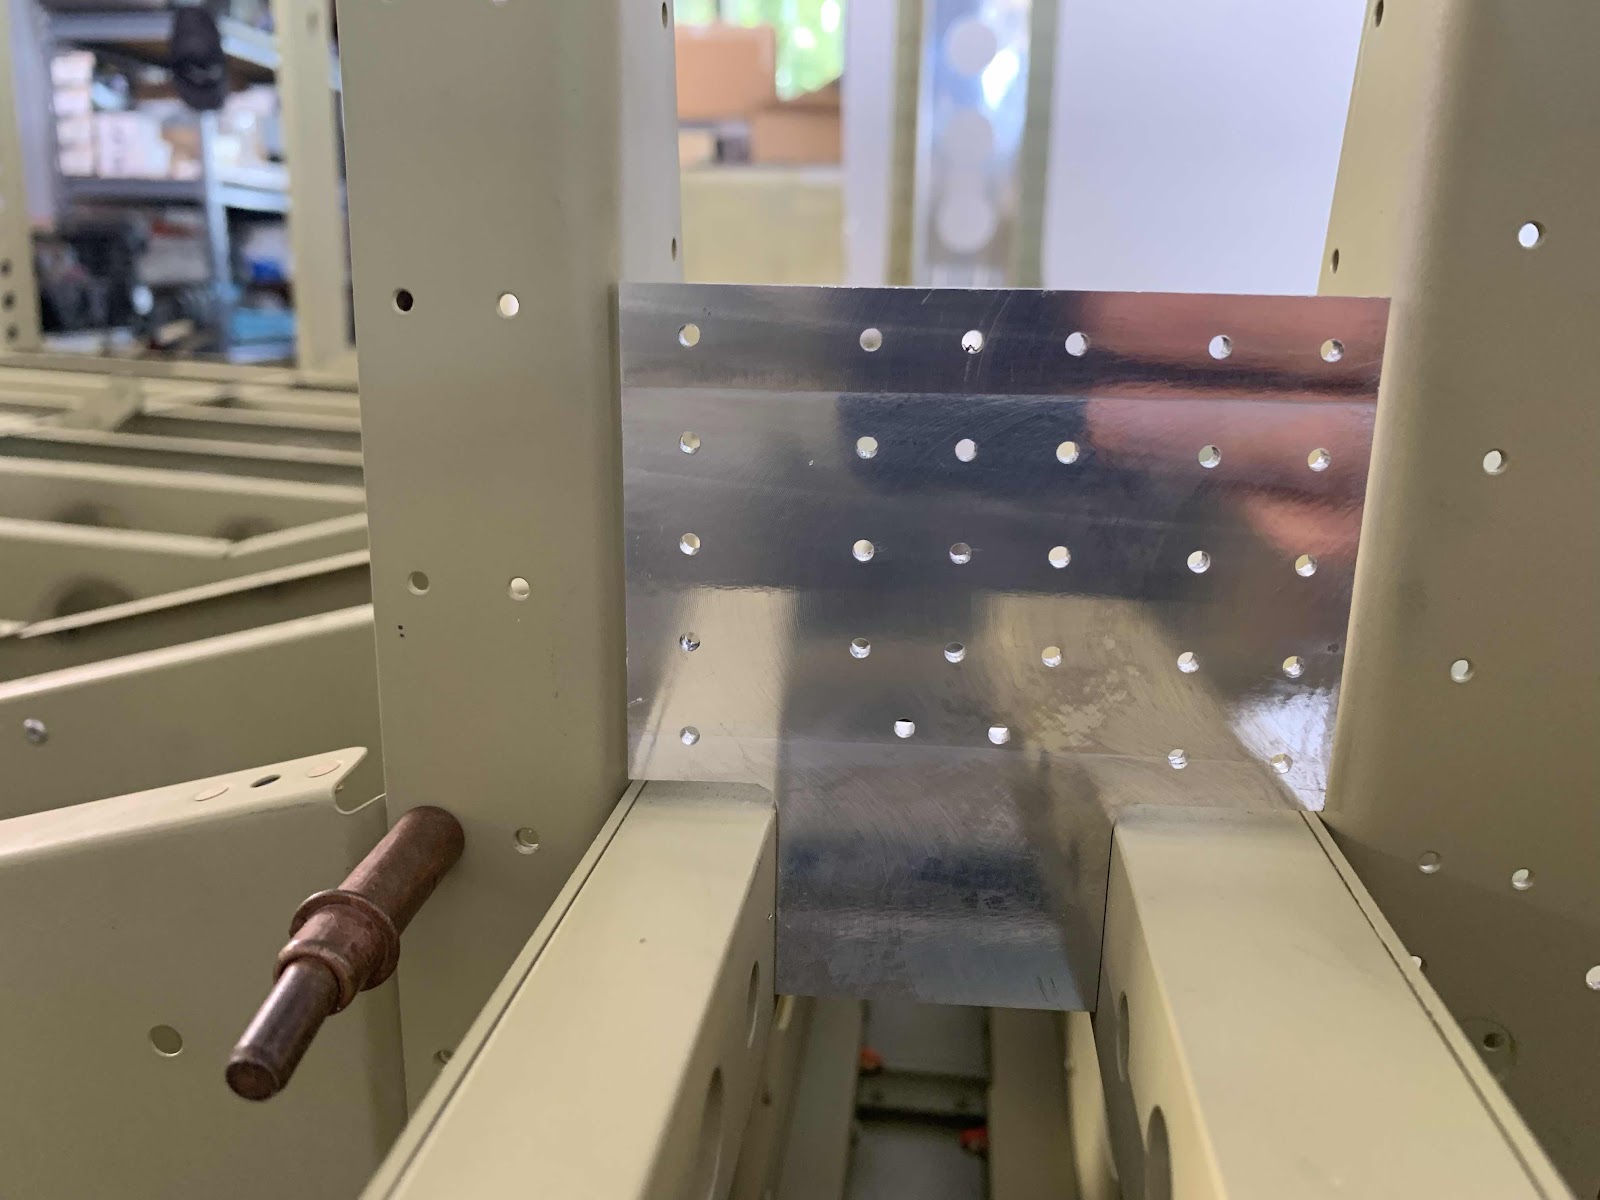
Once everything was clecoed and clamped together, it was time to match-drill #40 the holes in the Center Section Side Plates into the Upper Drag Fittings. Each side has 29 holes that need to be match-drilled. Shown here is the left side. I used a 6” #40 bit to drill most of the holes, but I had to use a 12” bit on a few of them.
After all the match-drilling was complete I removed the Side Plates and here is what the Upper Fittings looked like. This is the “outboard” side of the -R Fitting.....
.....and the “inboard” side.
I then removed both Upper Drag Fittings and both Lower Drag Fittings. Finally, I deburred all the holes in the Upper Drag Fittings and Center Section Side Panels. I’ll pick it up here tomorrow.
I finished up with Section 28 earlier today, so here goes Section 29. The first step in this Section is to prime the Forward Bottom Skins and the Center Bottom Skins where they overlap. (It is also recommended that all overlapping Skins in this Section be primed along any areas of contact). I had previous primed both of these Skins, so step 1 is automatically completed.....off to a great start!
The next step is to join the Forward Fuselage Lower Structure with the Mid Fuselage Lower Structure by sliding the assemblies together on a workbench. The two Structures together are becoming rather large, so I put both of my workbenches together to work on them. Here are the two assemblies clecoed together and ready for the next step.