Sunday, June 30, 2019

Fuselage, Firewall (Part 7)

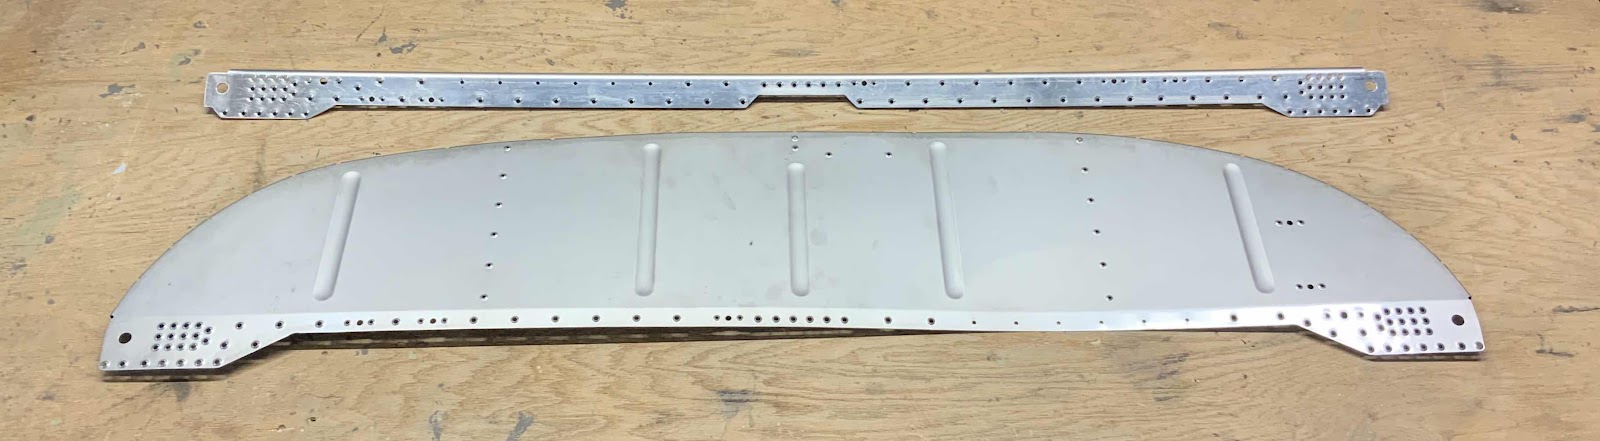
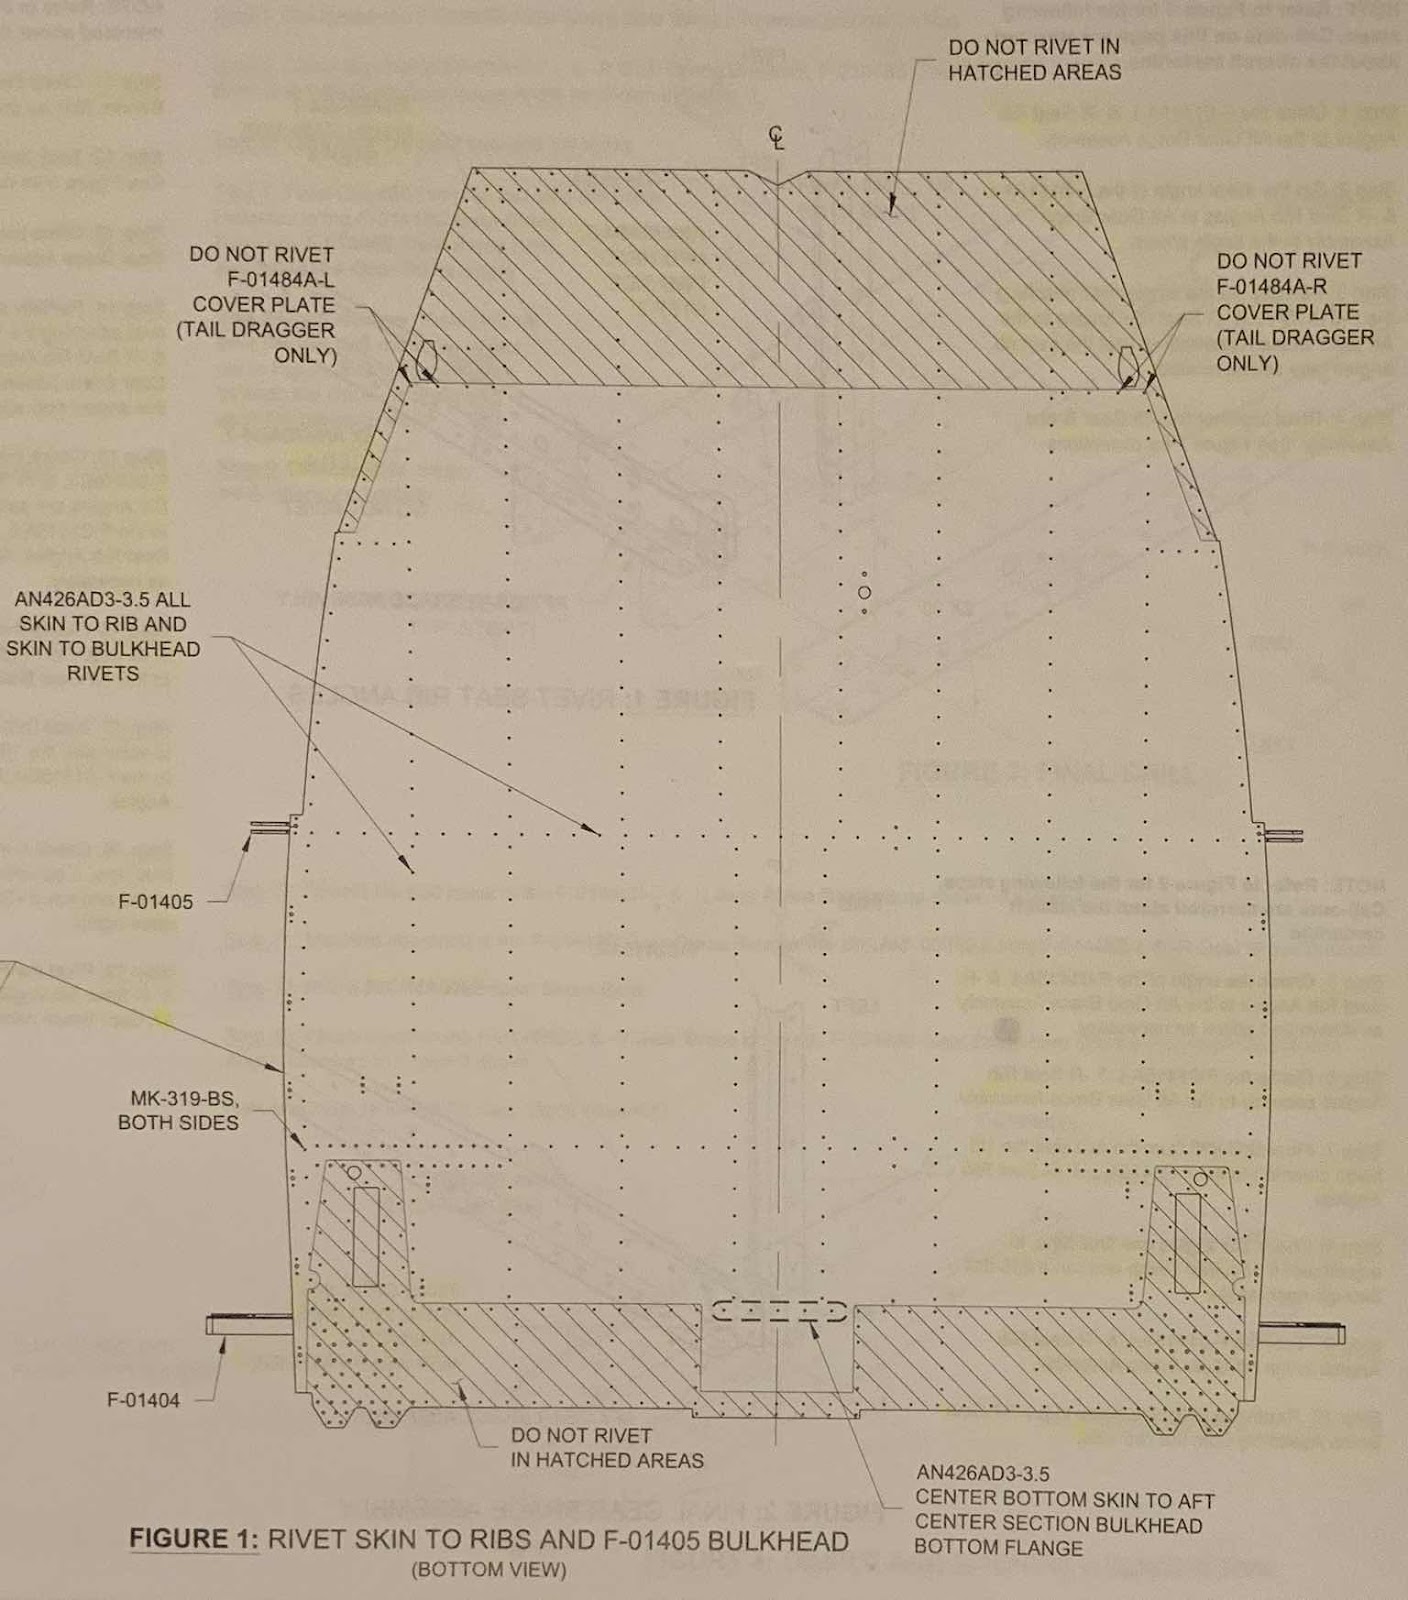
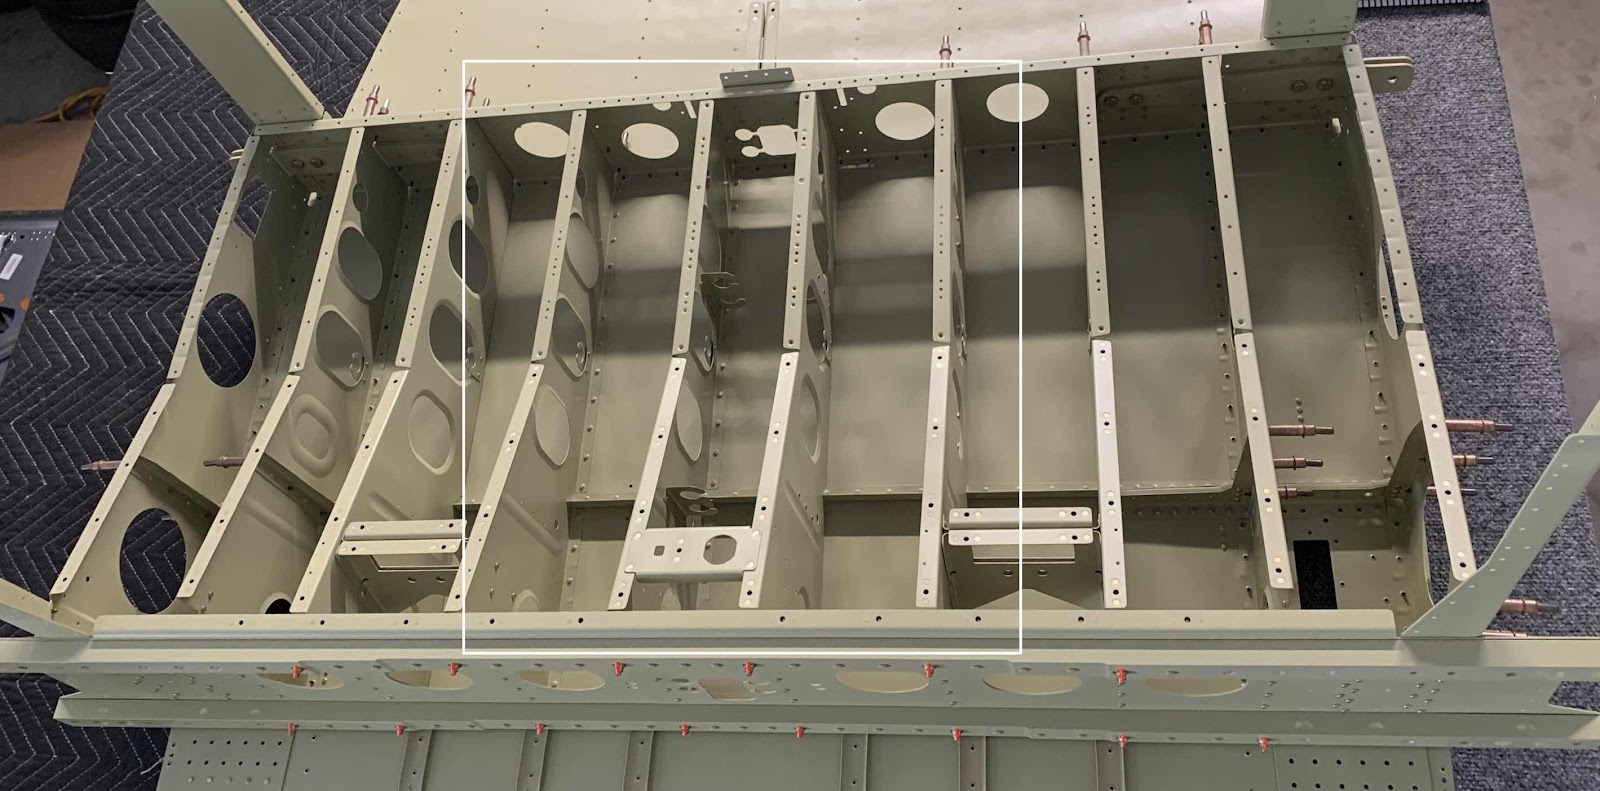
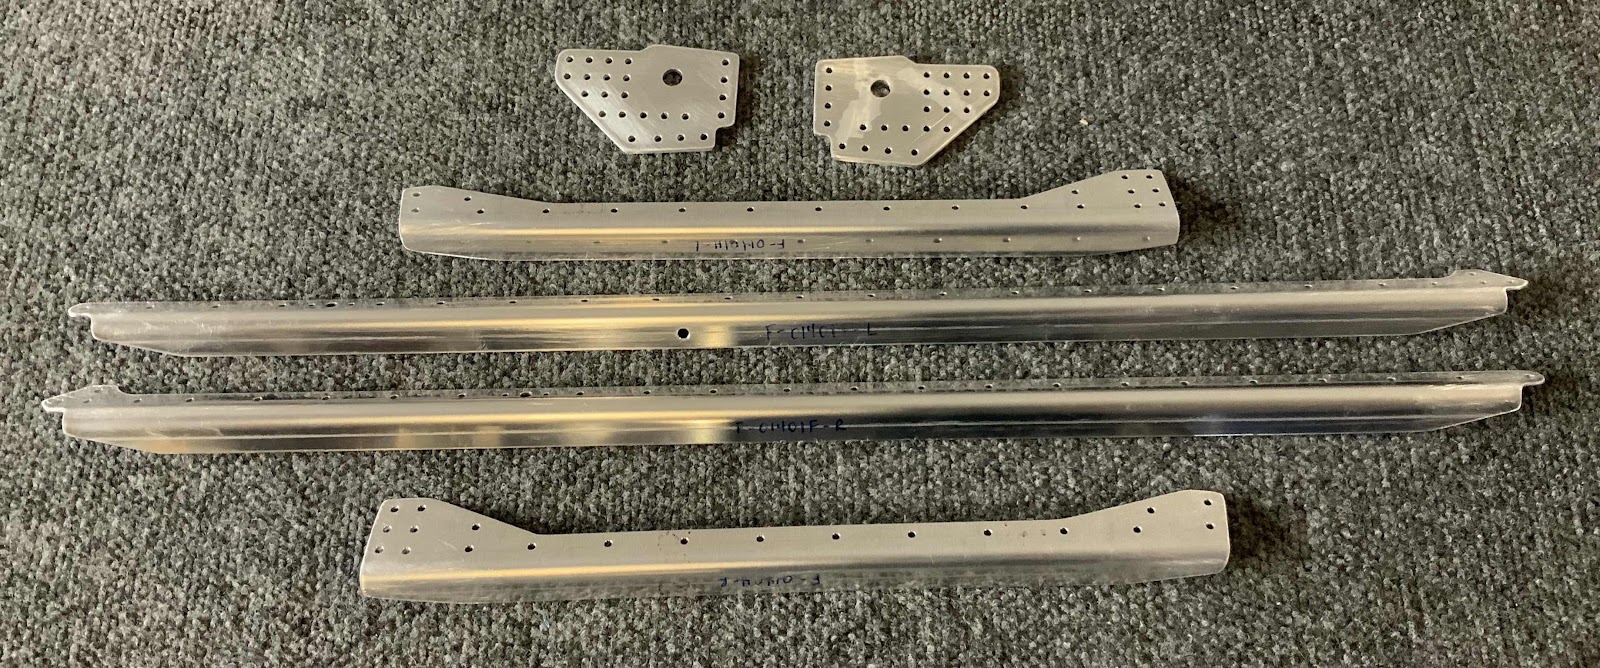
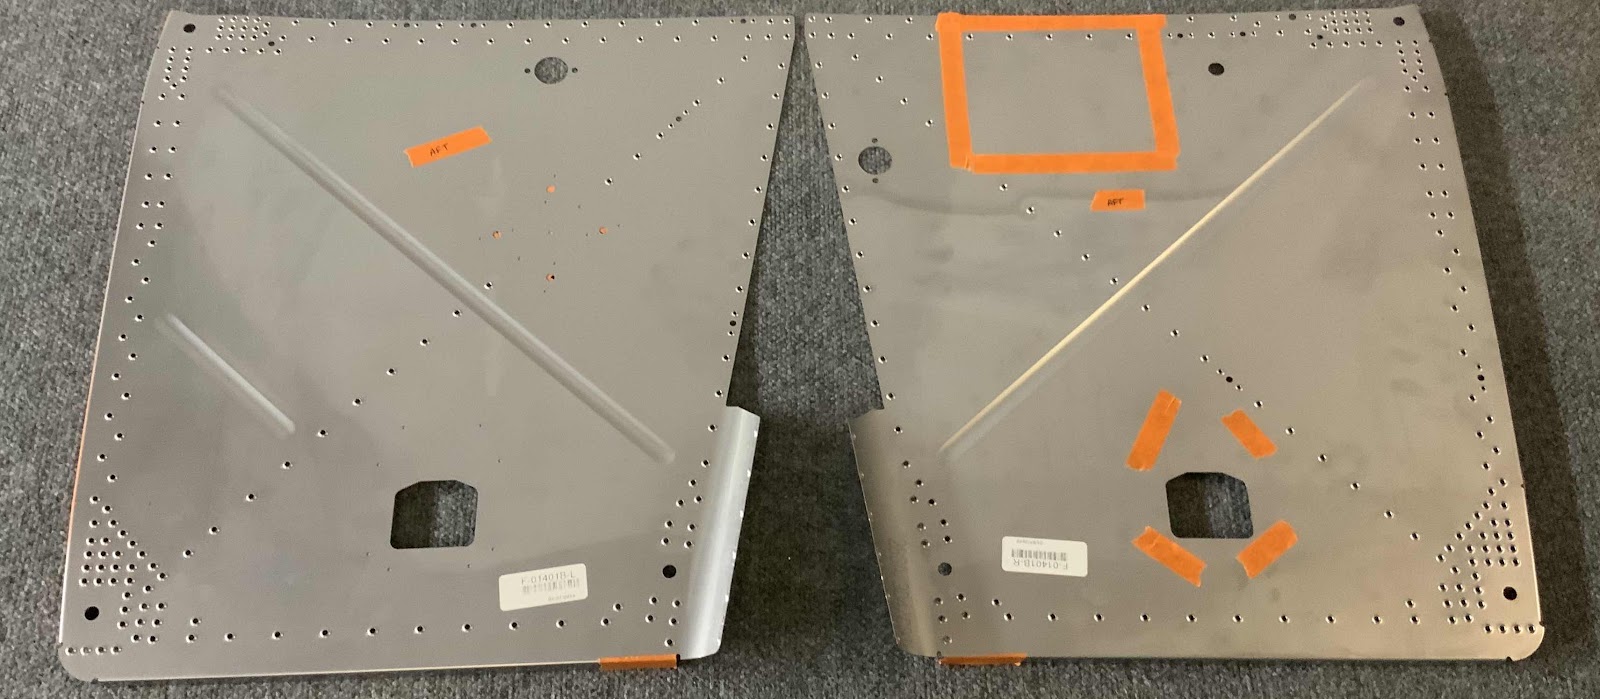
Today is the day to start riveting the Firewall together.  To start, I clecoed the four Firewall Angles to the Firewall Sides.  I wanted to see how all the holes and parts lined up.  Also, it gave me a 15th chance to make sure I didn’t rivet the holes I wasn’t supposed to (you can see some of the “do not rivet holes” with orange tape on them).

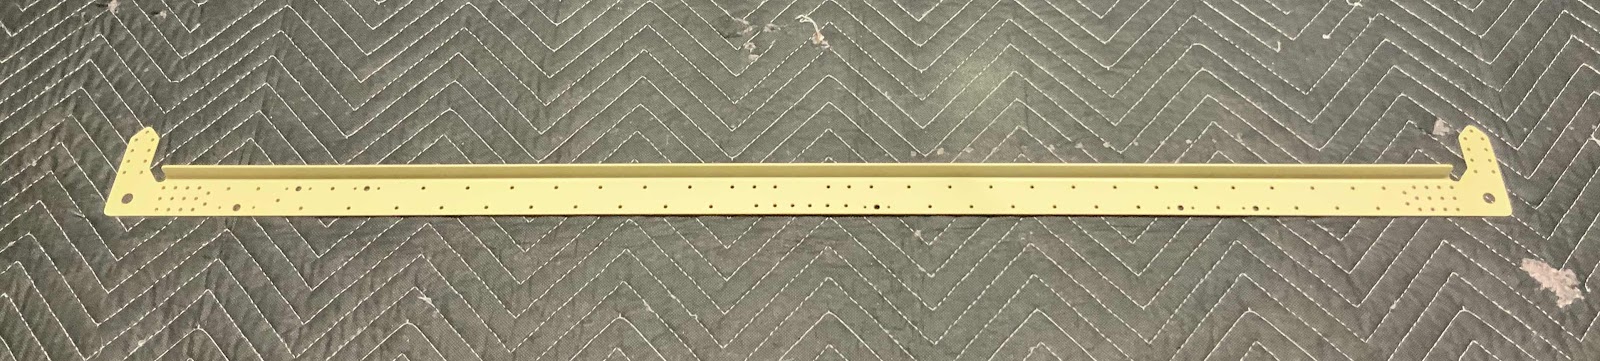
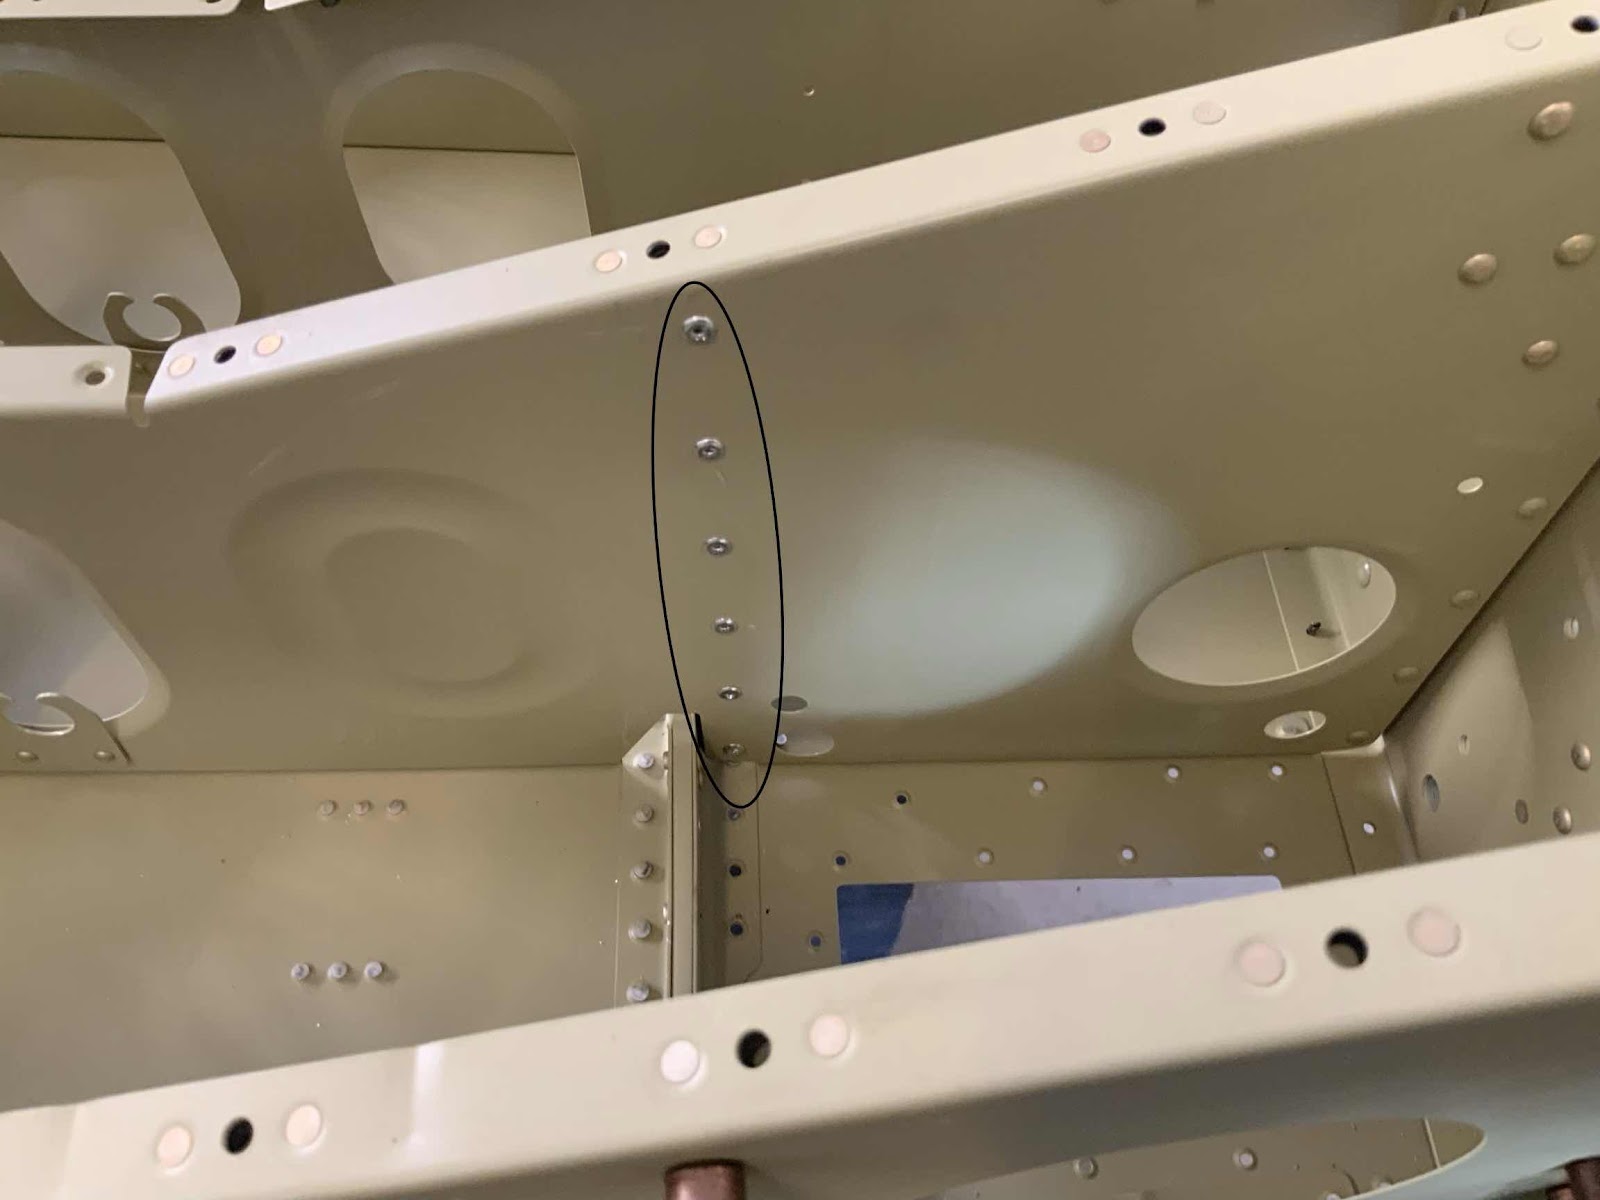
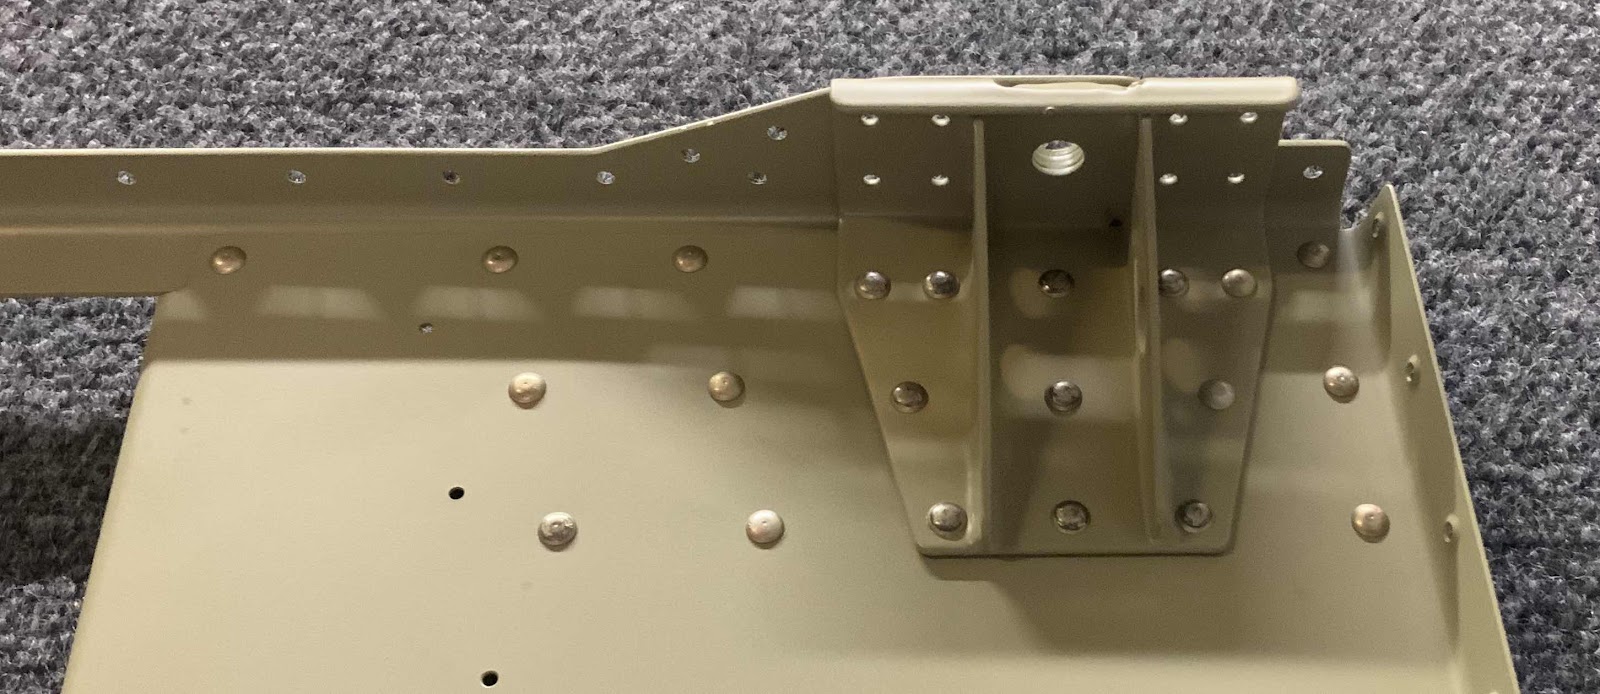
Here is a close up of the top center of the Firewall.....

.....without the upper Firewall Angle.....

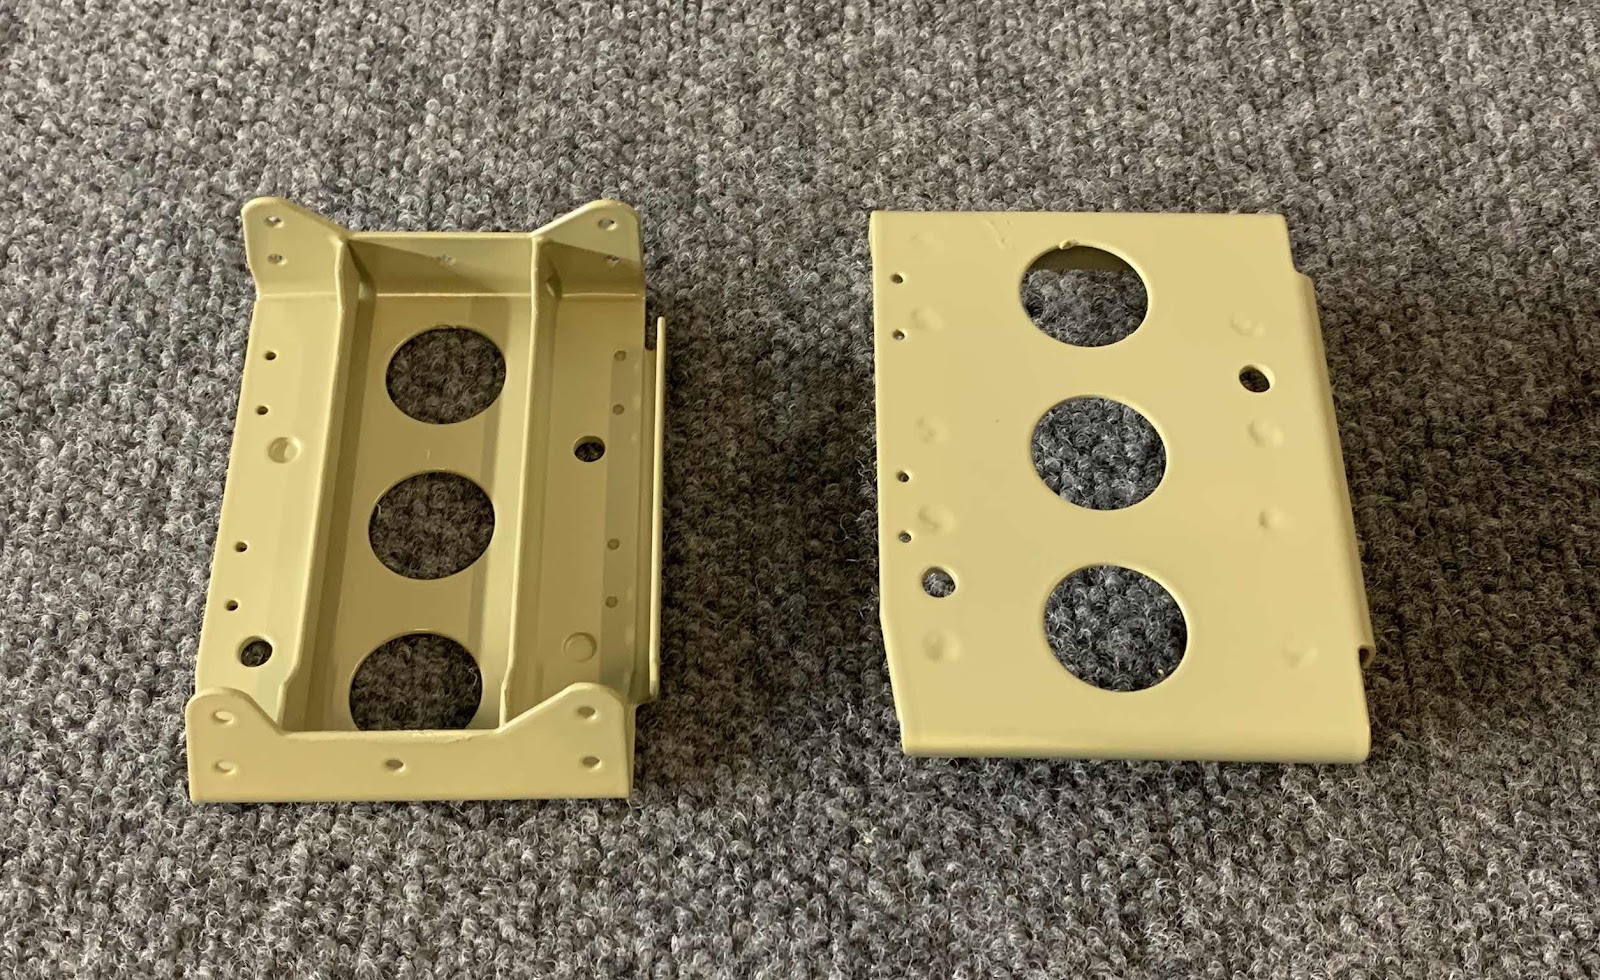
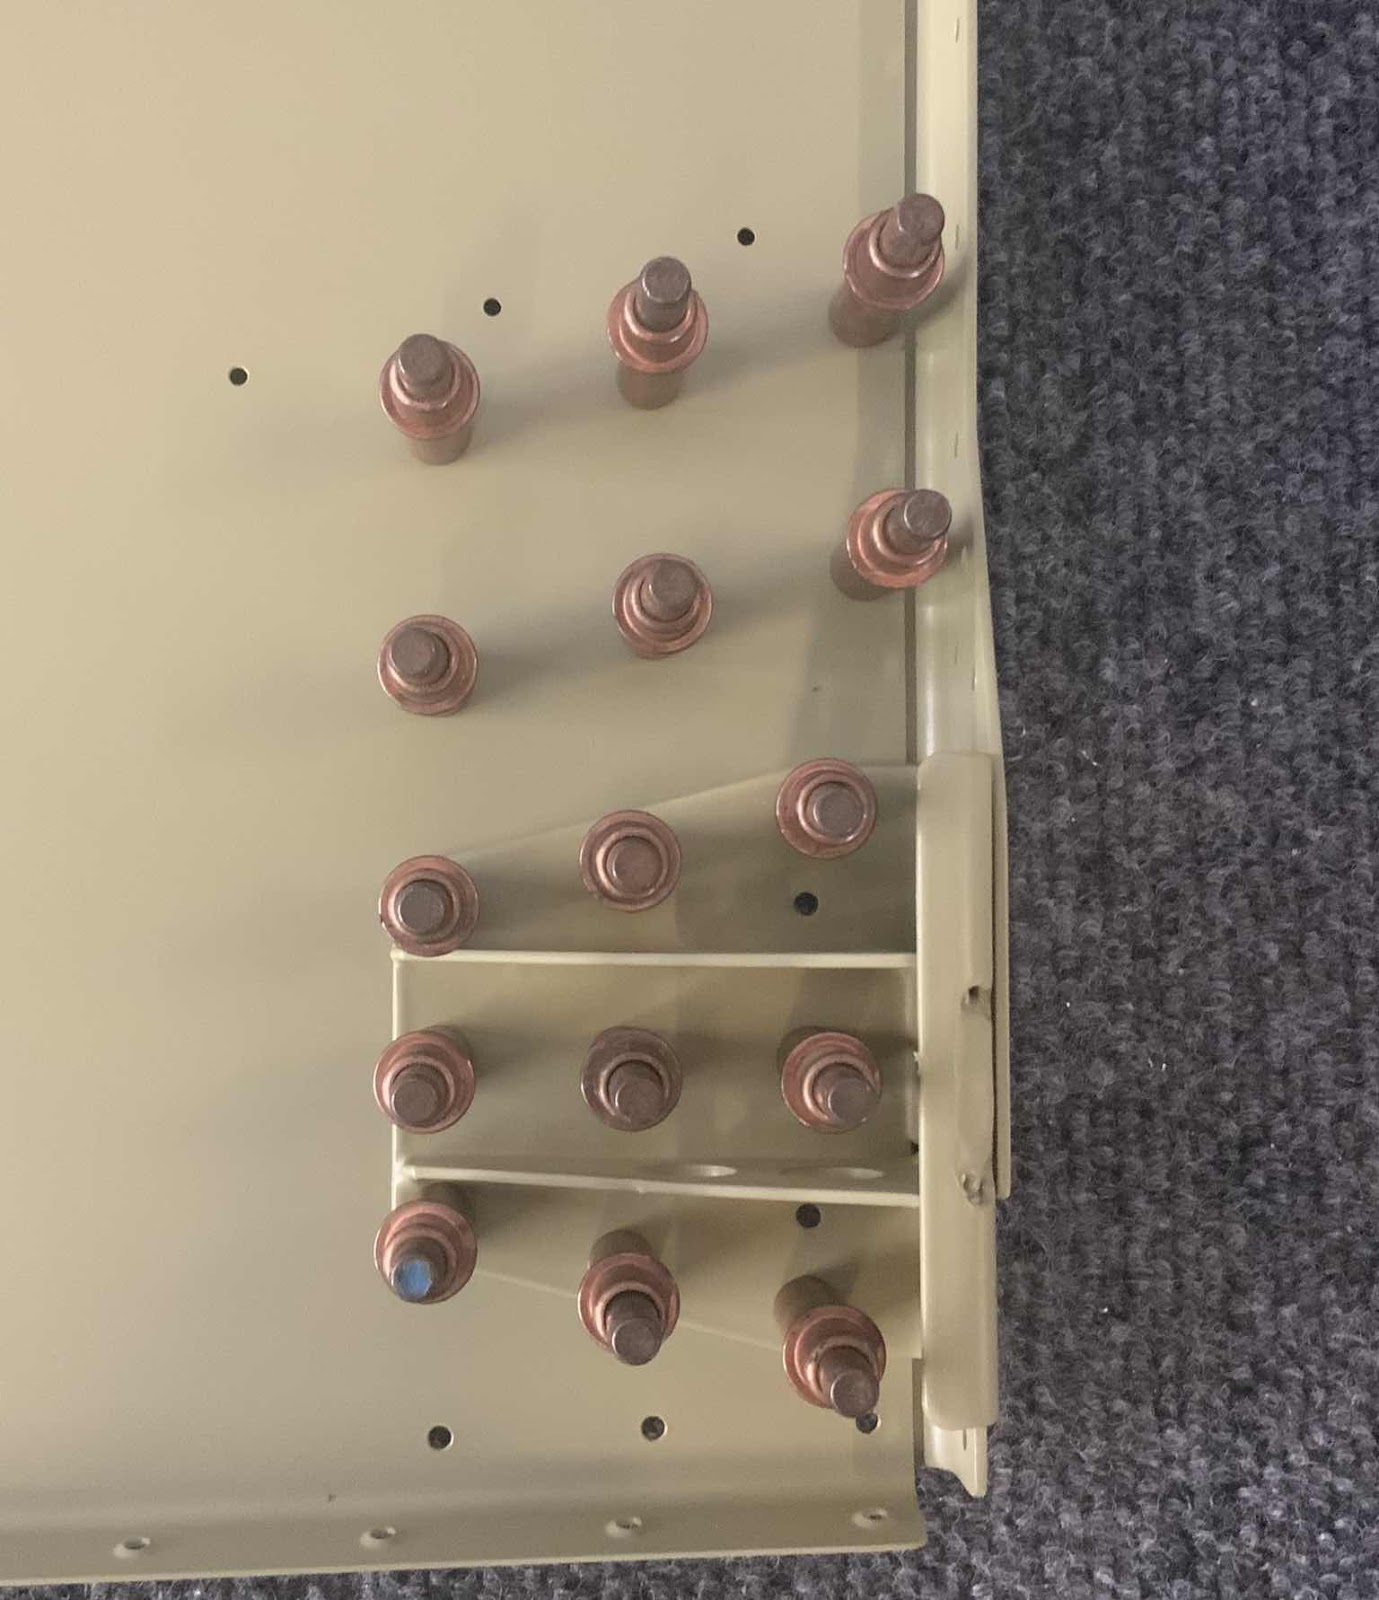
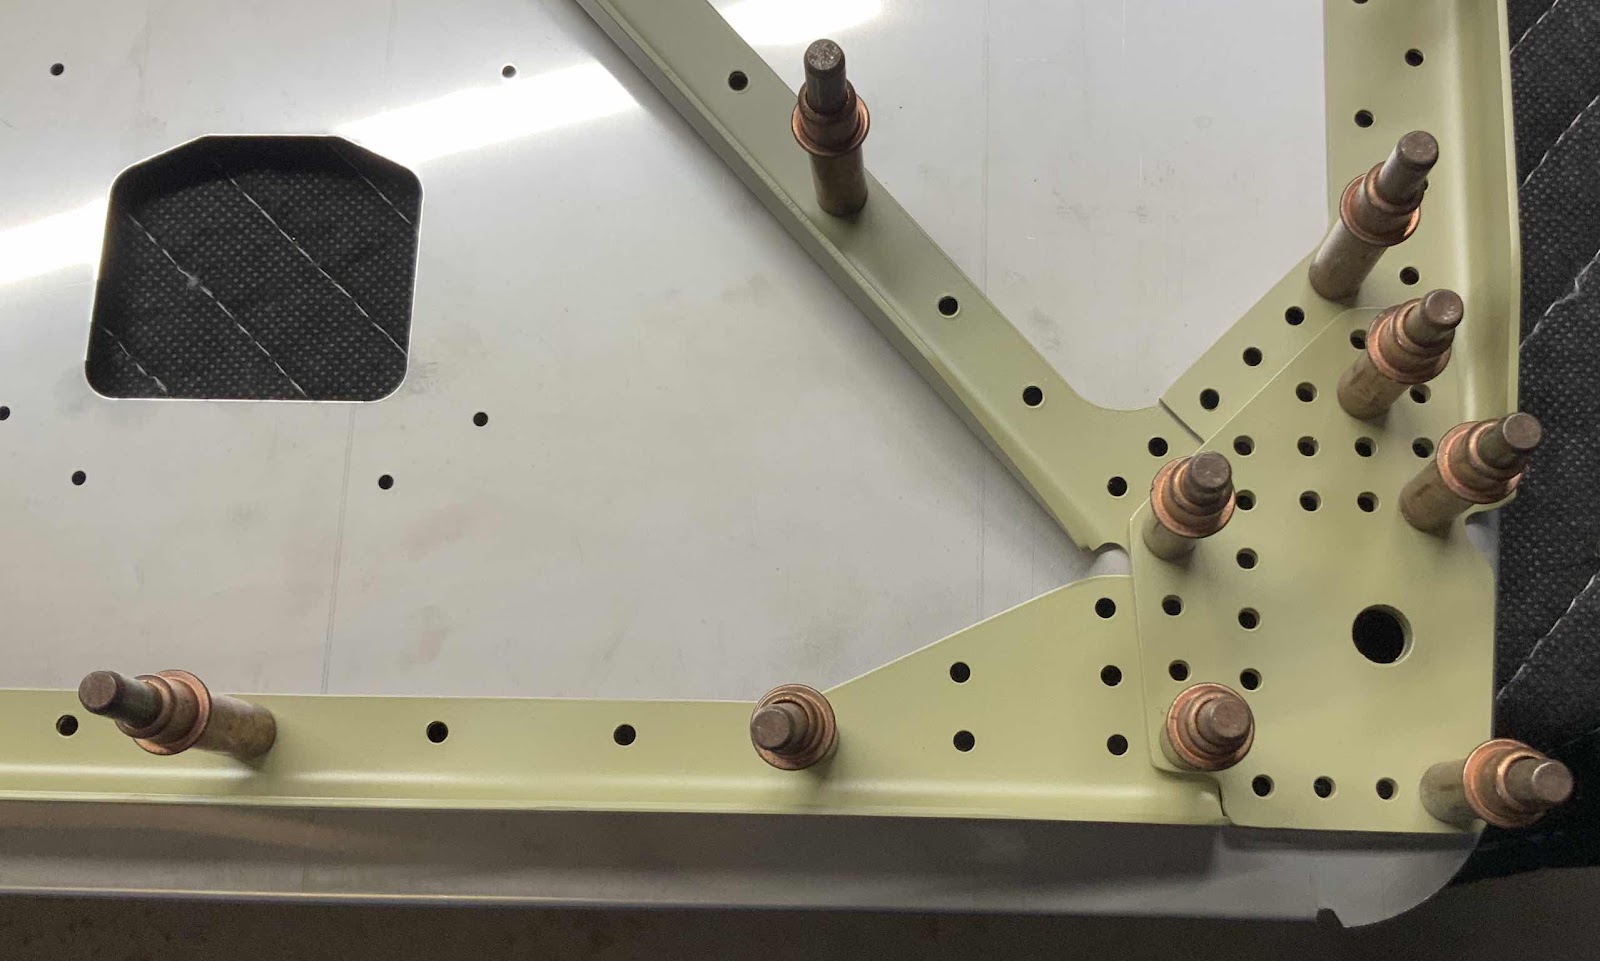
.....the bottom right corner of the right Firewall Side with all three Firewall Angles and Gussett.....

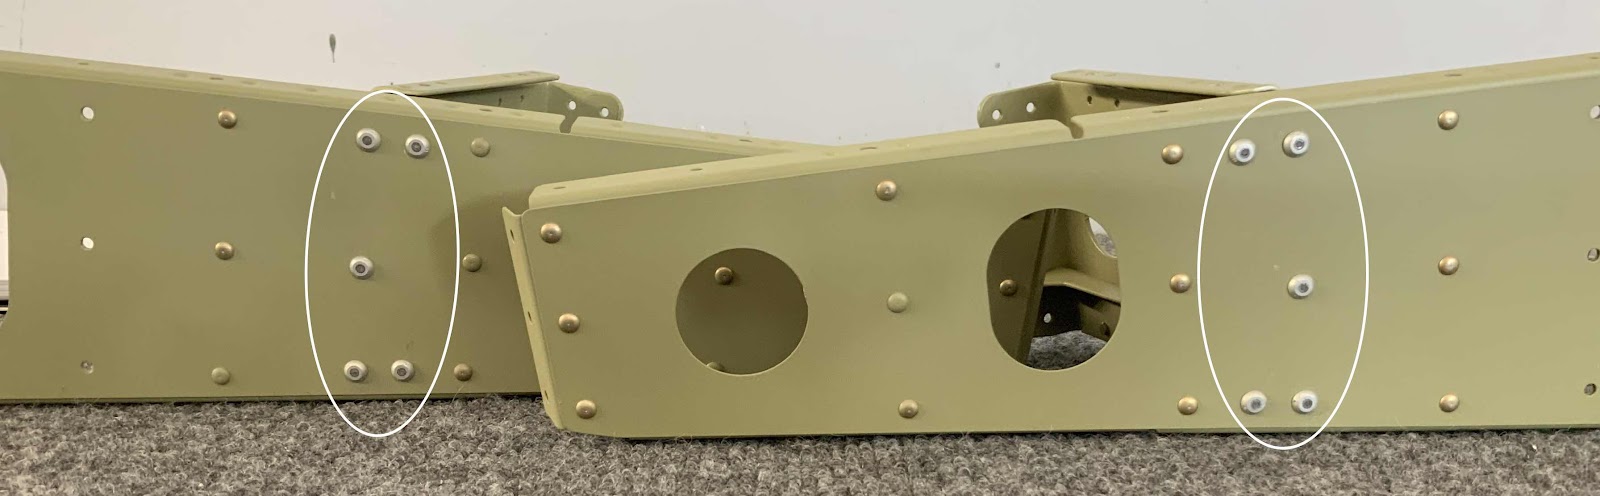
.....the bottom left corner of the left Firewall Side with all three Firewall Angles and Gussett.

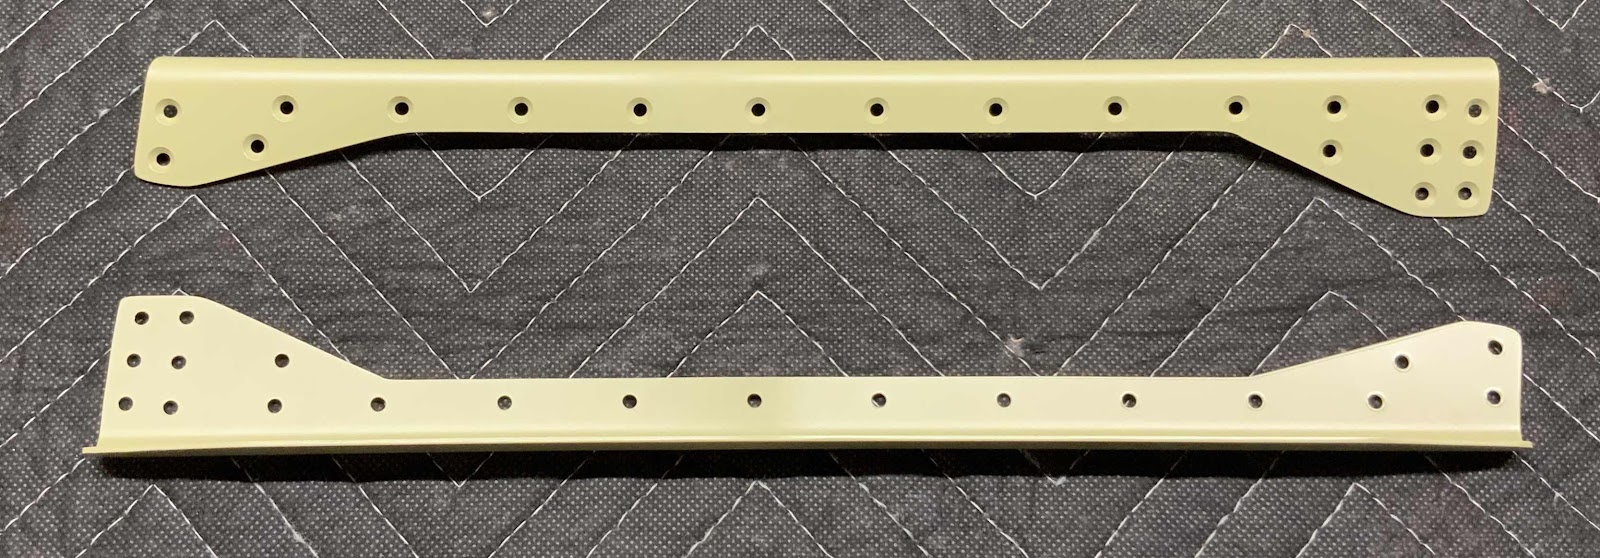
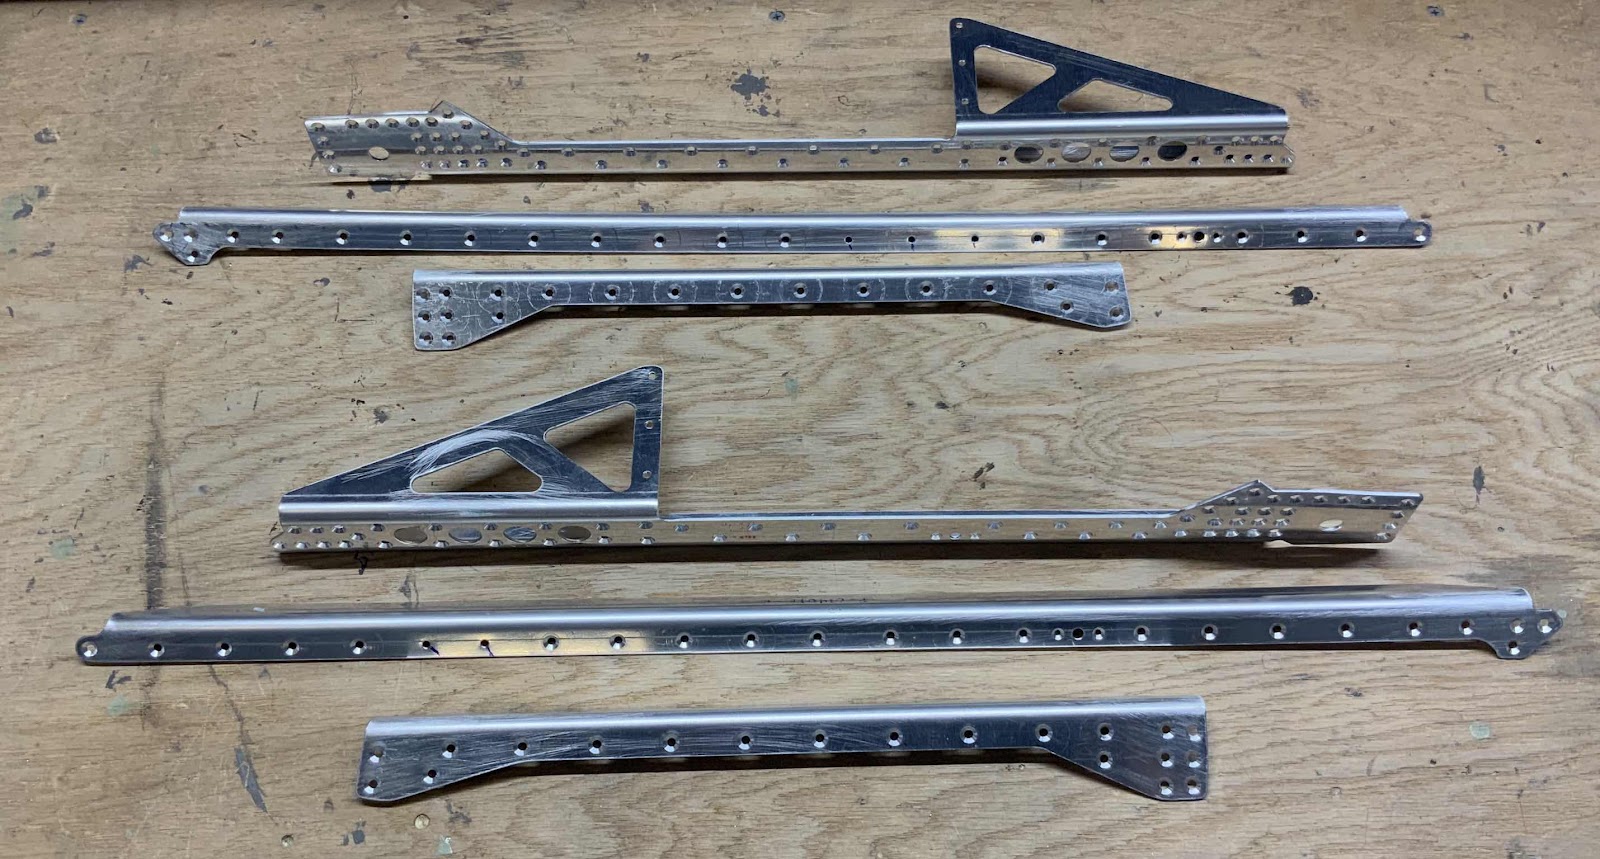
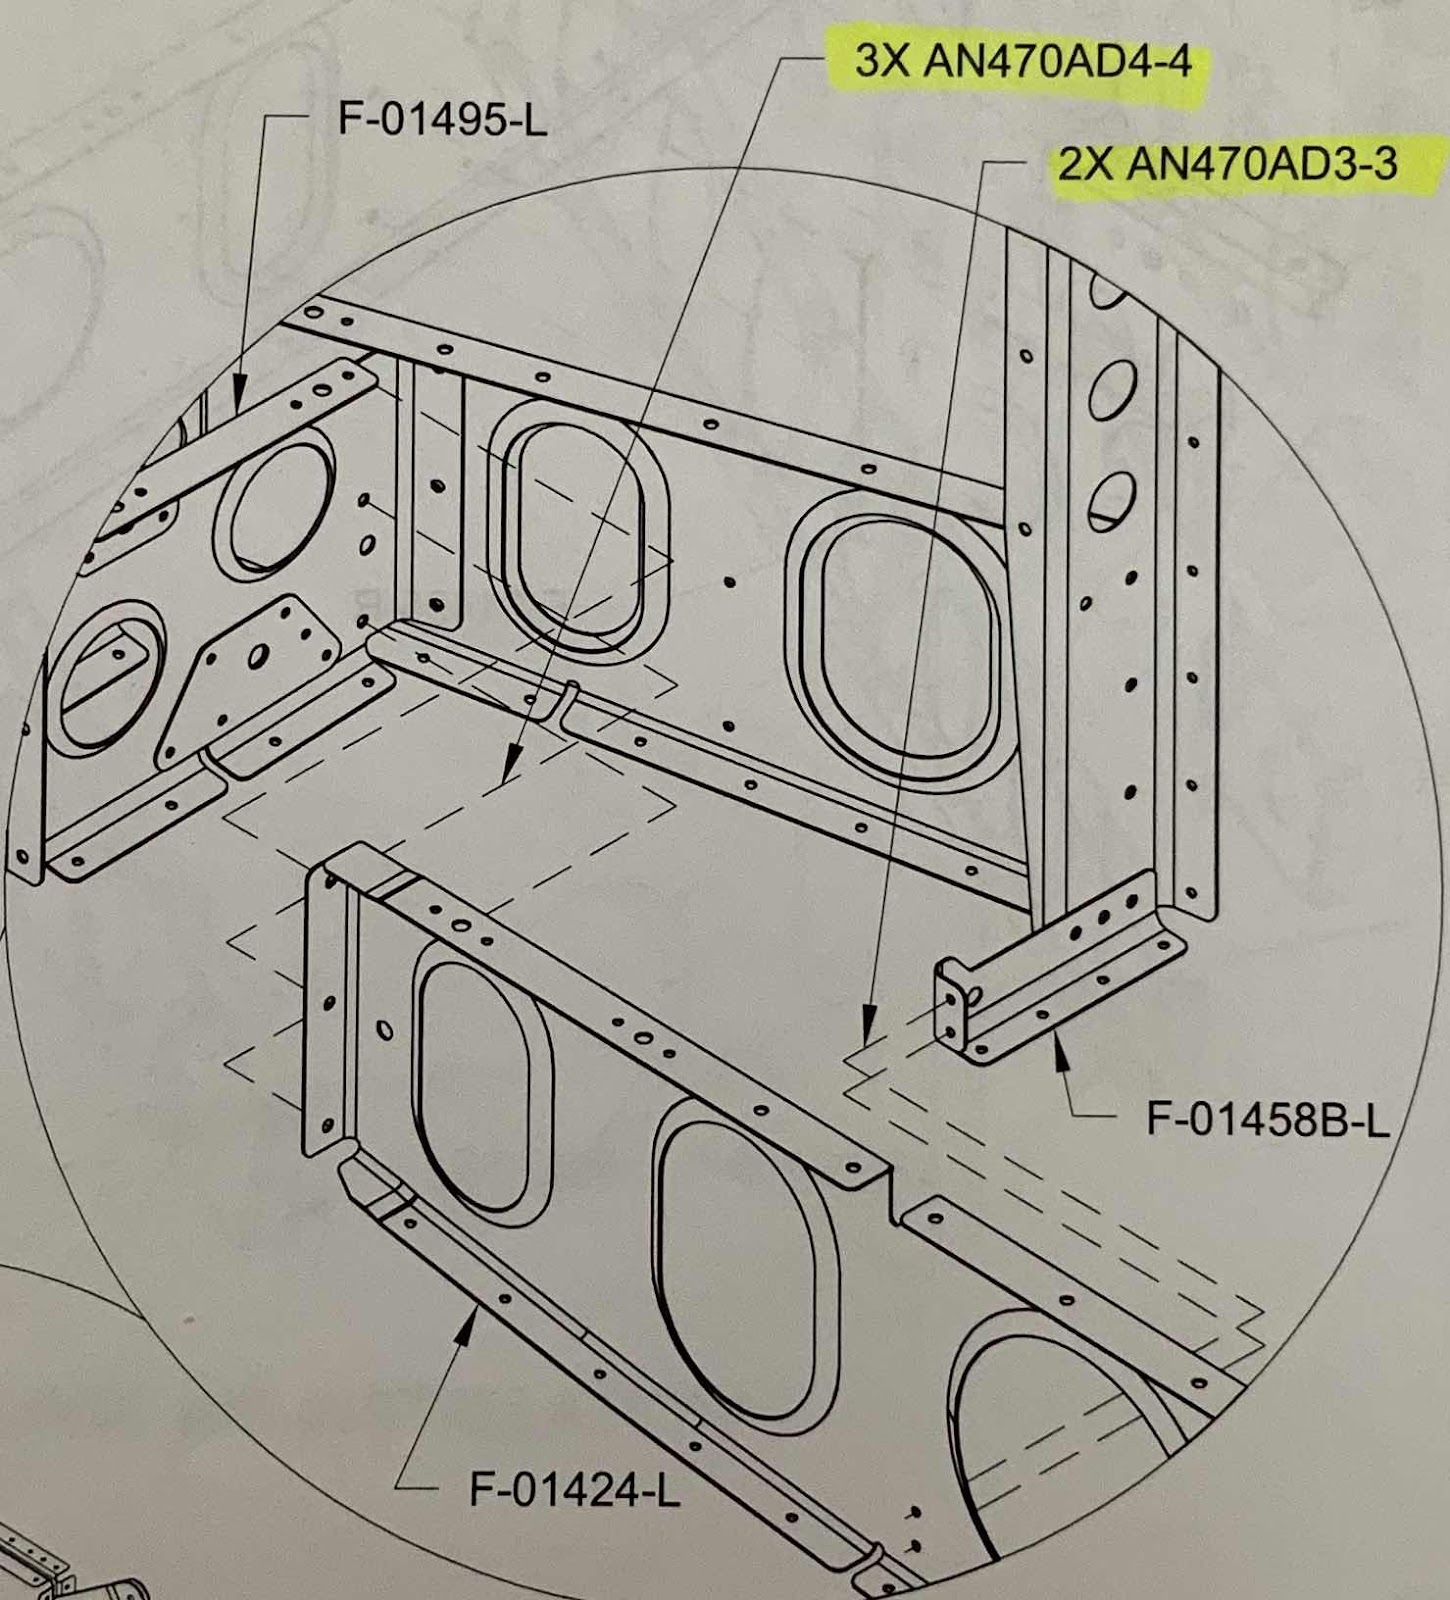
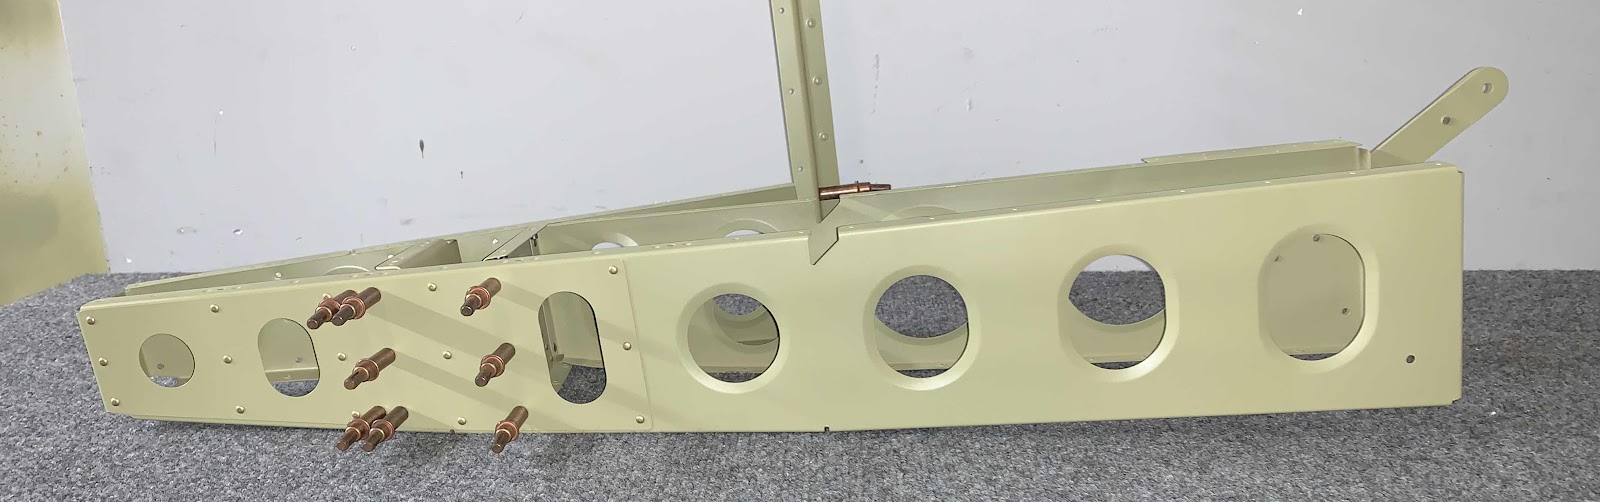
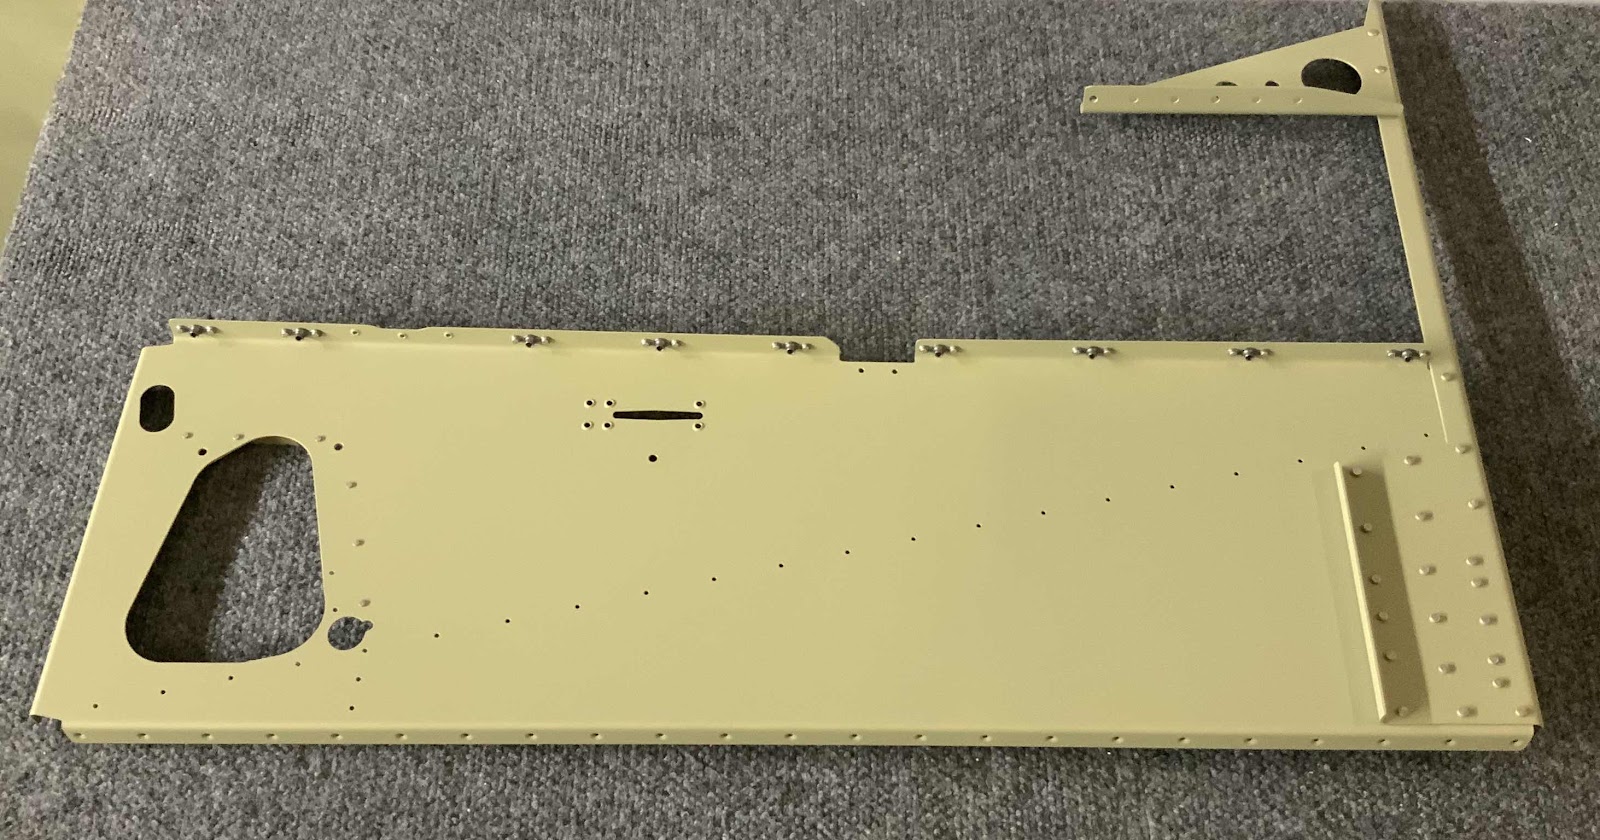
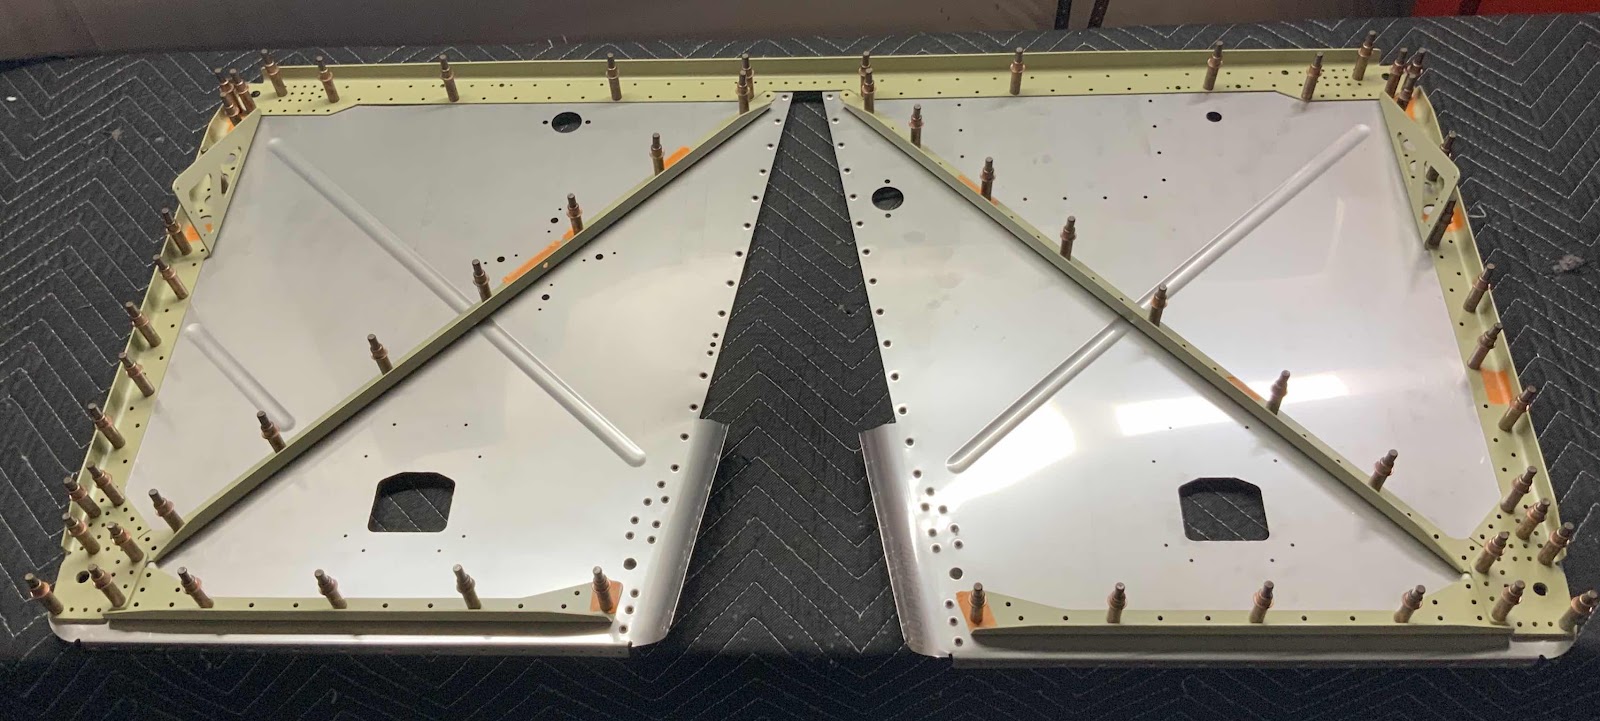
Once I was able to see how things went together, it was time to install the rivets....a lot of them.  All of rivets used today were  AN426AD4-4  and AN426AD4-7 (only where the Gussett covers the Firewall Angles.  Here is the front of the left Firewall Side showing the manufactured heads of the rivets installed on the Firewall Side.

Here is a closer look at the corner that has the Gussett (on the other side of the Firewall Side).

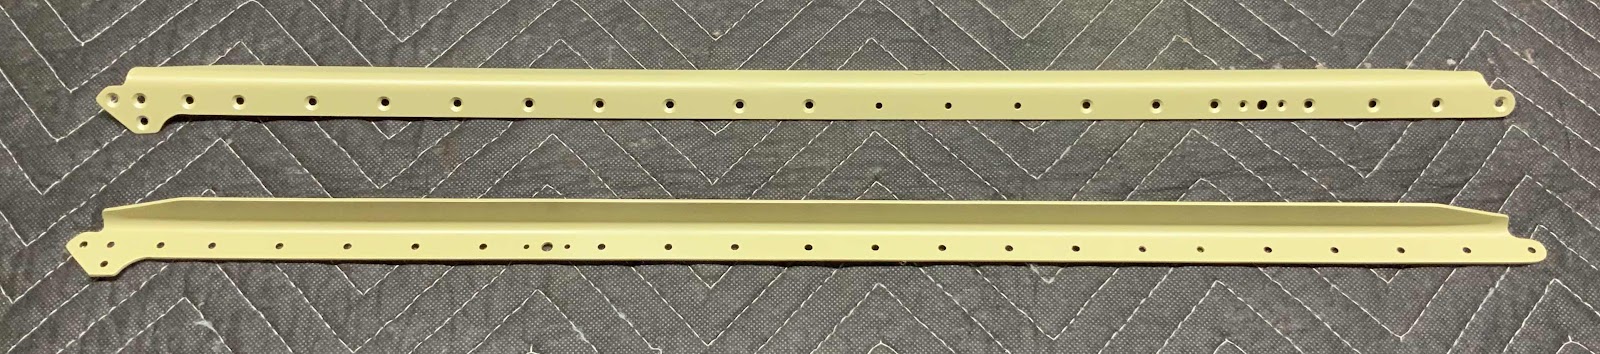
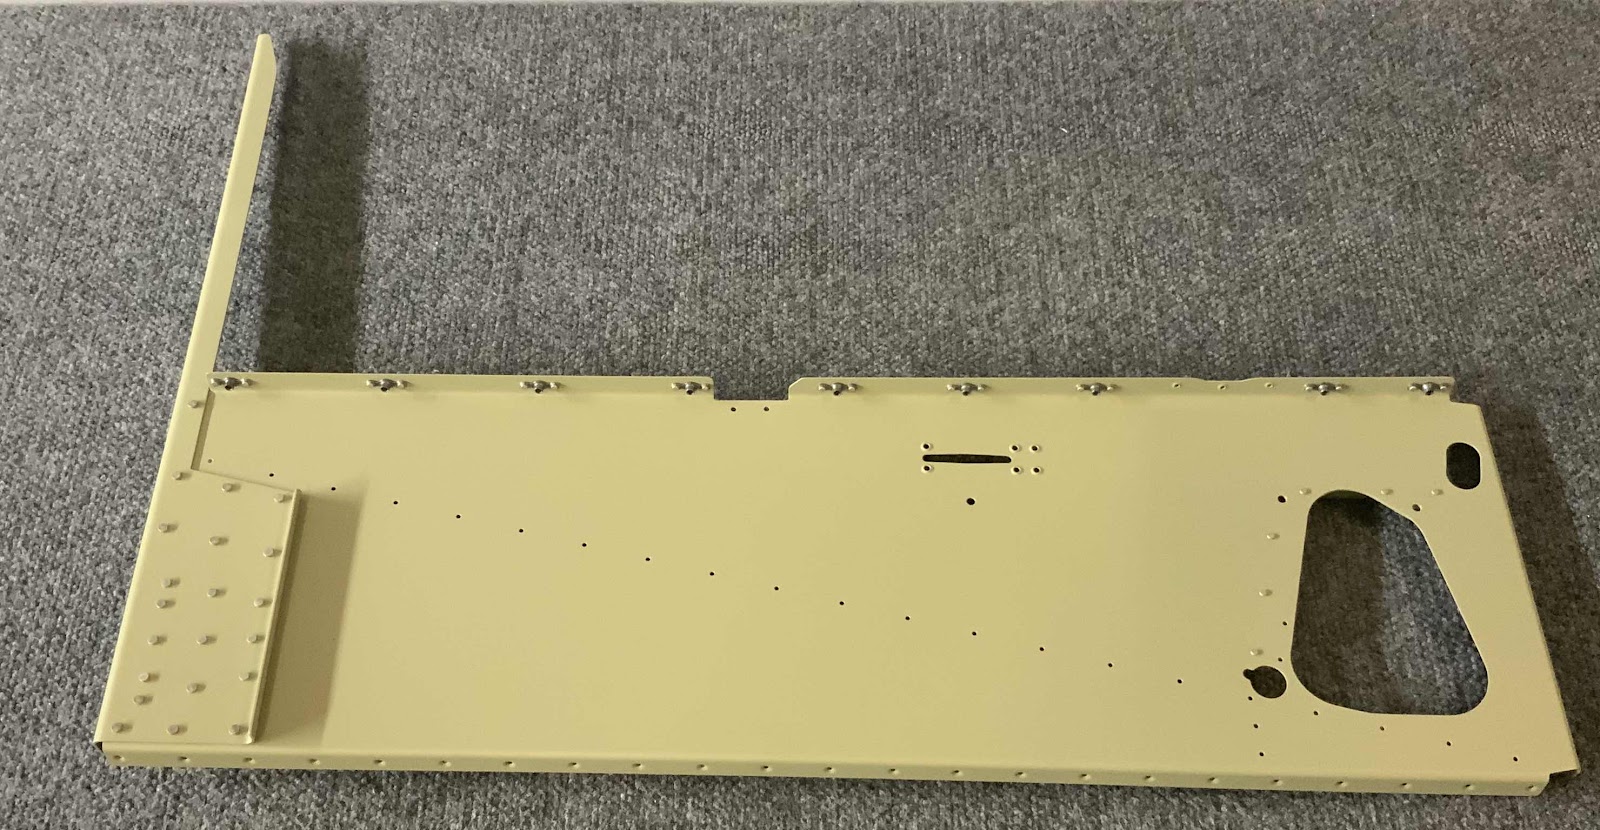
This is the opposite side of the picture above showing the Firewall Angles and the shop head side of the rivets.

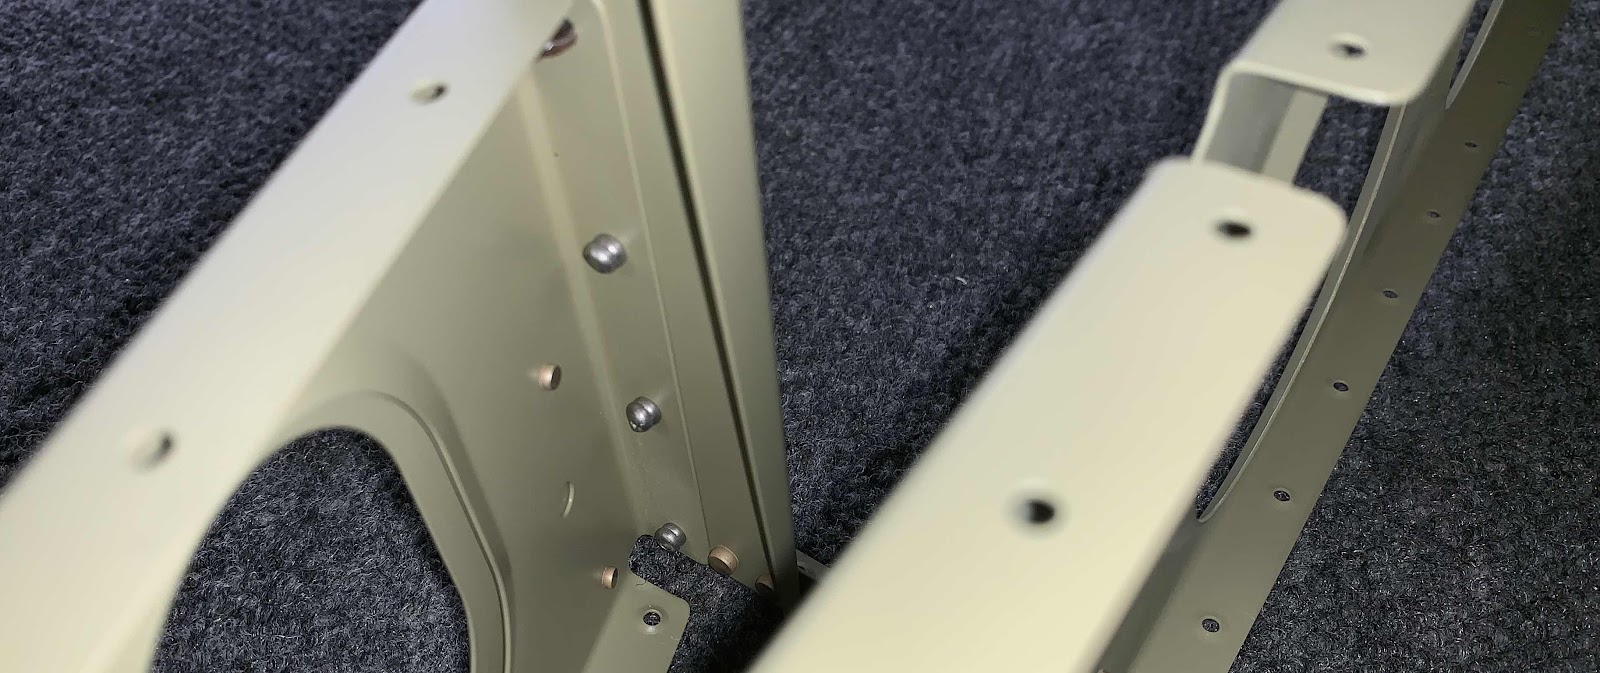
And a close up of the Gussett to Firewall Angles.

Saturday, June 29, 2019

Fuselage, Firewall (Part 6)

I continued working on the Firewall during this session.  Shown below is the F-01401D Firewall Angle (top) and the F-01401A Firewall Top (bottom).  All the #30 holes (except six) and the #40 holes in the Firewall Angle were countersunk to accept a dimpled skin.  If you zoom into the picture, you can see all the holes that were countersunk.  The Firewall Top had all the #30 (except six) and #40 holes in the web dimpled.  I was able to dimple part of the holes with my pneumatic squeezer and part with the DRDT-2.

Here is the F-14132 Tunnel Angle (top) and the F-01401C Firewall Center.  I cleaned the edges and deburred the holes in the Firewall Angle.....then, set it aside for a few pages later in the plans.  The Firewall Center had the #30 and #40 holes dimpled.  (I just realized I missed the two #30 holes on the left side - I’ll get ‘em).

All of the following parts were treated with Alumiprep and Alodine during my last work session.  Today, I primed them with Akzo.  These are the F-01401H-L & -R Firewall Angles.....

.....the F-01401F-L & -R Firewall Angles.....

.....the F-01401G-L & -R Firewall Angles.....

.....and the F-01401K Gussets.

During today’s session, I cleaned the edges, deburred the holes, countersunk the appropriate holes, and treated with Alumiprep and Alodine the following parts/pieces.  Here is the FF-01402 Relay Doubler (top) and the F-10401L Firewall Gussets (bottom).....

.....F-01401D Firewall Angle.....

.....and the F-10401J Firewall Angle.

Tomorrow, I will start from here and start riveting the Firewall Assembly together.

Friday, June 28, 2019

Fuselage, Firewall (Part 5)

Today’s session was all about sanding and countersinking.  Shown below is the F-01401F, G, and H Firewall Angles.  They all had their edges cleaned, holes deburred, appropriate holes countersunk, and treated with Alumiprep and Alodine.  During the next session, they will all get primed with Akzo.


Fuselage, MID Lower Structure (Part 29)

After clecoing the F-01404 Bulkhead to the F-01484 Center Bottom Skin, it’s now time to start riveting them together.  To start, the F-01416B Seat Rib Angles get riveted to the Seat Ribs with six LP4-3 blind rivets.  The picture below shows the location of the rivets circled in black.  This is the “outside” of the right Seat Rib.....


.....the “outside” of the left Seat Rib.....


.....the “inside” of the right Seat Rib.....


.....and the “inside” of the left Seat Rib.

Monday, June 24, 2019

Fuselage, MID Lower Structure (Part 28)

Yesterday, we completed the riveting on 4 of the 10 Ribs to the Bottom Skin.   Today, we were able to complete the remaining 6 Ribs.....132 rivets (if I counted correctly).  So, as shown below:

The F-01484 Center Bottom Skin is riveted to the Crotch Strap Assemblies, Seat Ribs, Inboard Seat Ribs, lower flange of the F-01405 Bulkhead Assembly, and the F-01448 Aft Gear Brace Assembly.

Sunday, June 23, 2019

Fuselage, MID Lower Structure (Part 27)

I was able to get some help installing the F-01404 Bulkhead to the F-01484 Center Bottom Skin.  The first five rivets get installed are shown at the bottom of the plans excerpt below with the heavy black circle around them.  Then, the Center Bottom Skin gets riveted to the Crotch Strap Assemblies, Seat Ribs, Inboard Seat Ribs, lower flange of the F-01405 Bulkhead Assembly, and Aft Gear Brace Assembly.

Of the 10 total Ribs, we were able to get the four Ribs highlighted below completed.....77 rivets total.  I am working from the center of the assembly outward toward the tips.   

To accomplish the riveting, I set up my two work tables next to each other with enough room to get my creeper in between the tables.  I then set the assembly on top of the tables as shown below.  Since all the other holes have clecoes installed, it sat pretty level and stable on the table.  I used rivet tape (scotch tape) to hold the rivets in place since they being installed “upward”.  My riveting buddy used the bucking bar on the top of the assembly between the Ribs.

*****4 Ribs down, 6 Ribs to go*****

Thursday, June 20, 2019

Fuselage, MID Lower Structure (Part 26)

After priming the Step Attach Weldment’s during Part 25, I was now able to start some of the assembly.  Here are the Step Attach Weldments riveted to the F-01423B-L & -R Outboard Baggage Rib.  This is the first time that cherry rivets are used in the build.  There are five rivet locations (circled below) for each Step Attach/Rib attachement  The plans have you install CR3213-4-2 in the front two holes and either CR3213-4-2 cherry’s or AN470AD4-5’s in the other three locations.  It looked a little difficult (not impossible) to install the solid rivets, so I decided to use the optional cherry rivets.  The 10 rivets circled in the picture below are the “manufactured heads” (I guess) of the rivets.....

.....and here is the “shop head” side.

The next parts to get attached were the two Step Attach Ribs using AN470AD4-4 universal rivets.  This picture shows the location of the Ribs on the assembly and the manufactured heads of the rivet locations.

Here is the shop head side of the rivets.  This area was a little tight to get your hand and bucking bar into, but not too difficult.


The F-01424-L & -R Baggage Ribs were the next parts to get riveted to the assembly.  Here is how the plans show the pieces going together.....


.....and here is where the Rib(s) and Bracket(s) were riveted to the assembly.

Here is the opposite (inside) side of the picture above showing the shop head sides of the rivets.  (The three silver shop heads are from the LP4-3 blind rivets.

This is the F-01425-L Baggage Rib clecoed into place on the Step Attach Rib (three clecos) and Step Attach Weldments (5 clecos).  These will get rivets during the next work session and the baggage area structure will continue.

Wednesday, June 19, 2019

Fuselage, Firewall (Part 4)

Today’s work on the Firewall was a relatively short session.  Shown below is the:

- F-01401K, Gussets (x2)
- F-01401H (L & R), Firewall Angles (small angles)
- F-01401F (L & R), Firewall Angles (large angles)

I separated the parts (as required), cleaned the edges, and deburred the holes.  Most of the holes now need to be countersunk, so I wills start there during the next session.

Fuselage, MID Lower Structure (Part 25)

Short session tonight on the MID Lower Structure.  I started today’s session by doing a little work on the F-00016-L & -R Step Attach Weldments.  First, I countersunk the eight holes (for the nutplate rivets) for an AN426AD3 rivet as shown below in the plans excerpt.  (The F-14145-L & -R Step Attach Angles were previously prepared).  Second, I final-drilled the four holes holes shown below to 1/4”.

Since I also like to prime powder coated parts.....Lastly, I scuffed the two pieces with grey scotchbrite and primed them with Akzo.  Here’s the two Step Attach Weldments after the primer dried.

That’s it today for the MID Lower Structure.  During the next session, several pieces with begin to get riveted together.

Monday, June 17, 2019

Fuselage, Firewall (Part 3)

Tonight, I riveted the F-01490 Nose Gear Brackets, F-01451 (-L & -R) Tunnel Sides, and F-0141E (-L & -R) Firewall Angles together using AN470AD4-5 and AN470AD4-6 rivets as directed by the plans.  Here is the Left Tunnel Side Assembly after the rivets were installed.....

.....a close up look of the shop head side of the rivets.....

.....and a close up look at the manufactured head side of the rivets.

This is the Right Tunnel Side Assembly after the rivets were installed.....

.....a close up look at the shop head side of the rivets.....

.....and a close up look at the manufactured head side of the rivets.

Once the riveting was completed, I continued and completed the dimpling of the #30 and #40 holes in the F-01401B (-L & -R) Firewall Sides.  The holes that are covered by the orange tape do not get riveted (right now anyway).

Sunday, June 16, 2019

Fuselage, Firewall (Part 2)

The first thing today was to separate the F-01499 Cover Angle Brackets.  Once separated, the edges were cleaned, holes deburred, holes dimpled, treated with Alumiprep and Alodine, and Akzo primed.

These are the F-01490 Nose Gear Brackets.  They came powder coated from Van’s and really didn’t need any additional corrosion protection (I don’t think).  At any rate, I scuffed them with grey Scotchbrite and sprayed them with Akzo primer.

Yesterday, I treated the F-01451-L & -R Tunnel Sides.  I let them dry overnight and Akzo primed them today.  After allowing them suffice time to dry, I installed the 18 K1000-08D nutplates (nine on each side) with AN426AD3-3.5 rivets.....you can see nine of them on the top Tunnel Side.  Then, the two Cover Angle Brackets were installed using 12 AN470AD3-3 rivets (six on each Bracket).....can see one of the Brackets on the bottom Tunnel Side.  The Cover Angle Brackets also had two K-1000-08D nutplates installed.

I clecoed the Nose Gear Brackets, Firewall Angles, and Tunnel Sides together.  The 11 common #30 holes were final-drilled and are now ready for rivets.  This is the right Tunnel Side (you can also see the Cover Angle Bracket and installed nutplates).

Here is a close up.....

This is the left Tunnel Side (again, you can see the Cover Angles Bracket and installed nutplates).

Here is a close up of the left side.