
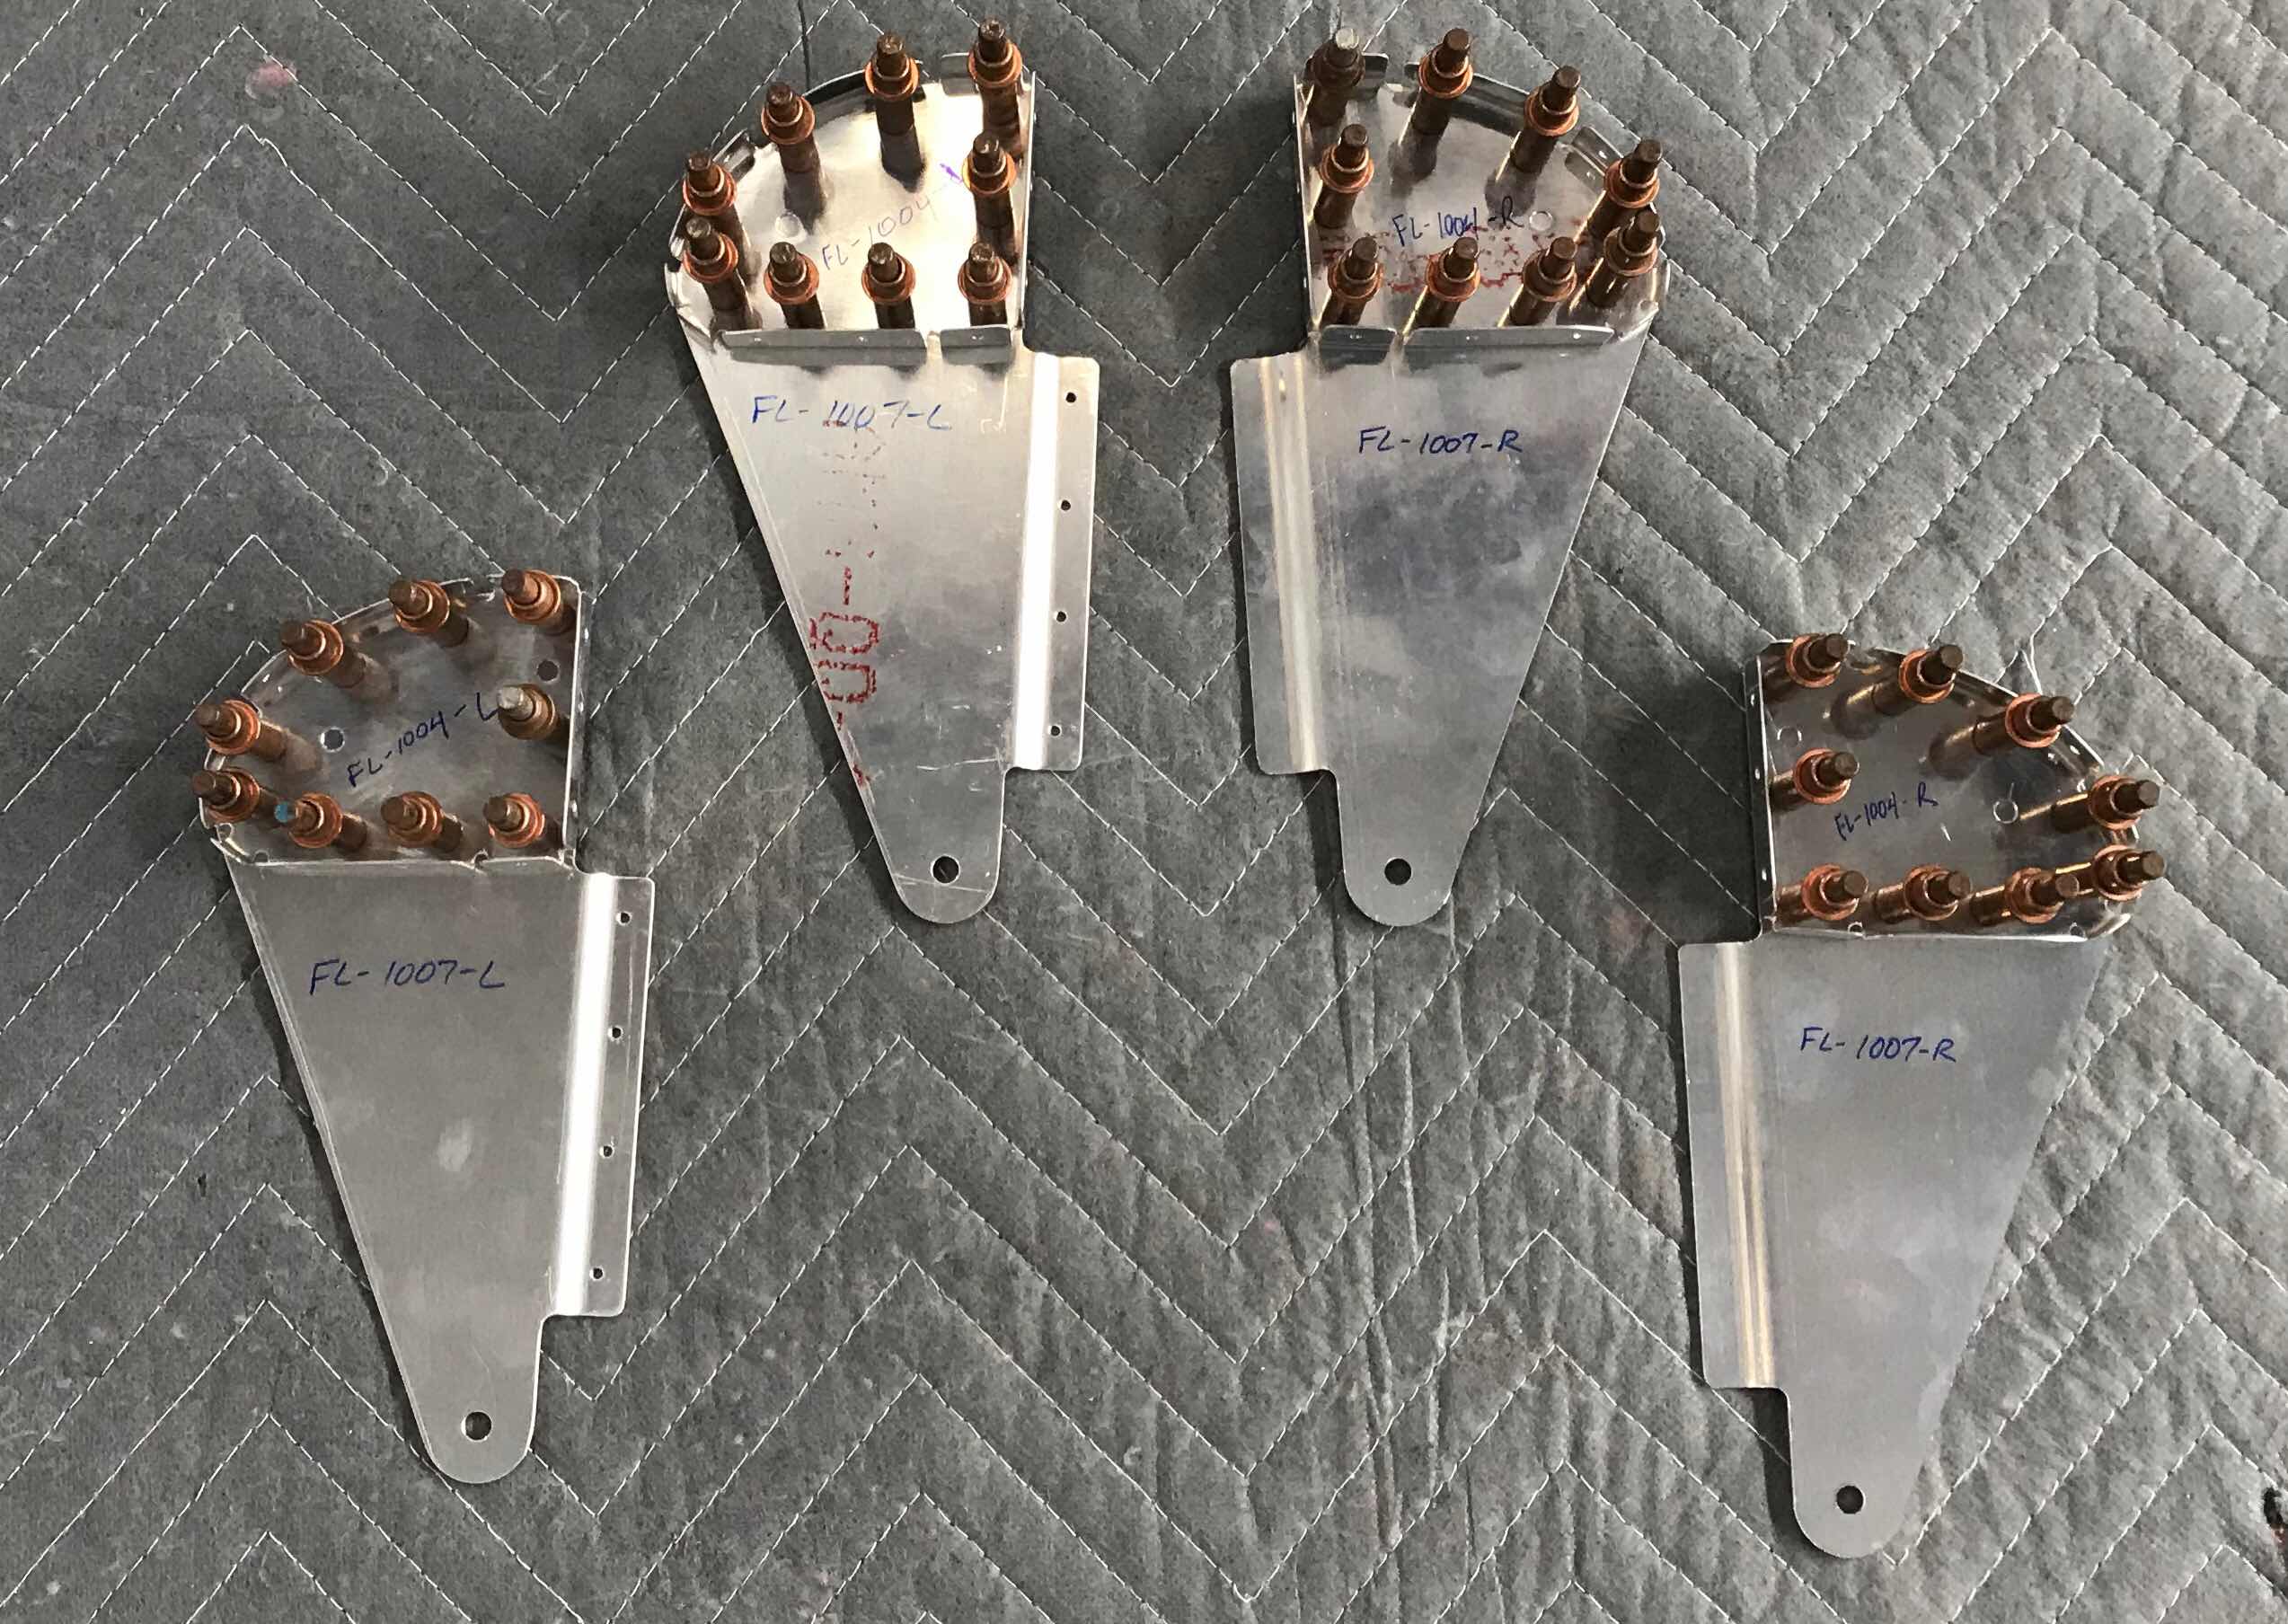
This session started with clecoing the Left (x2) and Right (x2) Hinge Pair Rib Subassemblies together as shown in the plans excerpt below. The FL-1004-L Nose Ribs and FL-1007-L Hinge Brackets make up the two Left Subassemblies and the FL-1004-R Nose Ribs and FL-1007-R Hinge Brackets make up the Right Subassemblies.

Once clecoed together, Step 6 states to final-drill all the #30 holes common to both parts and the Spar Attach Flanges (completed in Part #1). Here are the four completed Subassemblies.
Continuing on, the small tabs (shown in the hatched areas below) in the FL-1005-L & -R Main Ribs need to be removed. I clamped the Ribs to my worktable and used my Dremel tool with a cutoff wheel to complete this process. I then used a small fine hand file and 220 grit sandpaper to clean up the area. Next, the #40 holes (17 in each Main Rib) and #30 holes (three in each Main Rib) were final-drill.

After that work was completed, I cleaned all the edges of the 16 Main Flap Ribs. They are shown below and ready to be initially installed in their appropriate Flap (see below).

Alright, so all of the internal parts of the Left and Right Ribs have been completed and ready for the next step. The next step is to temporarily cleco other the Flaps as shown in the plans excerpt below.

Here is the Left Flap clecoed together as described above.
