
Today’s session was very long and very productive. To start off, the CS-00018-L & -R Left and Right Brake Pedal Assemblies were attached to the WD-655-L & -R Rudder Pedals. The plans call for a mixture of hardware to make the attachments. Here is what the plans recommend:
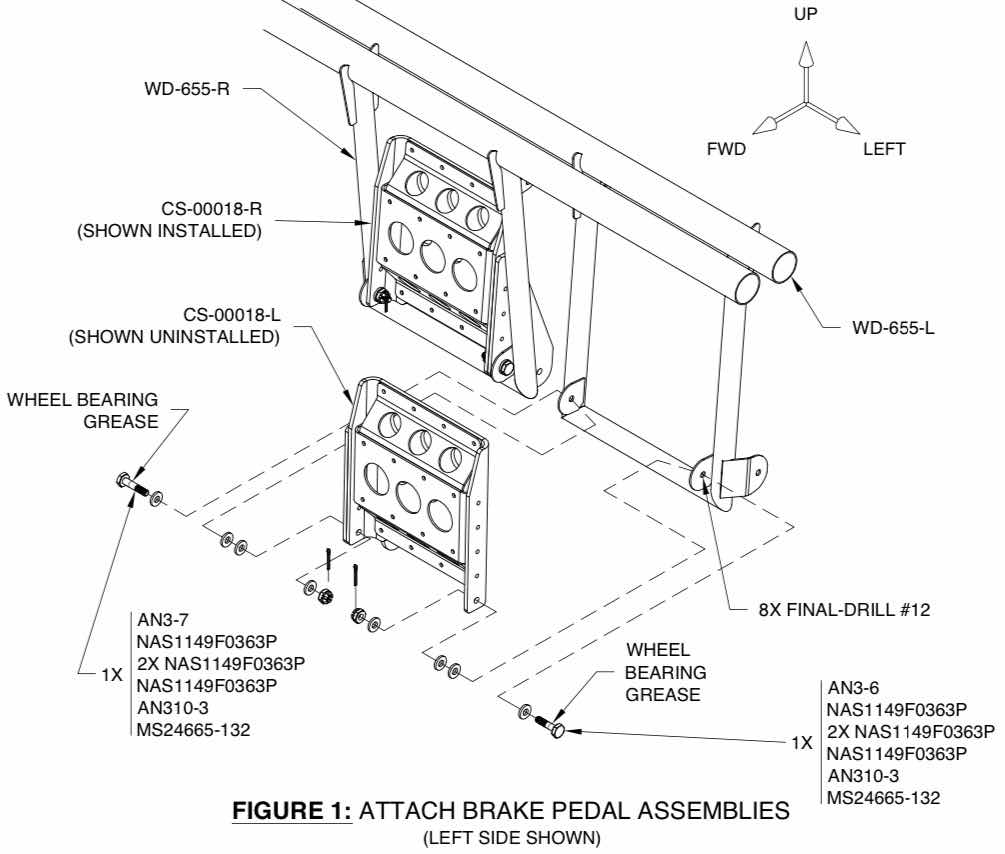
The plans also make three statements regarding this portion of the installation:
1. “A balance must be struck between free play and friction such that both are minimized. The brake pedal assemblies much be secure but must also rotate by gravity alone before the cotter pins are installed”.
2. “Due to manufacturing tolerances, it may be necessary to use a different mix of washers than what is shown in Figure 1. If required, use a heavy soft-faced hammer to make slight adjustments to the brake pedal mounting tabs”.
3. “Tighten the nuts and bolts until they are finger-tight. DO NOT use standard torque values”.
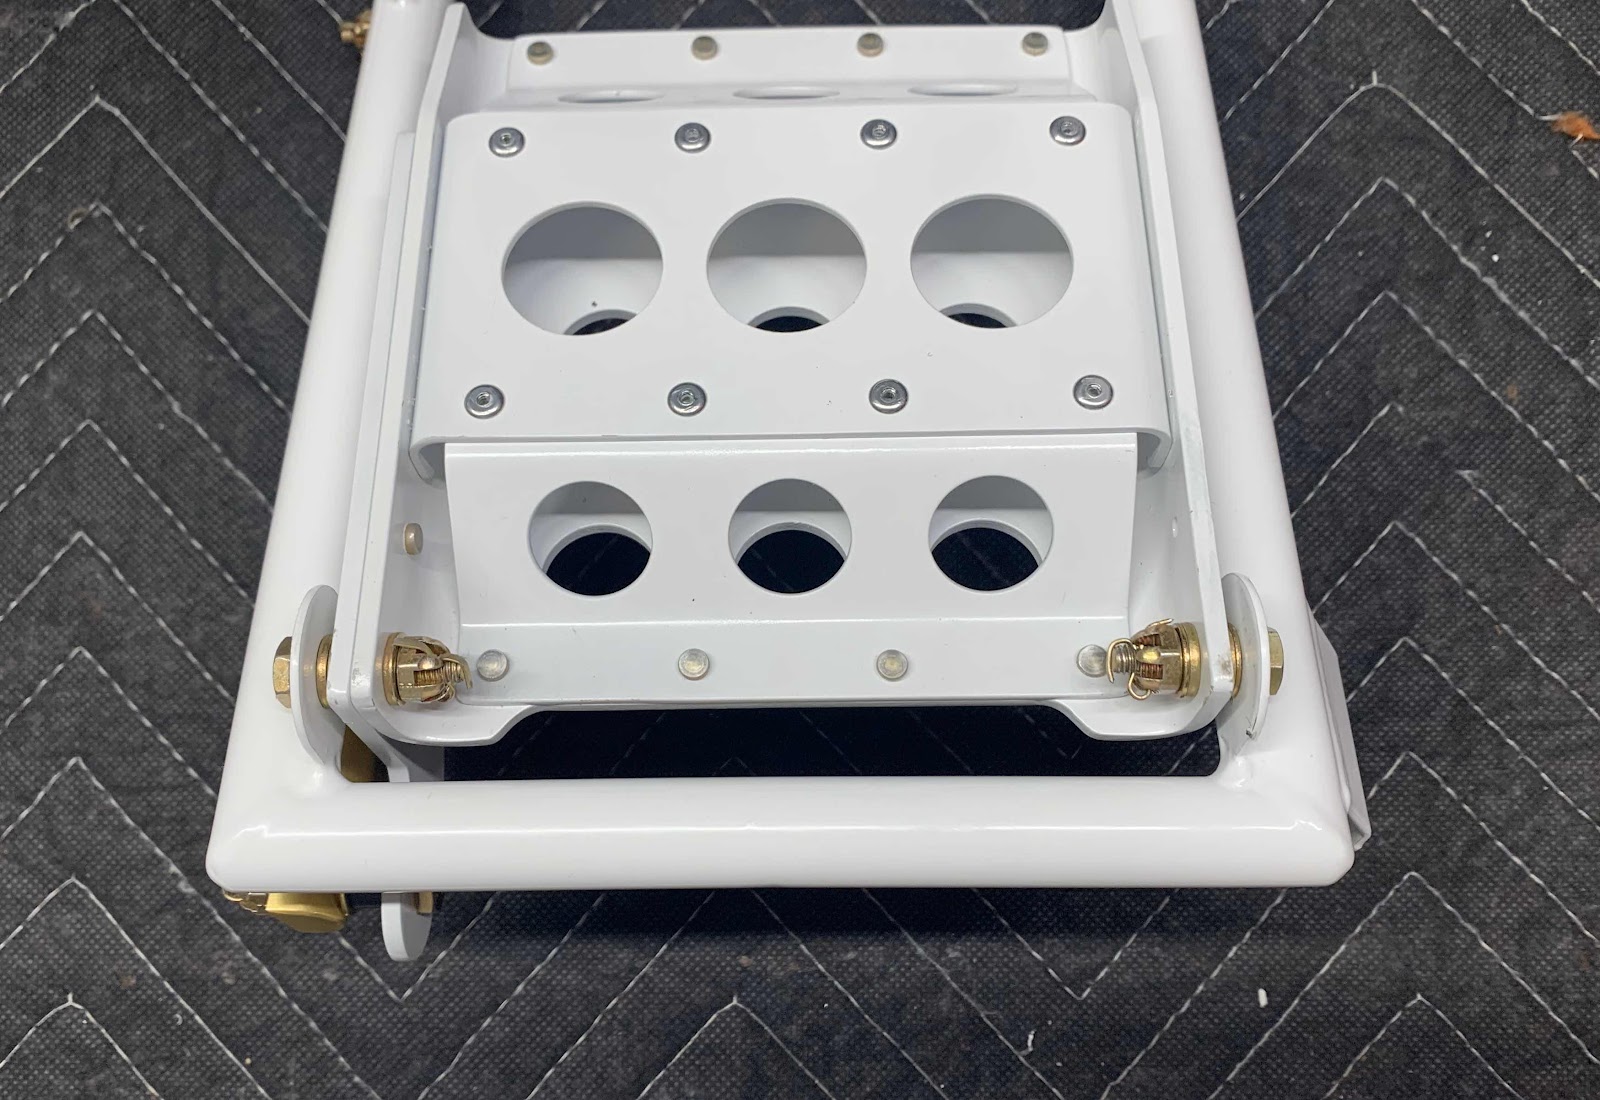
Sooooo, with all that, I started off using the recommend hardware for the installation. However, the hardware used in the final assembly was just a little different than shown above. There wasn’t a huge variation....such as using a skinnier NAS1149F0332P washer versus a fatter NAS1149F0363P washer. It worked out to my satisfaction and, to the best of my knowledge, complies with #1 and #2 above. Here is what the first assembly looks like with the installed hardware.
Once I completed all four Brake Pedal to Rudder Pedals assemblies, I moved on to the next step.....attaching the four Brake Master Cylinders to the same assemblies. Here is how they get assembled.....
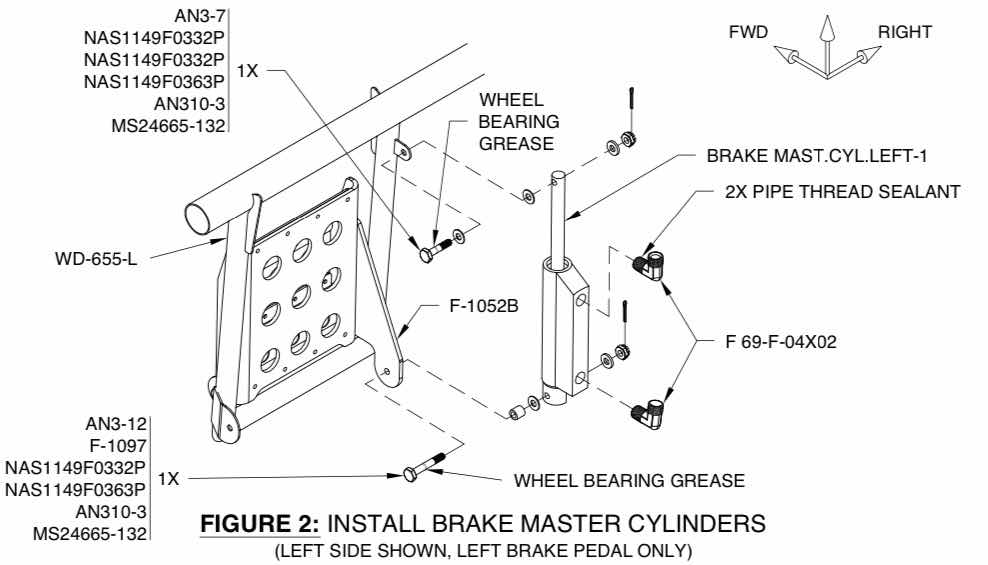
In the picture below, you will notice the two blue elbows attached to the Master Cylinder. These DID NOT come with kit from Van’s. In Section 31, Fuel System, I detailed the purchase and installation of the cabin fuel lines from Aircraft Specialty. I also said I would purchase the Cabin Brake lines from the same company....I did (more on that later). The blue elbows were included in the kit from Aircraft Specialty. Here is the first Brake Cylinder install.....
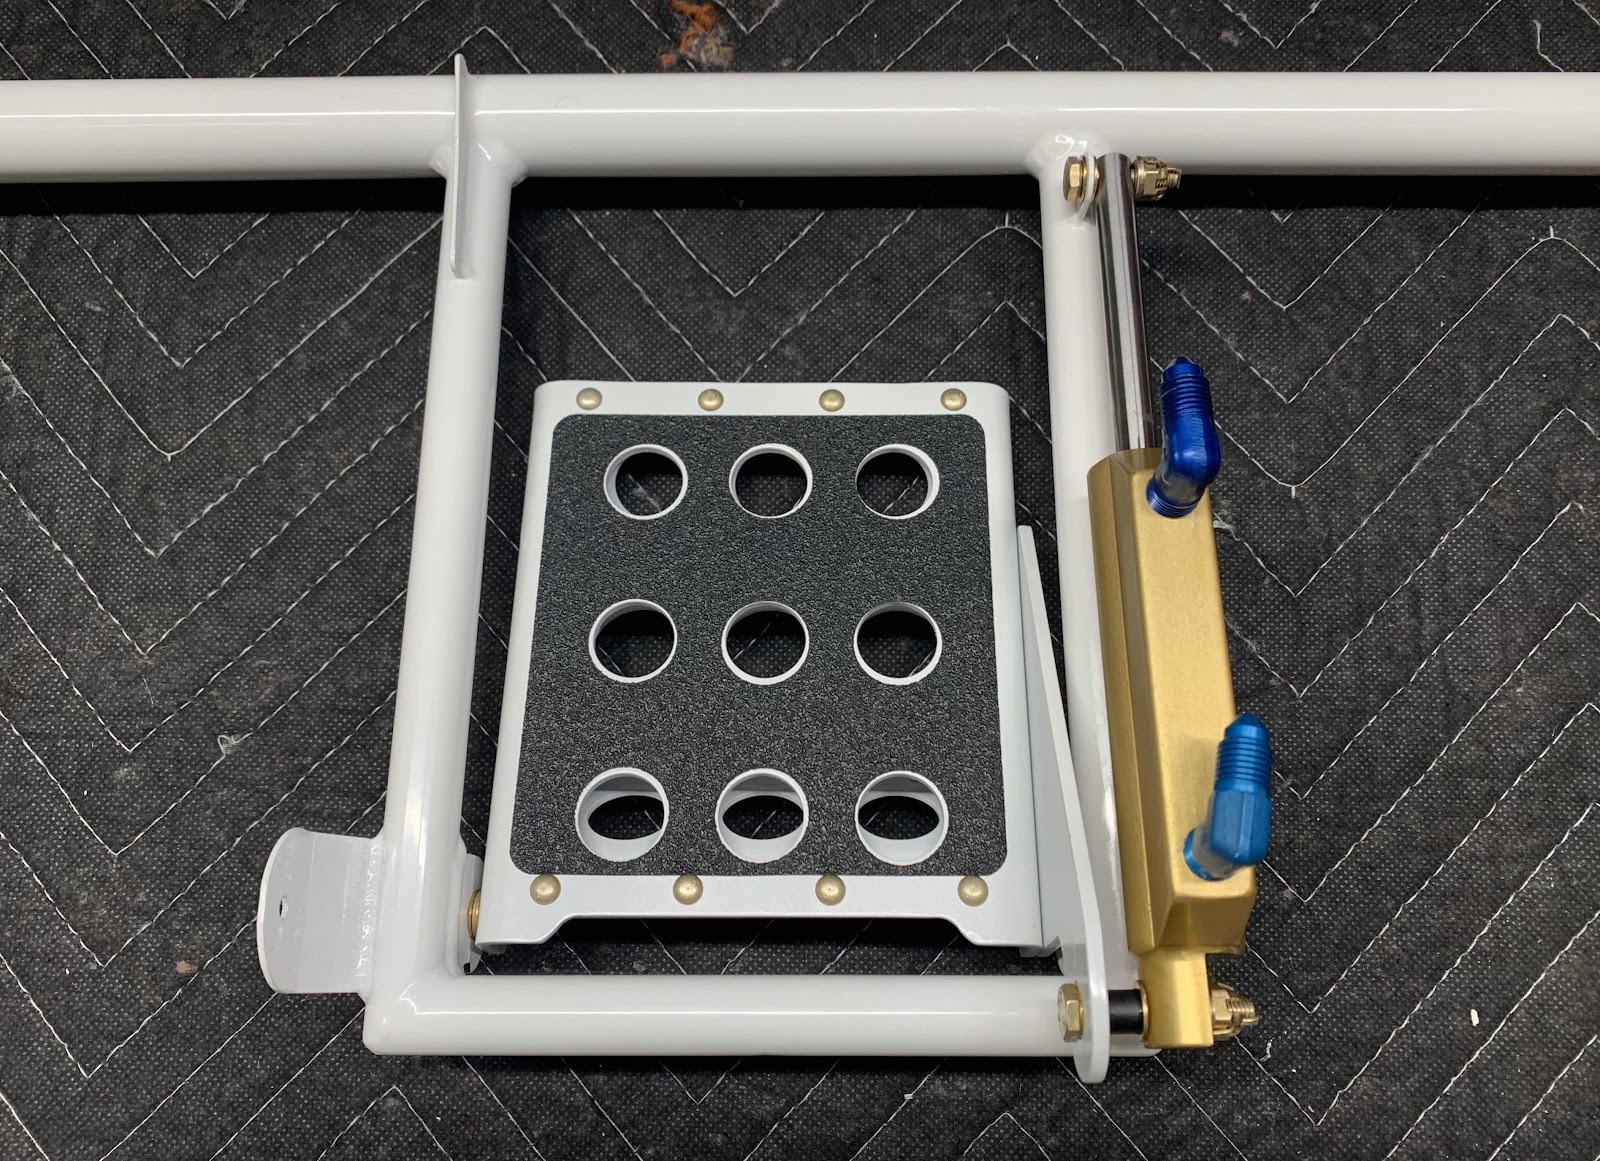
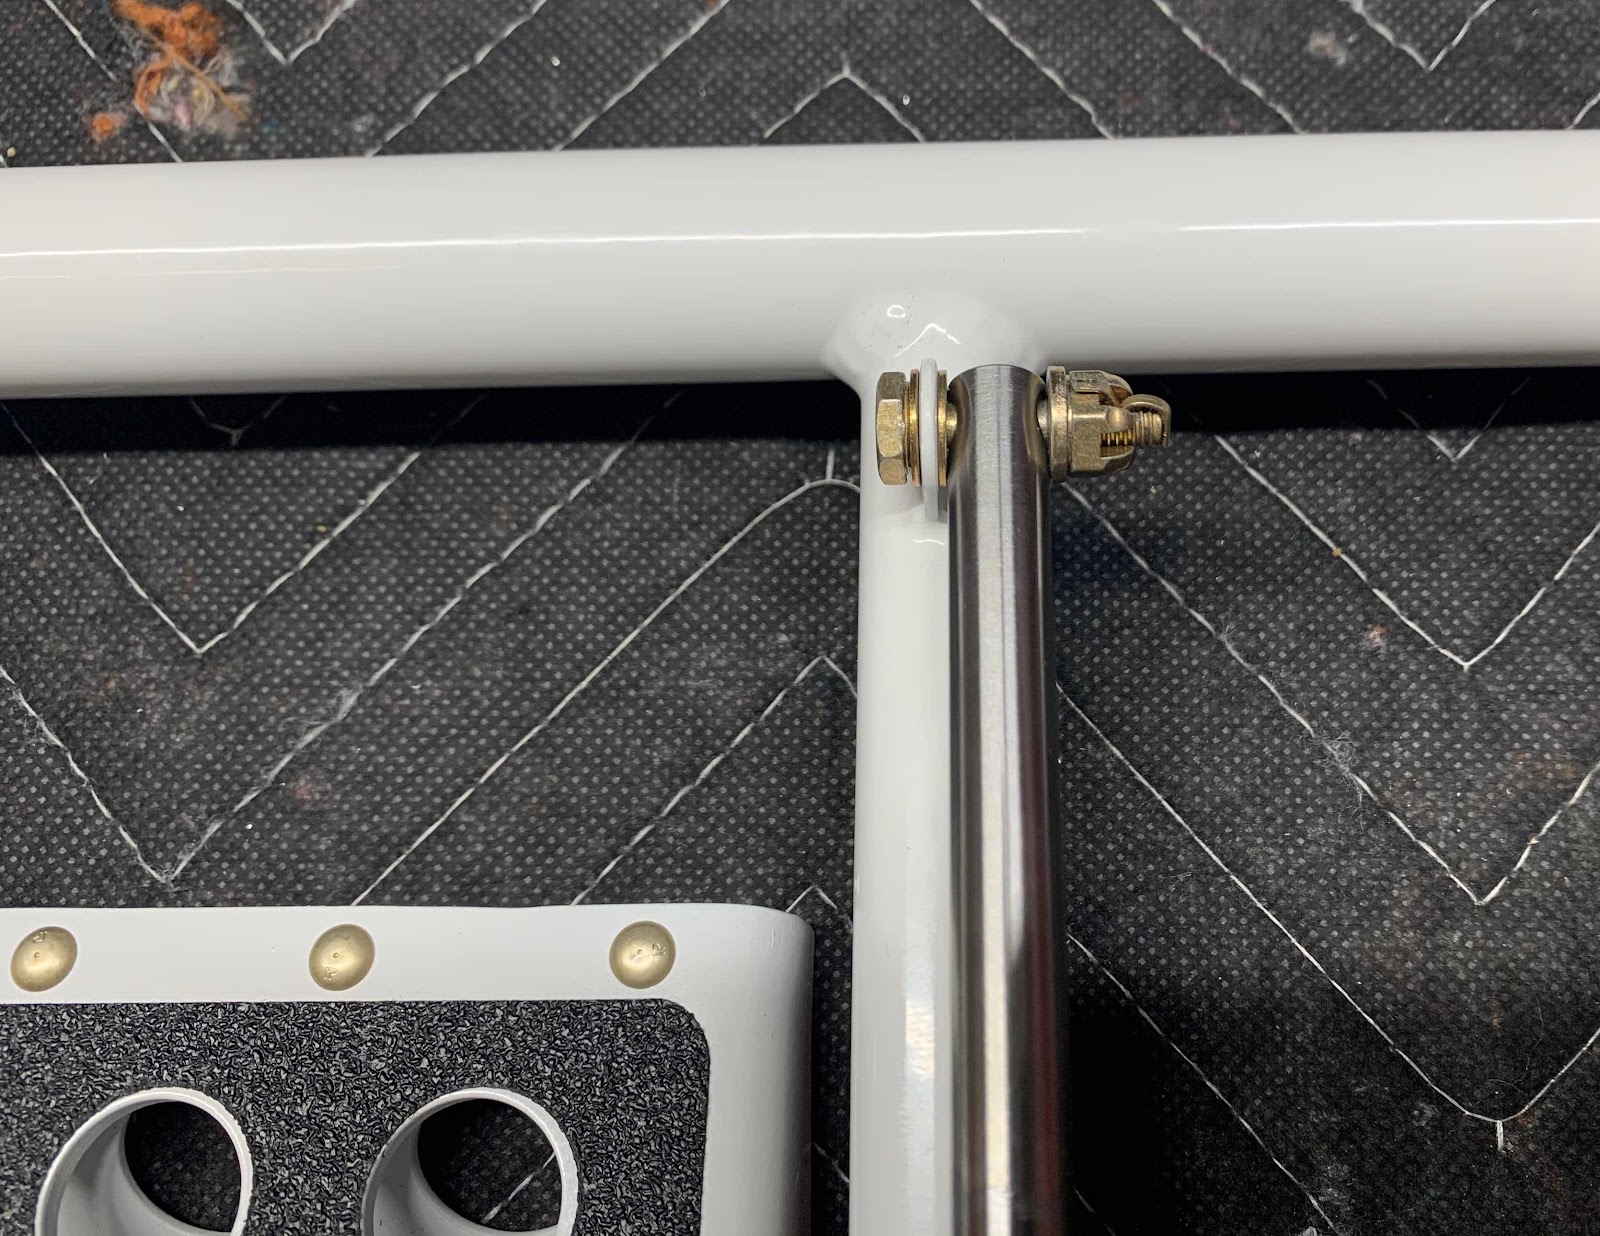
.....a close up of the bottom.....

......and a close up of the top.
These are the Rudder and Brake Pedals for the pilot side (left).....
.....and the co-pilot side (right).

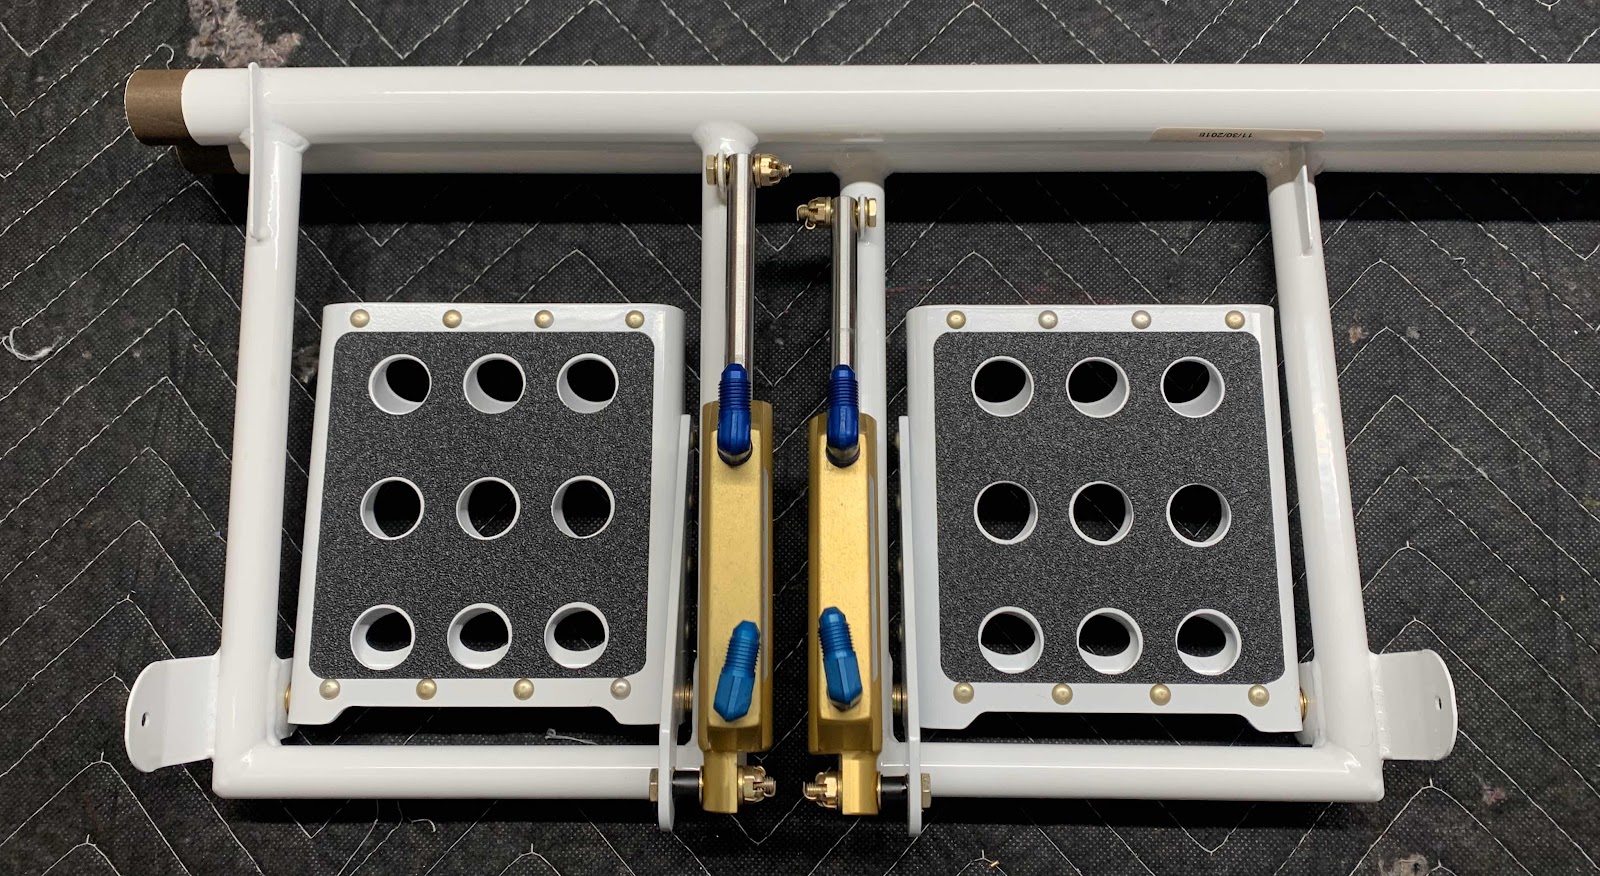
This is an overall view of all four Brake Pedals attached to the four Rudder Pedals.....

.....and what they will look like in the plane.

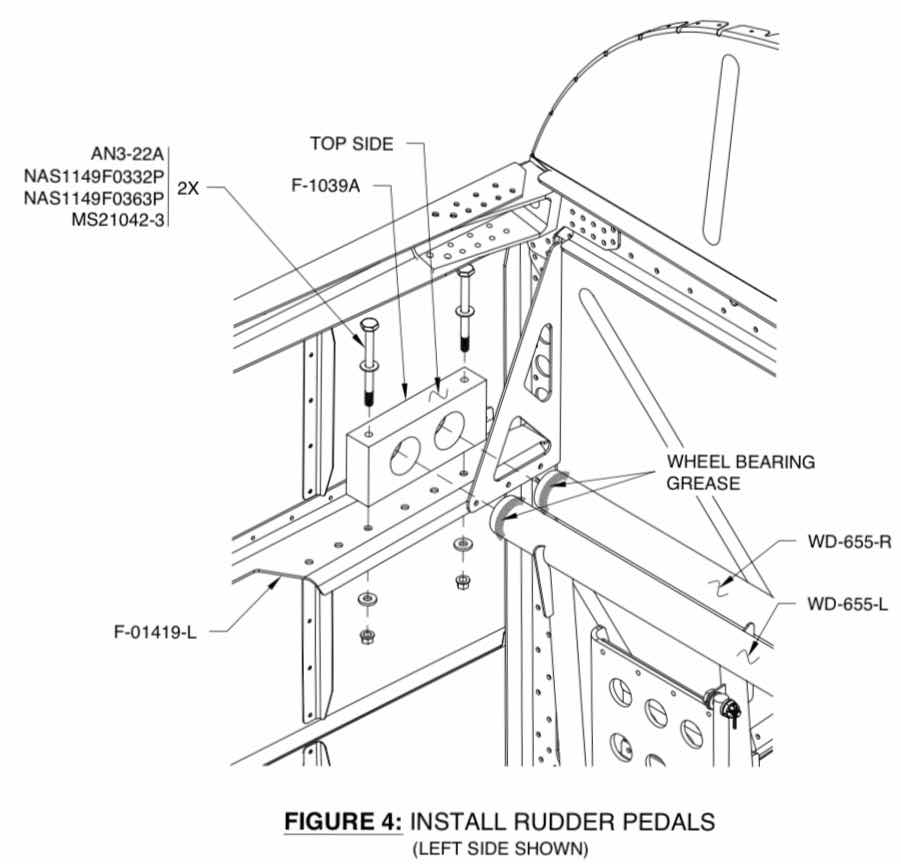
The next step is to install the Assemblies to the airplane. Here is the install procedure from the plans. The ends of the Rudder Pedals are coated with AeroShell #5 grease prior to being inserted into the F-1039A Rudder Pedal Bearing Blocks (prepared in Part 6). The Bearing Blocks were then attached to the airplane with the indicated hardware.
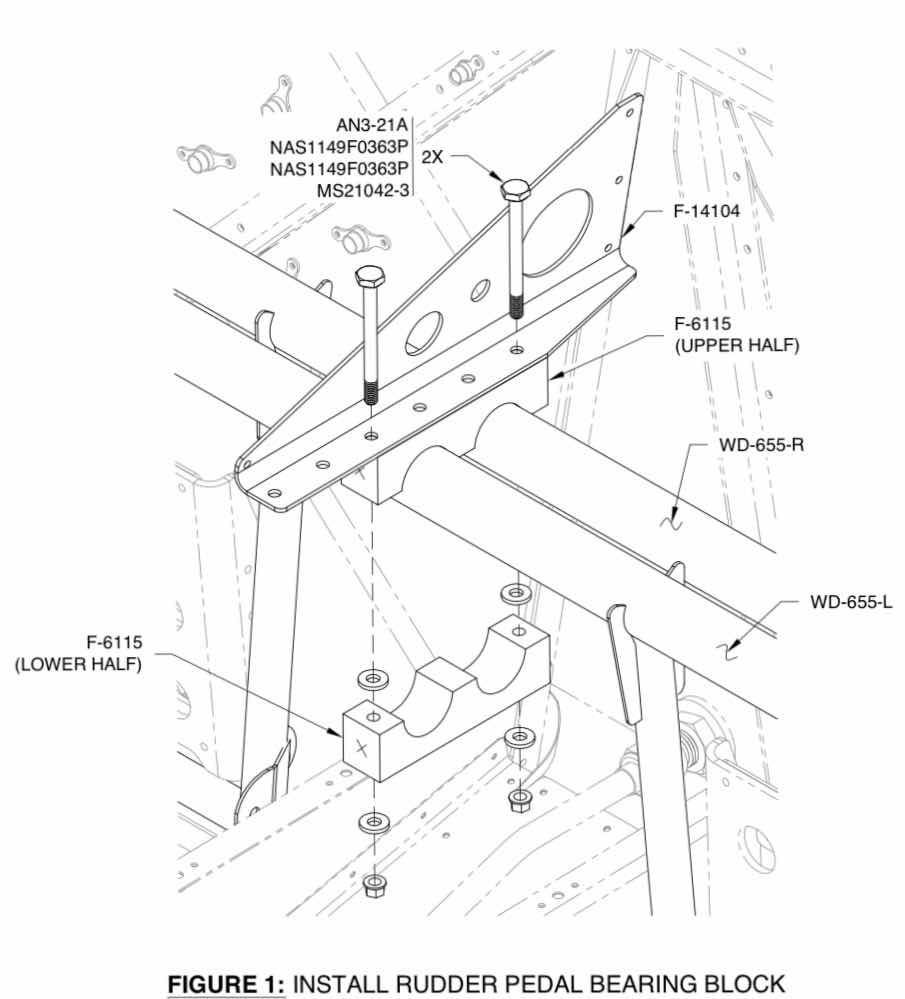
Once the left and right sides were installed to the airplane, the Upper and Lower Halves of the F-6115 Bearing Blocks were installed as shown below.
Here is the finished product on the airplane.....

.....a close up of the co-pilot side (right).....

.....and pilot side (left).
