
Well, I had to go run and hide for a little bit because Hurricane Irma came sniffing around! Luckily, no plane parts were injured. So, back to the grind.....
This is the F-01479 Aft Bottom Skin and it has some excess aluminum on the sides that has to be removed.

You can't really see from the picture above, but this is the directions from the plans. The excess material that needed to be removed is the hatched areas on both sides Aft Bottom Skin. First, I used a ruler and sharpie to make a cut line alone the correct side of the stamp marks. Secondly, I used a die grinder and cutting wheel to cut along the line. Then, I used the 6" Scotchbrite Wheel on the bench grinder to clean up the cut line. Finally, 220 grit sand paper was used to smooth it all out.

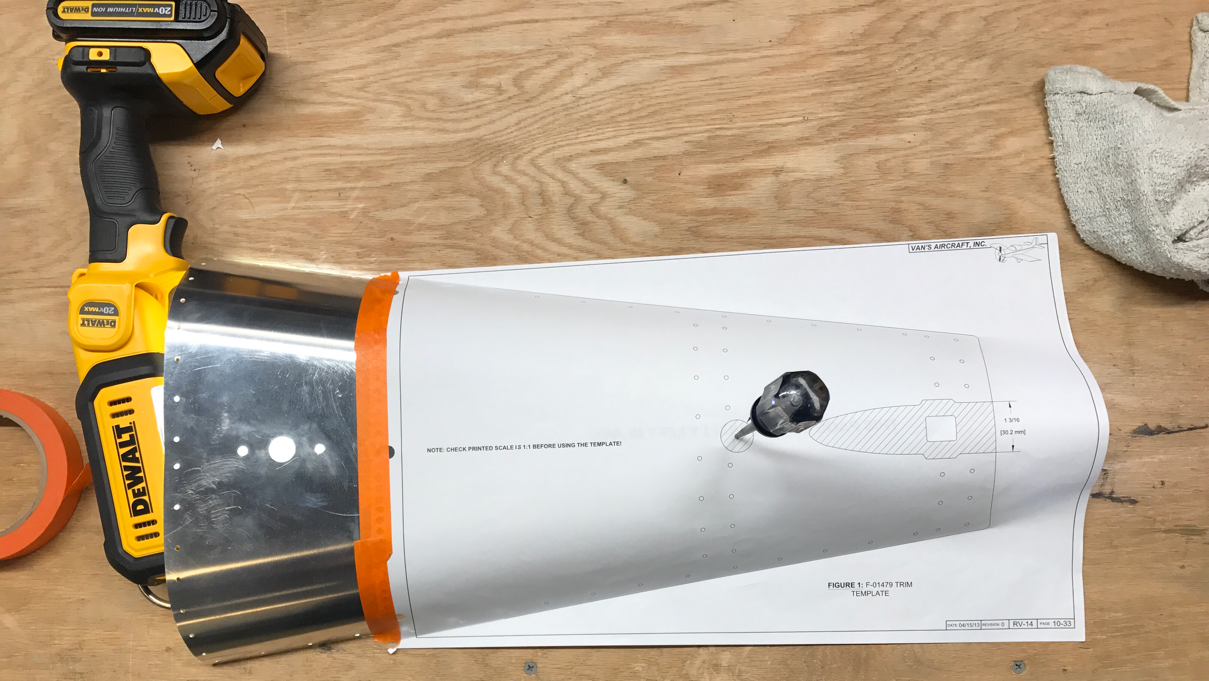
Four holes needed to be drilled in the Aft Bottom Skin as depicted in the plans below. I used a #12 drill bit on the two #12 holes and a unibit for the 9/16 and 3/4 holes. Next, is the removal of the hatched area as depicted below. This is the actual template from the plans that will be used in the next step.

Here is the template attached to the Aft Bottom Skin. It is a 1/1 scale and lines up perfectly with the pre-punched holes in the Skin. Why is the work light under there? The light shines through the pre-punched holes in the Skin and aids in the alignment of the holes in the template. Worked very well. I tucked the excess template paper under and taped it on the opposite side of the Skin. After verifying the alignment (several times), I used a new razor blade to cut out the hatched area of the template for the Tail Spring.
Once that section of the template was removed, I used to sharpie to trace the line on the aluminum. That's all for tonight.
