
I started today by installing the SPRING 00001 Gas Spring for the Canopy.

From the plans excerpt, the install looks like this. I will attach a picture of my completed install in the next few days (forgot to take a picture of the Springs).

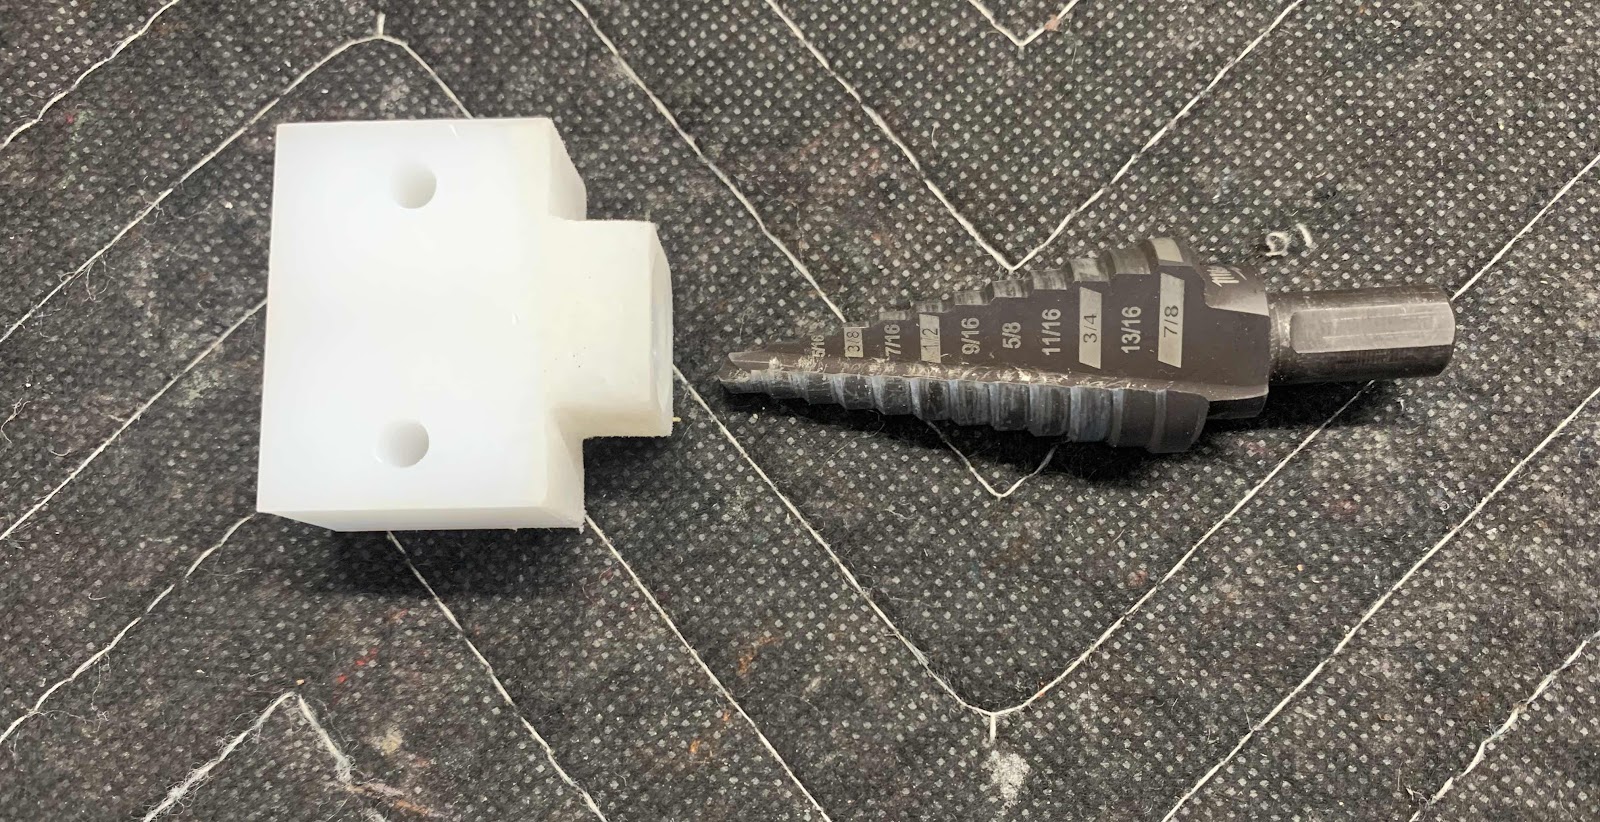
Now, I will start preparing parts that make up the Canopy Release or “Jettision”. The white plastic block below is the C-01434 Canopy Release Pivot Block. It needed two things done to it as described in the plans excerpt:
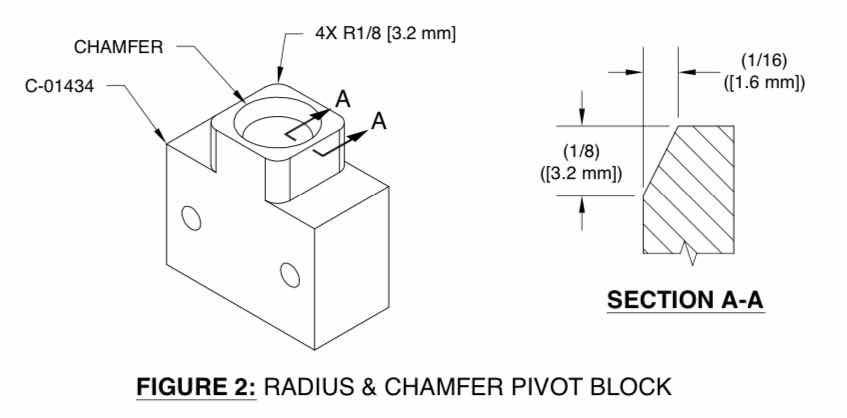
First, the four edges were rounded and then the interior portion of the center hole had to be chamfered. The edges were rounded very easily with a small sanding block and 220 grit sandpaper. The chamfered center hole initially was a pain in the a**. The plans recommend using a razor knife. I tried this method, but it looked like crap. So, I came up with something different. I used a step bit and turned it by “hand” to get the desired result. I think it worked out pretty good.
The ultimate goal is to have the Pivot block “cover” the weld on the WD-619 Canopy Release Assembly as shown below. Here, you can see the Pivot Block sitting flush on the base of the Release Assembly.....like I said is the goal of the chamfer in the first place.

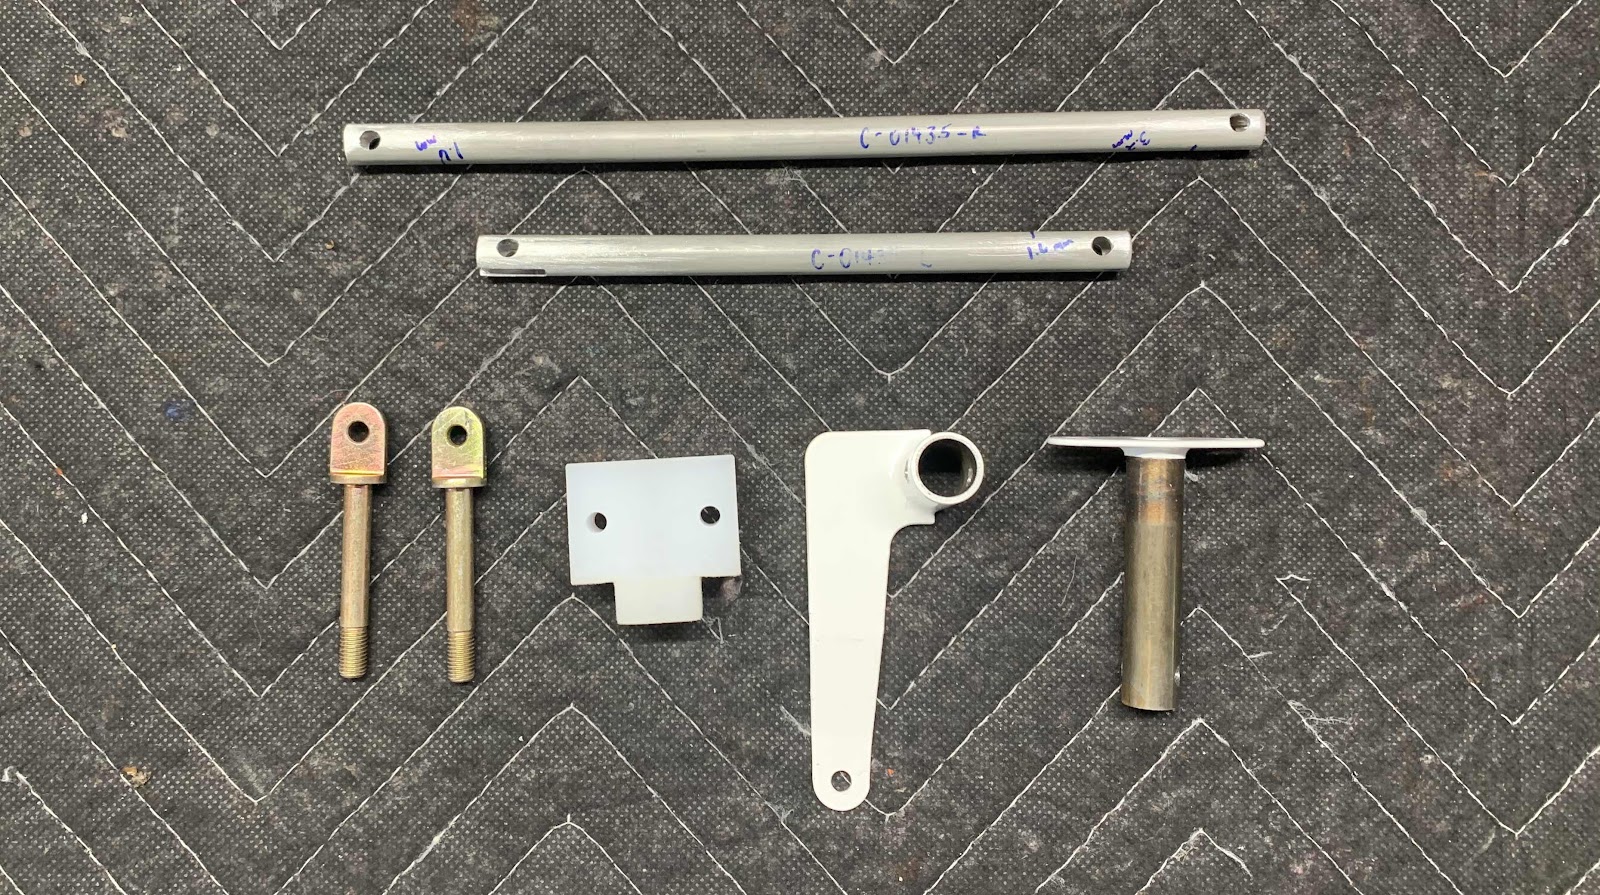
These are all the pieces that make up the Canopy Assembly Release Mechanism. The two F-01435-L & -R Canopy Release Pushrods had to be fabricated from raw AT6-058X3/8 tube. The -R is Pushrod is 8 1/2” and the -L is 6 1/32” and each has #12 holes drilled through each end. Also shown are the two Release Pins (that will be modified later), the previously discussed Canopy Release Pivot Block, the WD-618-1 Canopy Release Assembly and the WD-619 Canopy Release Assembly.
The two Canopy Release Pushrods had to be modified with a “notch” on each end. Here is one of the “notches” that was completed. First, I took the measurements from the plans and marked it off on the Pushrod. Next, I used my Milwaukee rotary tool with a small cutoff wheel to cut the top and bottom lines. I broke off the remaining piece of aluminum and used a small file (that just happened to be the correct width required for the “notch”) to shape the “notch”. Finally, I used 220 grit sandpaper to smooth everything out. The result turned out pretty good.

Here is another view.

This is the small file set that I used to make the “notches” on the Pushrods purchased from the Home Depot. There are two files I took out of the package. These are the two files I used to prepare the Pushrod “notches”. Each end of the Pushrod had different sized “notches” and the two files worked perfectly for each respective end.

I will prepare the remaining three “notches” on the two Pushrods and show the results once they are primed, painted and completed.