
After priming and painting the pieces yesterday, today’s session was all about riveting. I started with the four Backing Plates and the Access Hatch Doubler as shown in the excerpt below.

Each Backing Plates used four K-1000-06 nutplates and were attached with AN426AD3-3.5 rivets. Pictured below are the four Backing Plates.....two on the front side and two on the rear side.

Because the Backing Plates will be installed with the landing assemblies (and be visible through the landing light lenses), I also wanted the rivets and nutplates to be black. You can barely see, but the manufactured heads of the rivets and the nutplates have been painted flat black.

The Access Hatch Doubler 10 K1100-06 nutplates and AN426AD3-3.5 rivets. This Doubler will ultimately be painted when the entire airplane gets painted, so it will remain the green Akzo primer color. Here is the front side of the Doubler showing the manufactured heads installed on the nutplates.....

.....and the rear side.

Next to receive rivets were the two Mount Brackets and the two Splice Strips as indicated in the excerpt below.
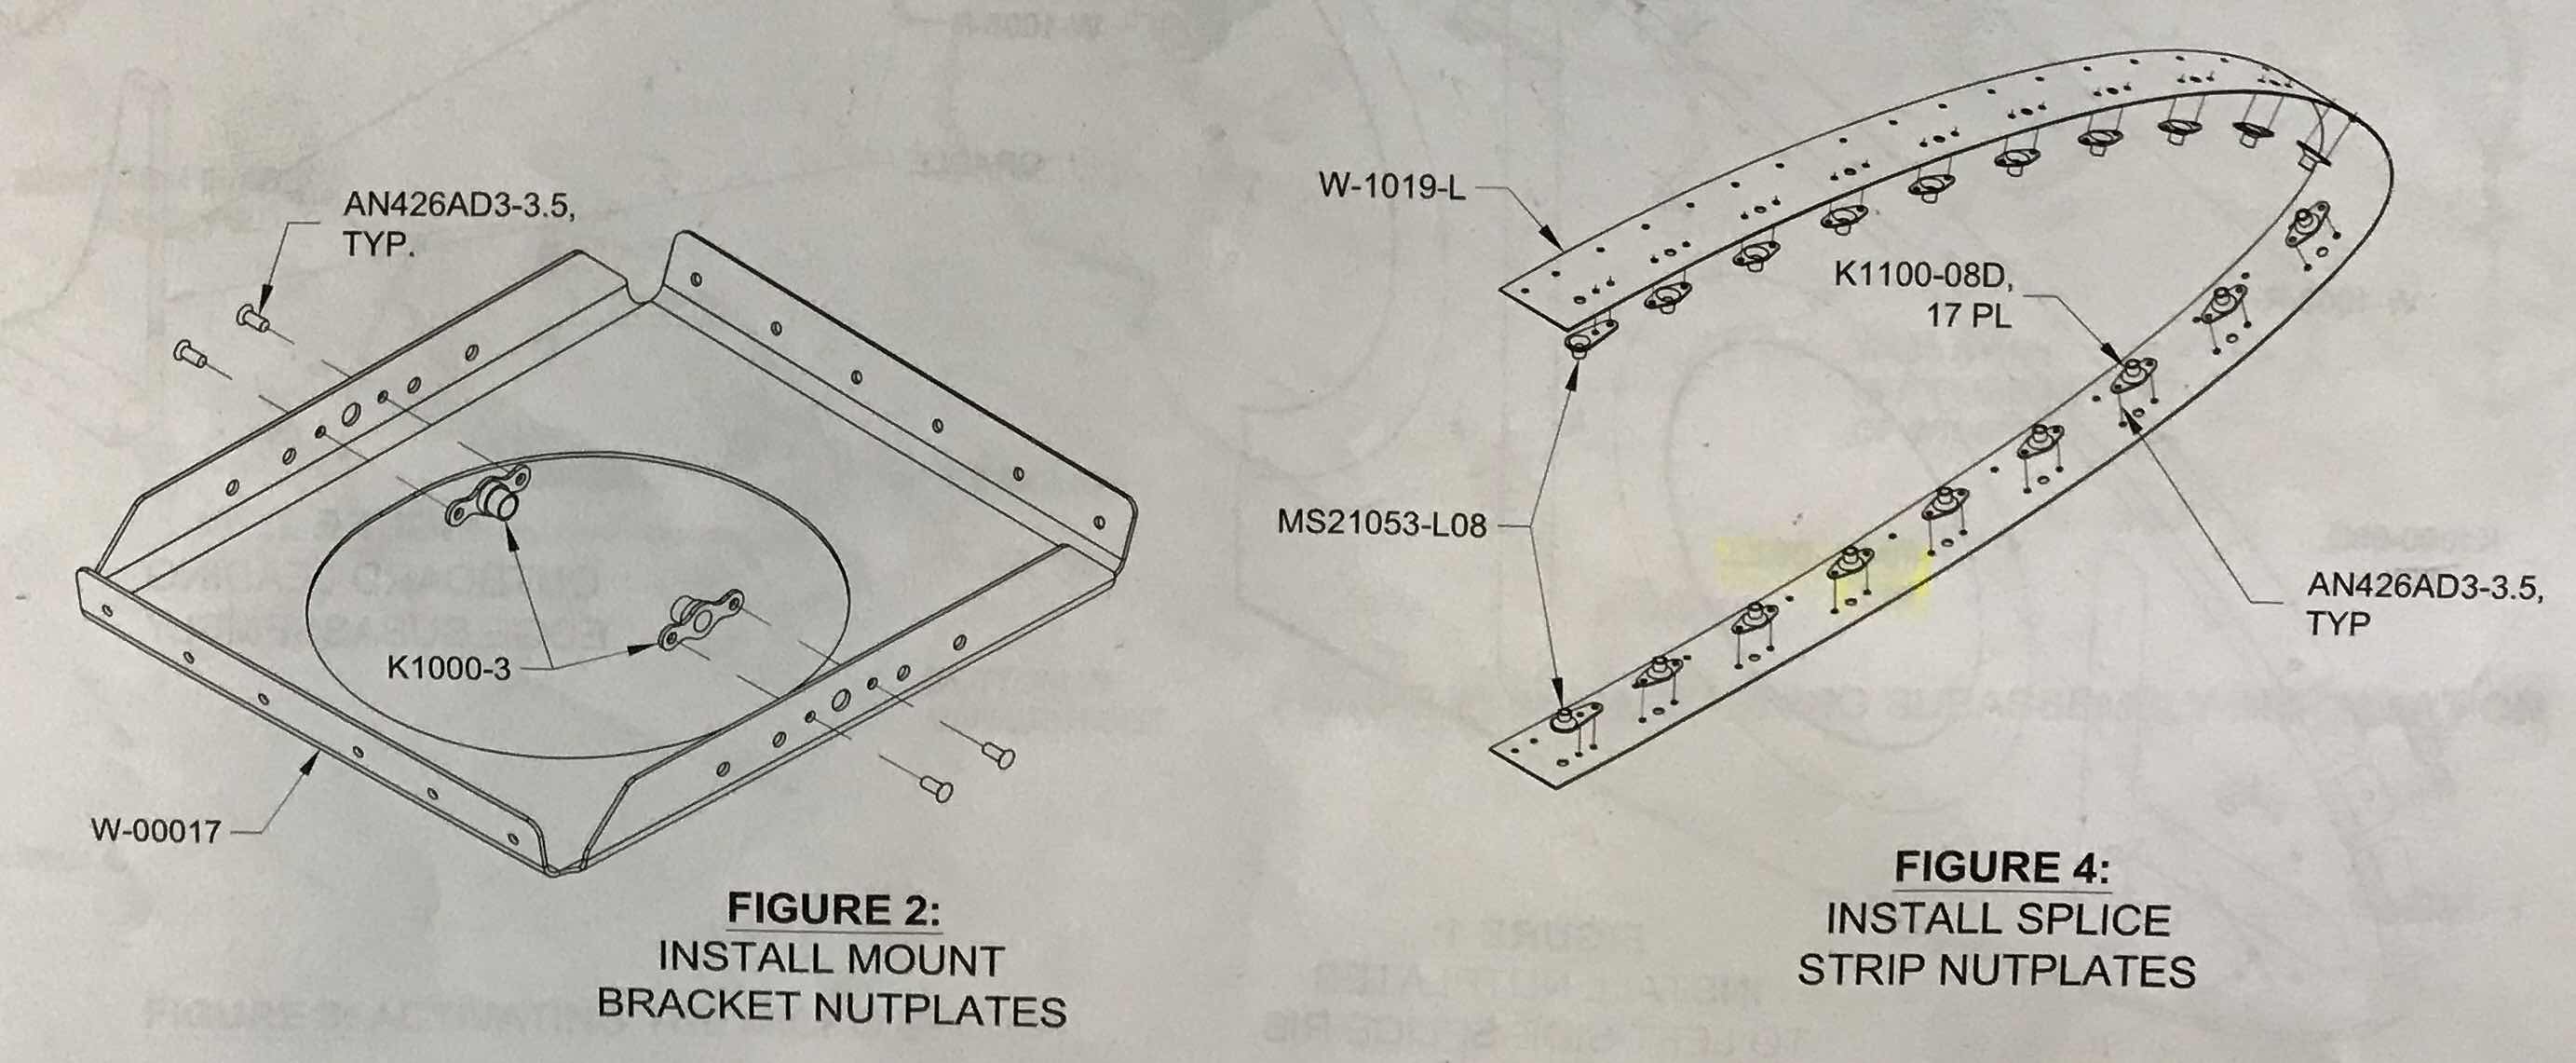
The Mount Brackets only had two K-1000-3 nutplates (each) and were installed with AN426AD3-3.5 rivets. Just like with the Backing Plates, I painted the manufactured head of the rivets and the nutplates flat black.....for the same reason.

The Splice Strips each received 19 nutplates.....(17) K1100-08D and (2) MS21053-L08. Both types of nutplates used the same AN426AD3-3.5 rivets. Here is a picture of both sides of the Splice Strips.

With all the nutplates installed on the nine pieces, I shifted work back on the Leading Edge Skins.....specifically, the Leading Edge Skins. Just like on the Right Outboard Leading Edge Skin, I dimpled all the holes I could reach with the pneumatic squeezer. I will dimple the remaining holes with the DRDT-2 machine.
