
The work and pictures from this post are from July 6, 2023.
To start, I took some measurements from the “glove box” opening to the firewall angle. Based on those measurements, I cut two pieces of aluminum angle from a stock piece of 1.25” x 1.25” x .063” to a length of 14.25 inches. (I actually cut the angles slightly longer than 14.25” and sanded them to size…..which turned out to be 14.25”). Next, I needed to verify the aluminum angle and the transponder mounting tray (all three pieces together) would fit in the glove box opening. It was actually a perfect fit….go figure!
To secure the bracket to the airplane, I match-drilled four mounting holes in the aluminum angles through the glove box “flange” and firewall angle…..two in the front and two in the back. I used a 90° air drill to make all four of the holes. The front two holes were pretty easy and straight forward, but the back two required a little more attention. Not because they were overly difficult, but due to their location. I had to use a couple of mirrors to make sure I was in the middle of aluminum angles and firewall angle. Once everything was “centered”, I clamped everything into position and drilled the holes…..top down. The 90° air drill was money in this situation.
I’m going to use AN3 bolts in all four locations to mount the bracket. Here’s the glove box side with the two mounting holes completed (one bolt with a nut and one without). Also of note in this picture: I “rounded” the upper portion of the aluminum angles just as they exit the glove box opening. That gets rid of the sharp 90° degree angles and make it cosmetically pleasing and a cleaner install. I clamped the two angles and “rounded” them together, as one, so they would be the same…..worked out great!
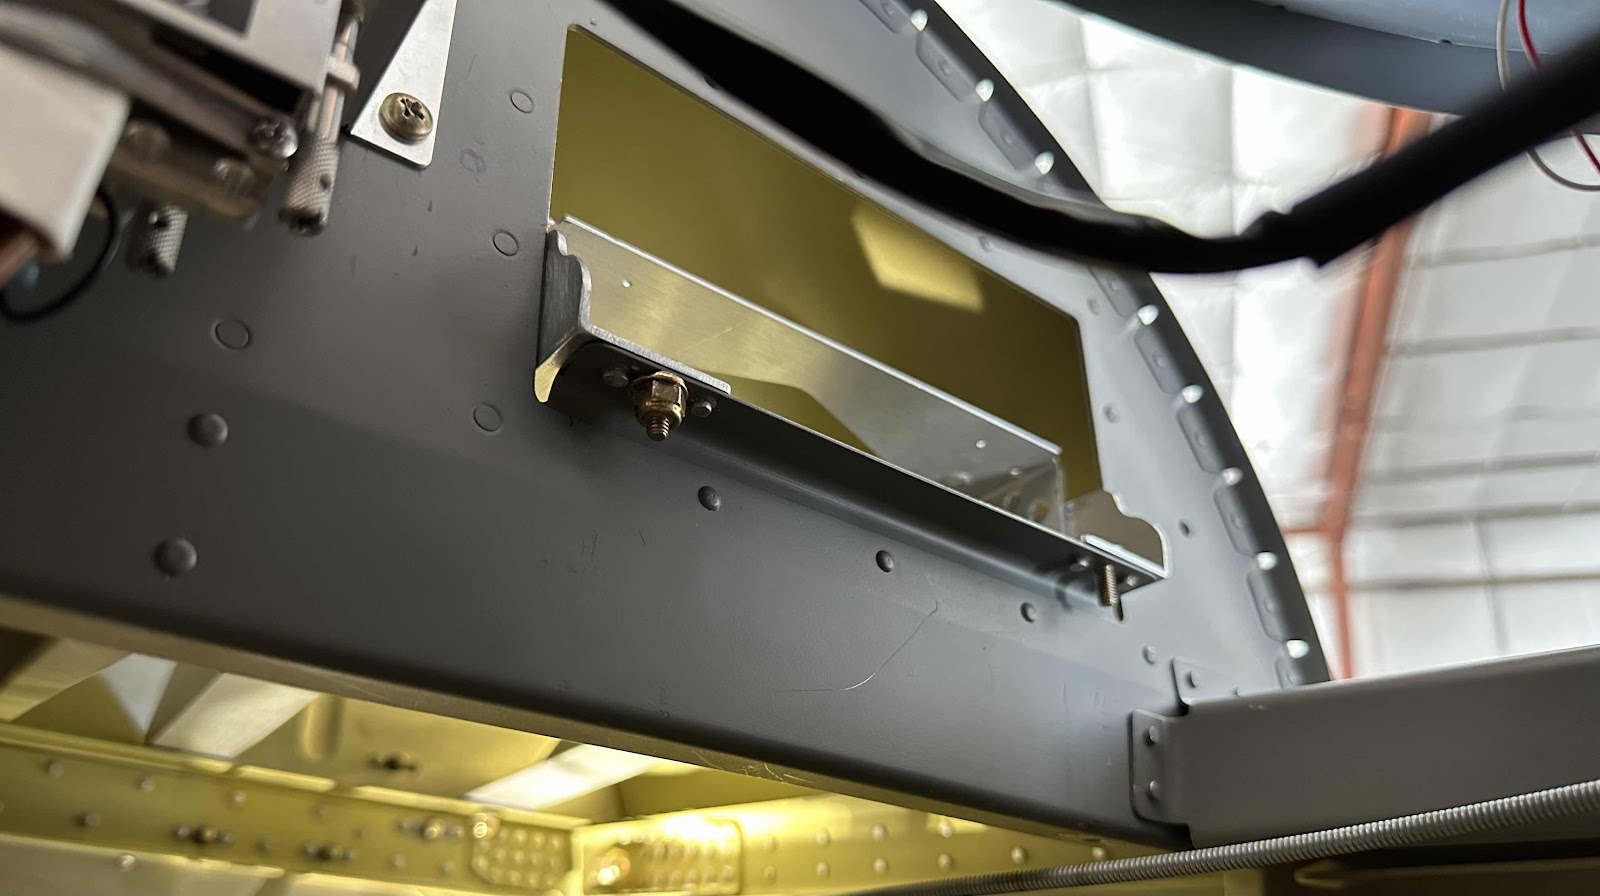
Here are the two mounting holes in the back on the firewall angle. Like I said, I had to use a couple different inspection mirrors to get this area correct. One thing to pay attention to: make sure the forward ends of the aluminum angles ARE NOT rubbing/touching the firewall. The firewall angle is big/wide enough, I was able to leave about an 1/8” inch gap. I think that will work great.

Working in this area was a pain in the butt. Laying on your back, under the panel in the footwell, using air tools requiring air hoses, in a tight location! It was definitely worth it in the end though…..just like most other things during the build. I’m happy with the way this bracket is going to work out!