
Today, I focused on the initial structure of the Aft Fuselage. The Battery Angle and Bellcrank Rib Assembly was riveted to the F-01407 Bulkhead in the area circled in the picture below. Six AN470AD4-4 universal rivets are used to connect the pieces.
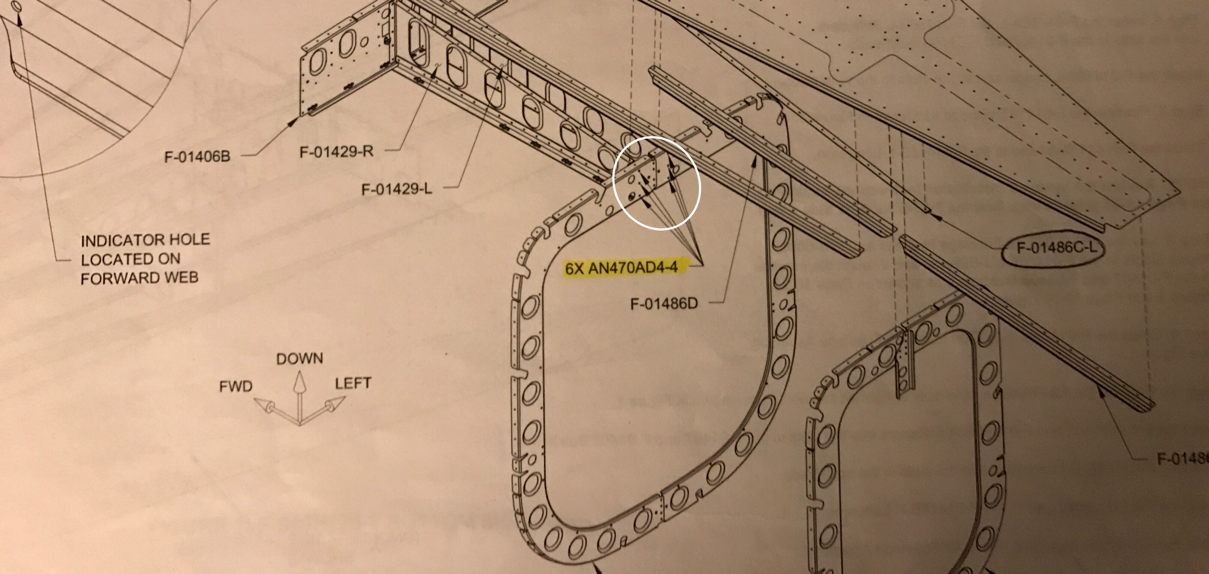
There was a "small" issue with installing two of the rivets. The plans state, on several occasions, to place the manufactured heads of the rivets on the forward side of the assembly. The circled rivet in the picture below is not set, but just inserted into the hole. This rivet (and it's pain in the ass brother on the other side) could not be set as oriented in the picture. You would think the nutplate was in the way, but it's not. The problem is the shop head of the rivet by the circle. That rivet prevents the Cup Rivet Set or the Offset Cup Rivet Set from being square on the manufactured head.

So, I had to turn the rivet around in the other direct in order to set the rivet properly. This is not a big deal structurally.....cosmetically I guess, but it doesn't bother me.

One possible solution, if it really means that much, is to leave the rivet (the one in the way) out when the Battery Angles and Bellcrank Ribs are assembled. After the F-01407 Bulkhead is riveted, you can go back and do the last rivet in the Battery Angle. There is plenty of room to set that rivet.

The plans recommend you place the F-01478 Bottom Skin upside down across two sawhorses. I did this, but put the sawhorses on the work tables for height. That way, I can stand up when working under the assembly. Here is the F-01407 Bulkhead, F-01408 Bulkhead, F-01486C-L & -R, F-01486D, and F-01486E J-Stiffeners clecoed to the Bottom Skin.

Here is another view. At this point, the Bulkheads are only riveted at the bottom, so there is no support at the top. I used the orange tape to help support the Bulkheads until the Side Skins and additional Stiffeners are installed.

I'm going to wait for some help before I rivet the assembly together, so I started work on the F-01473-L Side Skin. I dimpled all the #40 holes and all the #30 holes (except specified in the plans). Pictured is the Left Side Skin and all I need to do is the edge work before priming.
