
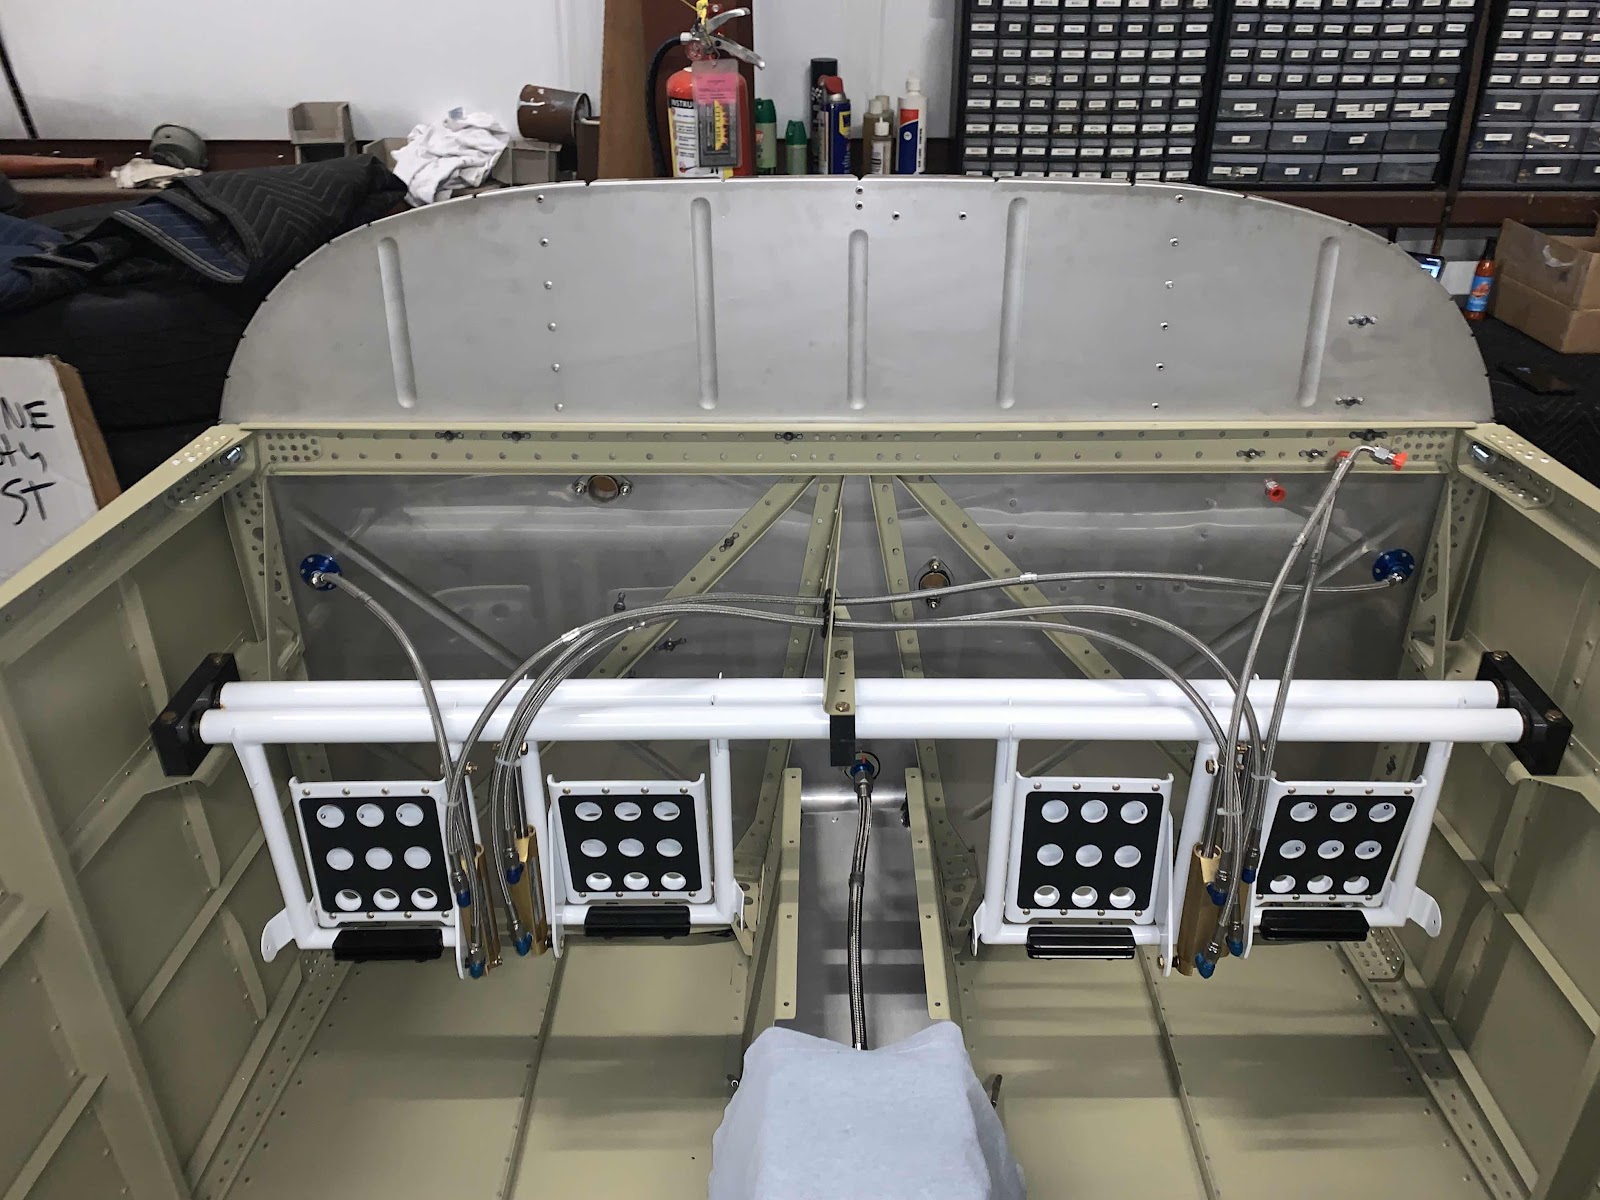
As I mentioned in a previous post, it’s time to talk more about the Cabin Brake System from Aircraft Specialty. The picture below shows the completed install of the Stainless Braided Brake Hose kit (minus the AN826-3D Tee installed in the top right corner on the Brake Fluid Reservoir.....more on that later). The hoses are very high quality, covered with a clear abrasion covering and have a 10 year warranty. I used the plans from this section of the plans and the guidance from the Aircraft Specialty website for the install.
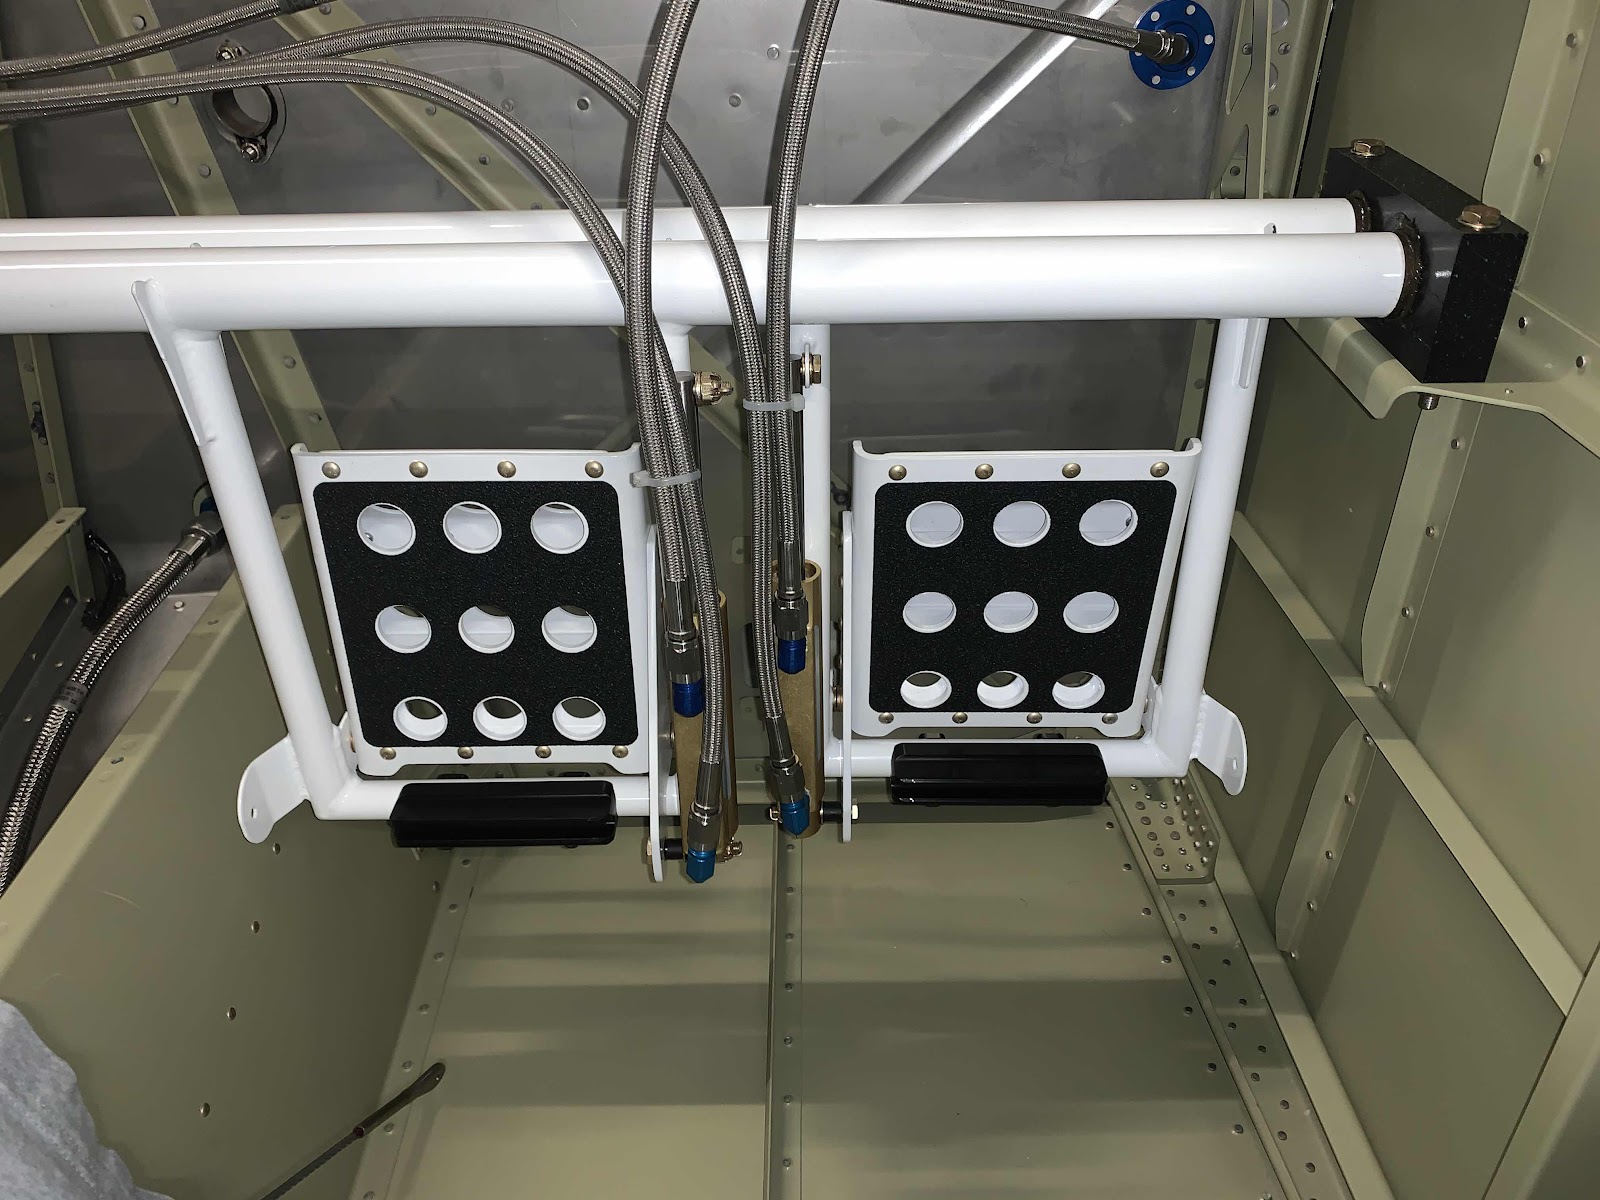
This picture shows the hoses final installed to the four -3 size 90 degree AN fittings (AN822 Elbows) on the two Brake Master Cylinders on the right (co-pilot) side. I used this guide from the Aircraft Specialty website to torque the hoses to the fittings.
This is the location where the Brake Hoses pass through the F-14104 Support Angle. Now, the hoses that come with the kit from Van’s are smaller in diameter than the ones from the Aircraft Specialty kit. As a result, only two hoses can pass through the hole on the right of the Support Angle (all three of the Van’s hoses are routed through this hole). So, I had to route the third hose (on the left) through an additional hole in the Support Angle. The hole was actually too small for the connector on the Brake Hose to pass through, so I had to enlarge the hole to 1/2” with a step drill. Once all that was completed, I installed a rubber grommet in each hole to complete the pass through.

This shows the hoses final installed to the other four -3 size 90 degree AN fittings (AN822 Elbows) on the two Brake Master Cylinders on the left (pilot) side.

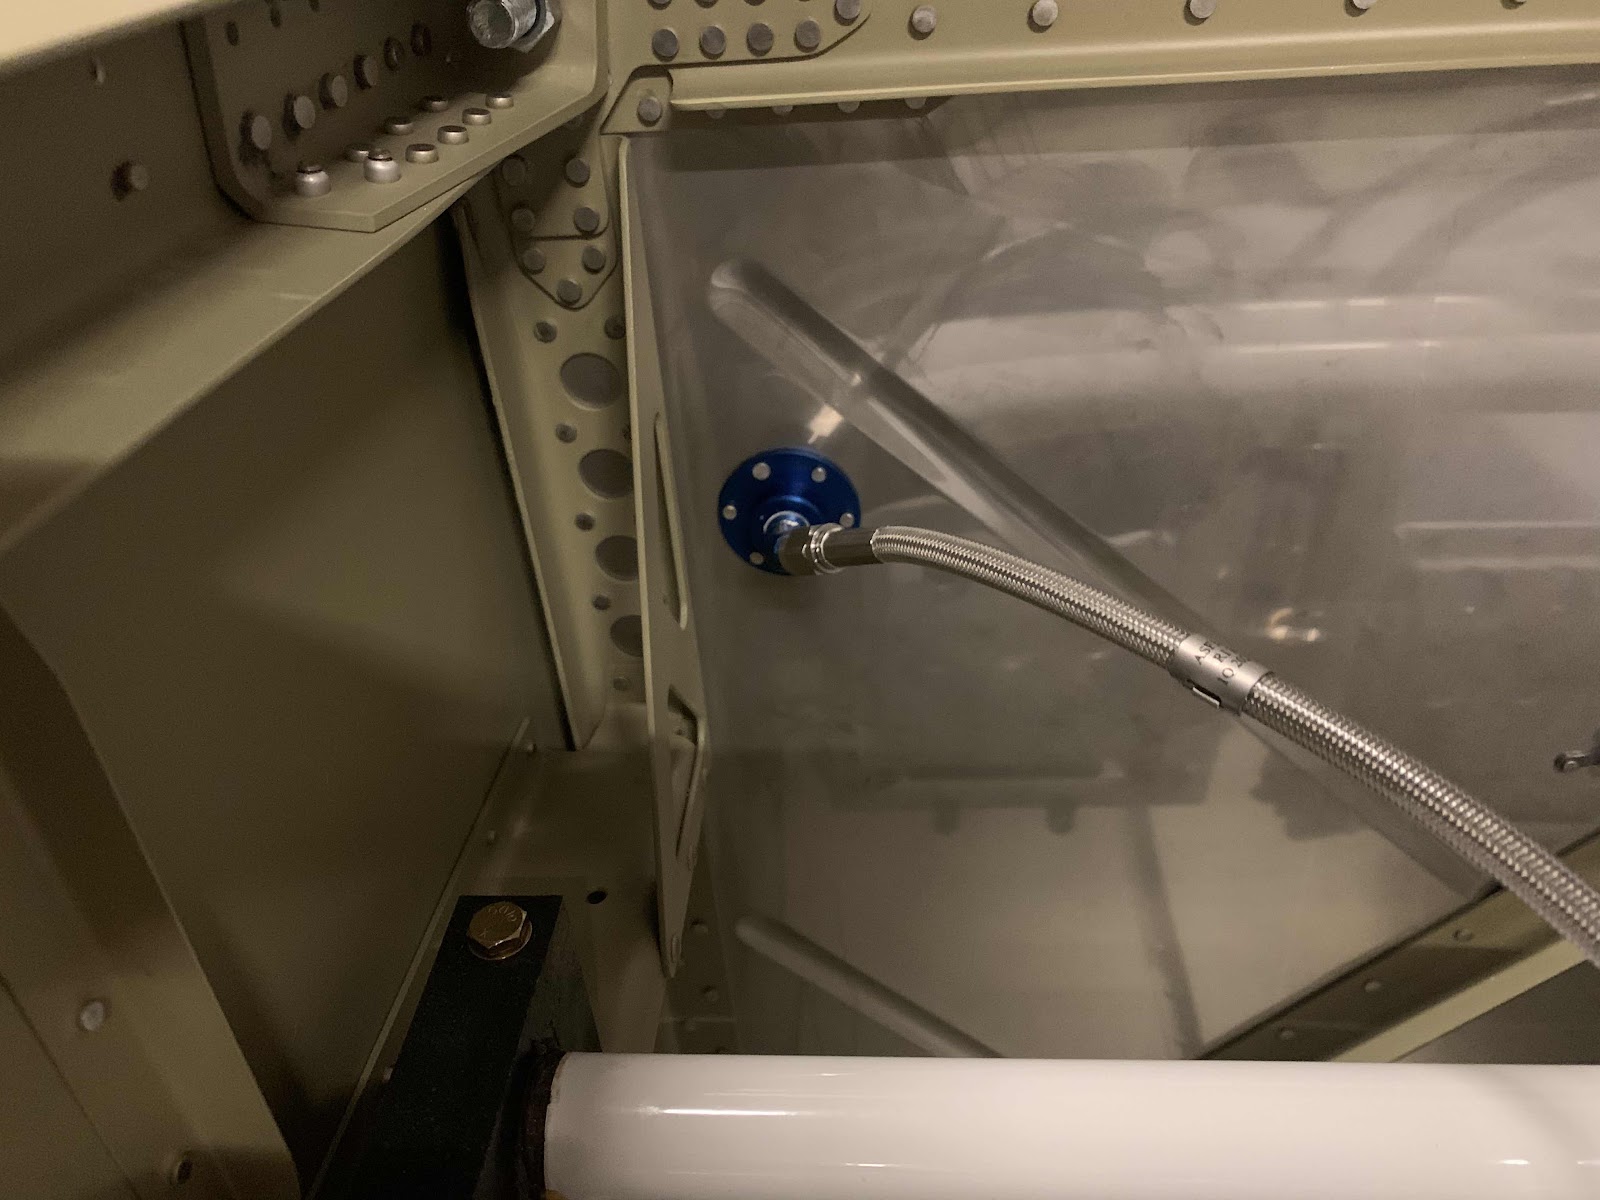
In the center of this picture, you can see the blue Flanged Coupling installed on the right (co-pilot) side. The Brake Hose is final attached to it with an AN823 45 degree elbow.....

.....and installed the same way on the left (pilot) side.
As I mentioned at the beginning of the post, all of the Cabin Brake Hoses have been completely installed.....minus the AN826-3D Tee fitting. I will install this fitting during the next work session. This Tee fitting will be installed between the three connectors shown in the picture below. So, for now.....this work session is complete.
