LOTS AND LOTS of work completed during this session. All the parts that were primed in Part 9 and primed/assembled in Parts 4 & 5 get assembled and riveted together.
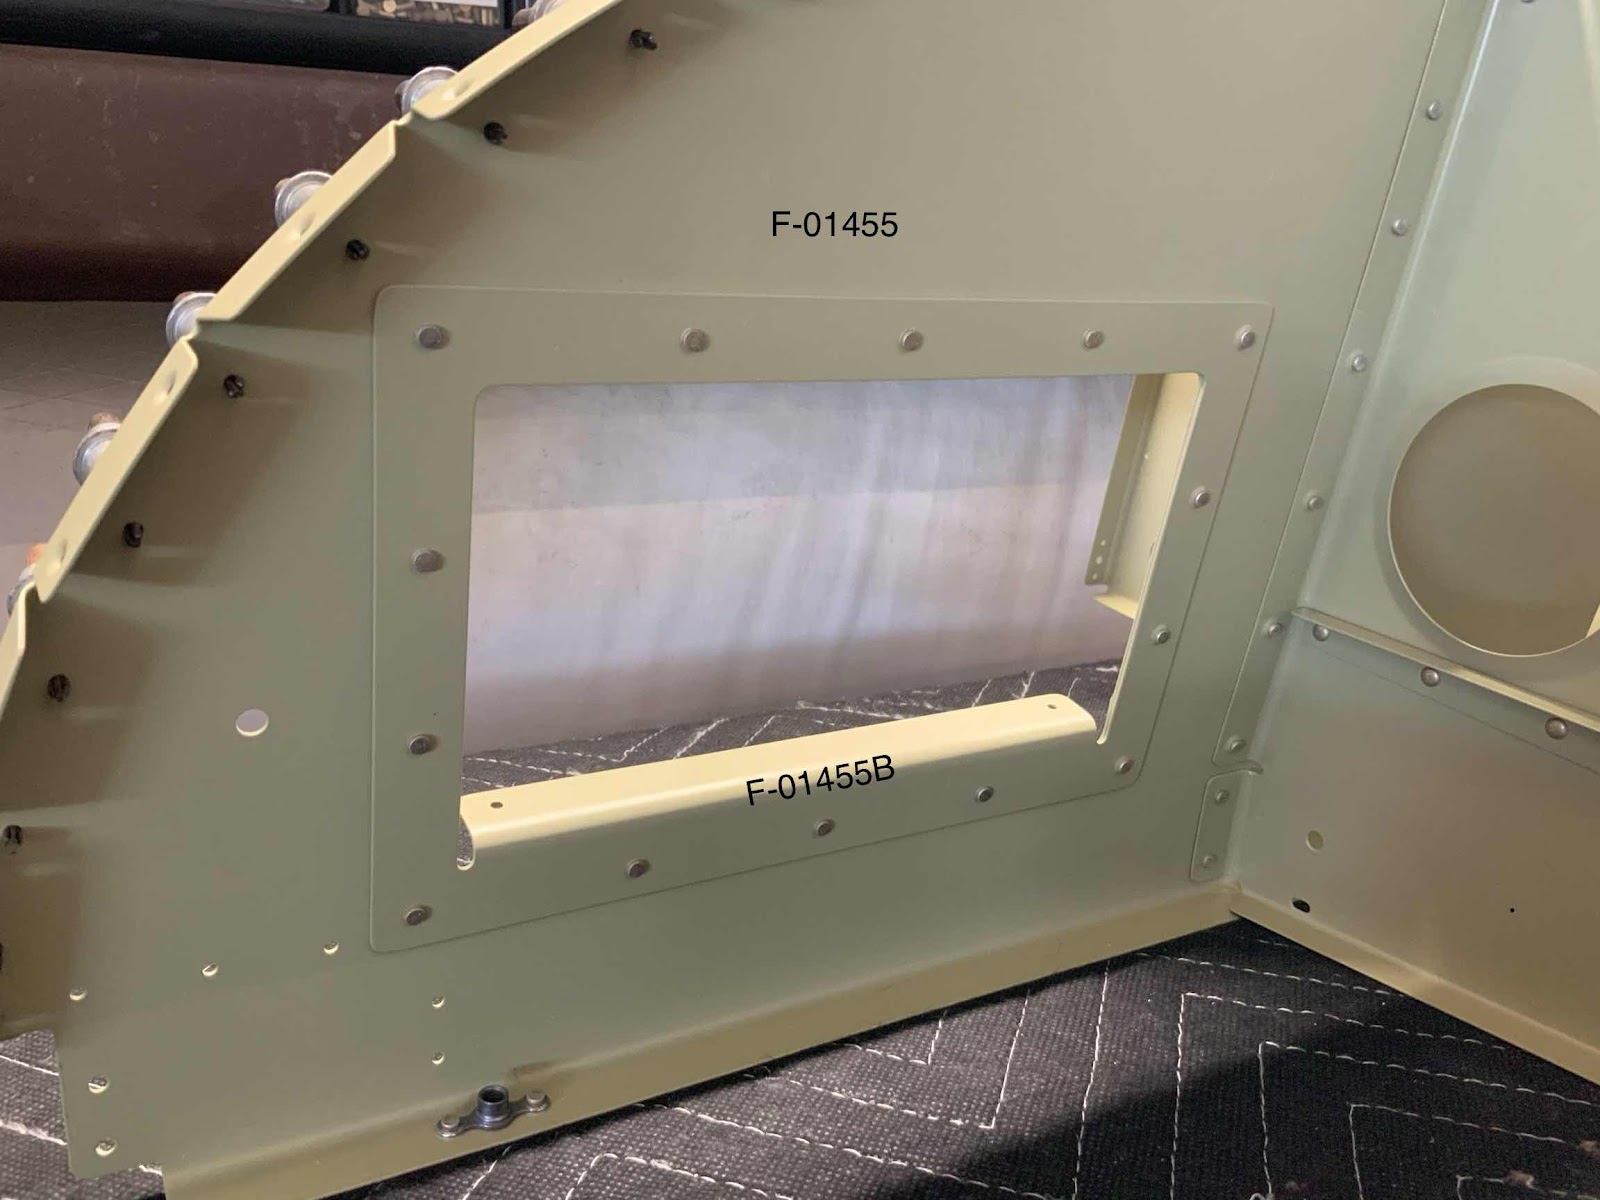
To get the session going, the F-01455B Map Box Doubler was riveted to the F-01455 Sub Panel using 10 AN470AD3-3.5 and four AN426AD3-3.5 rivets. These rivets were very easy to install with a hand squeezer.
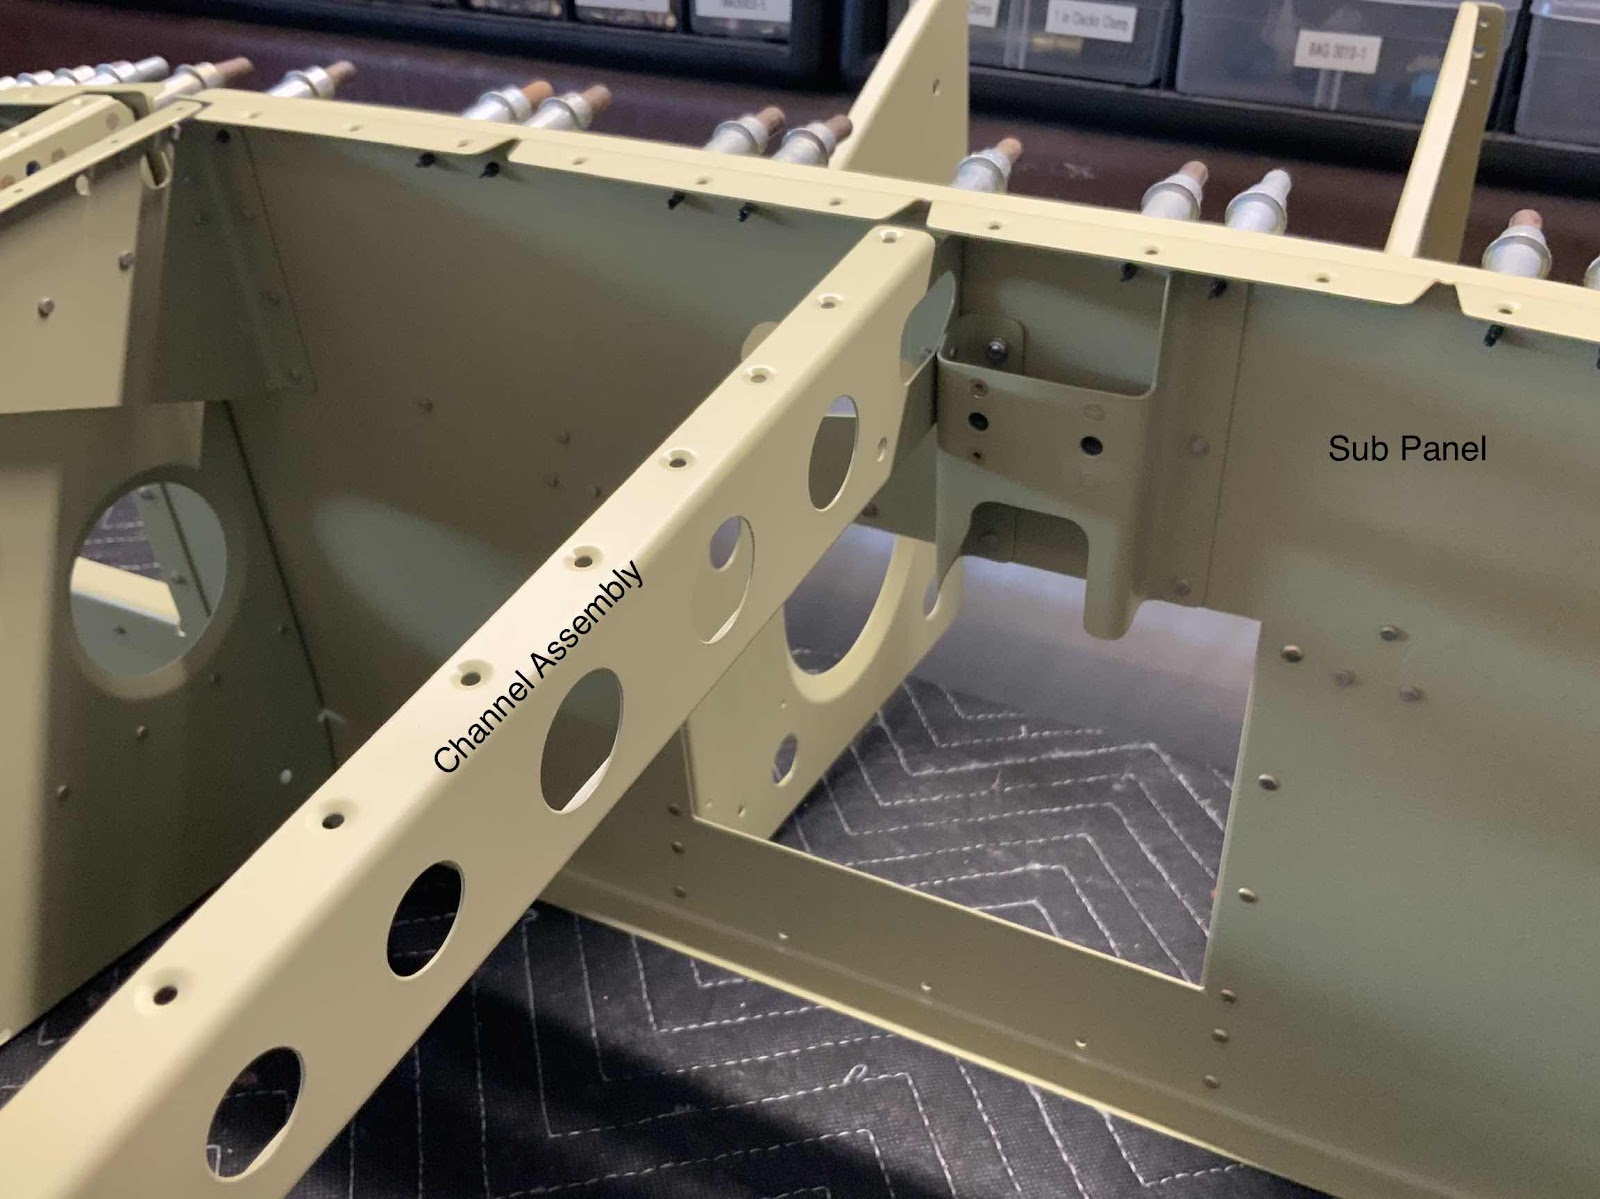
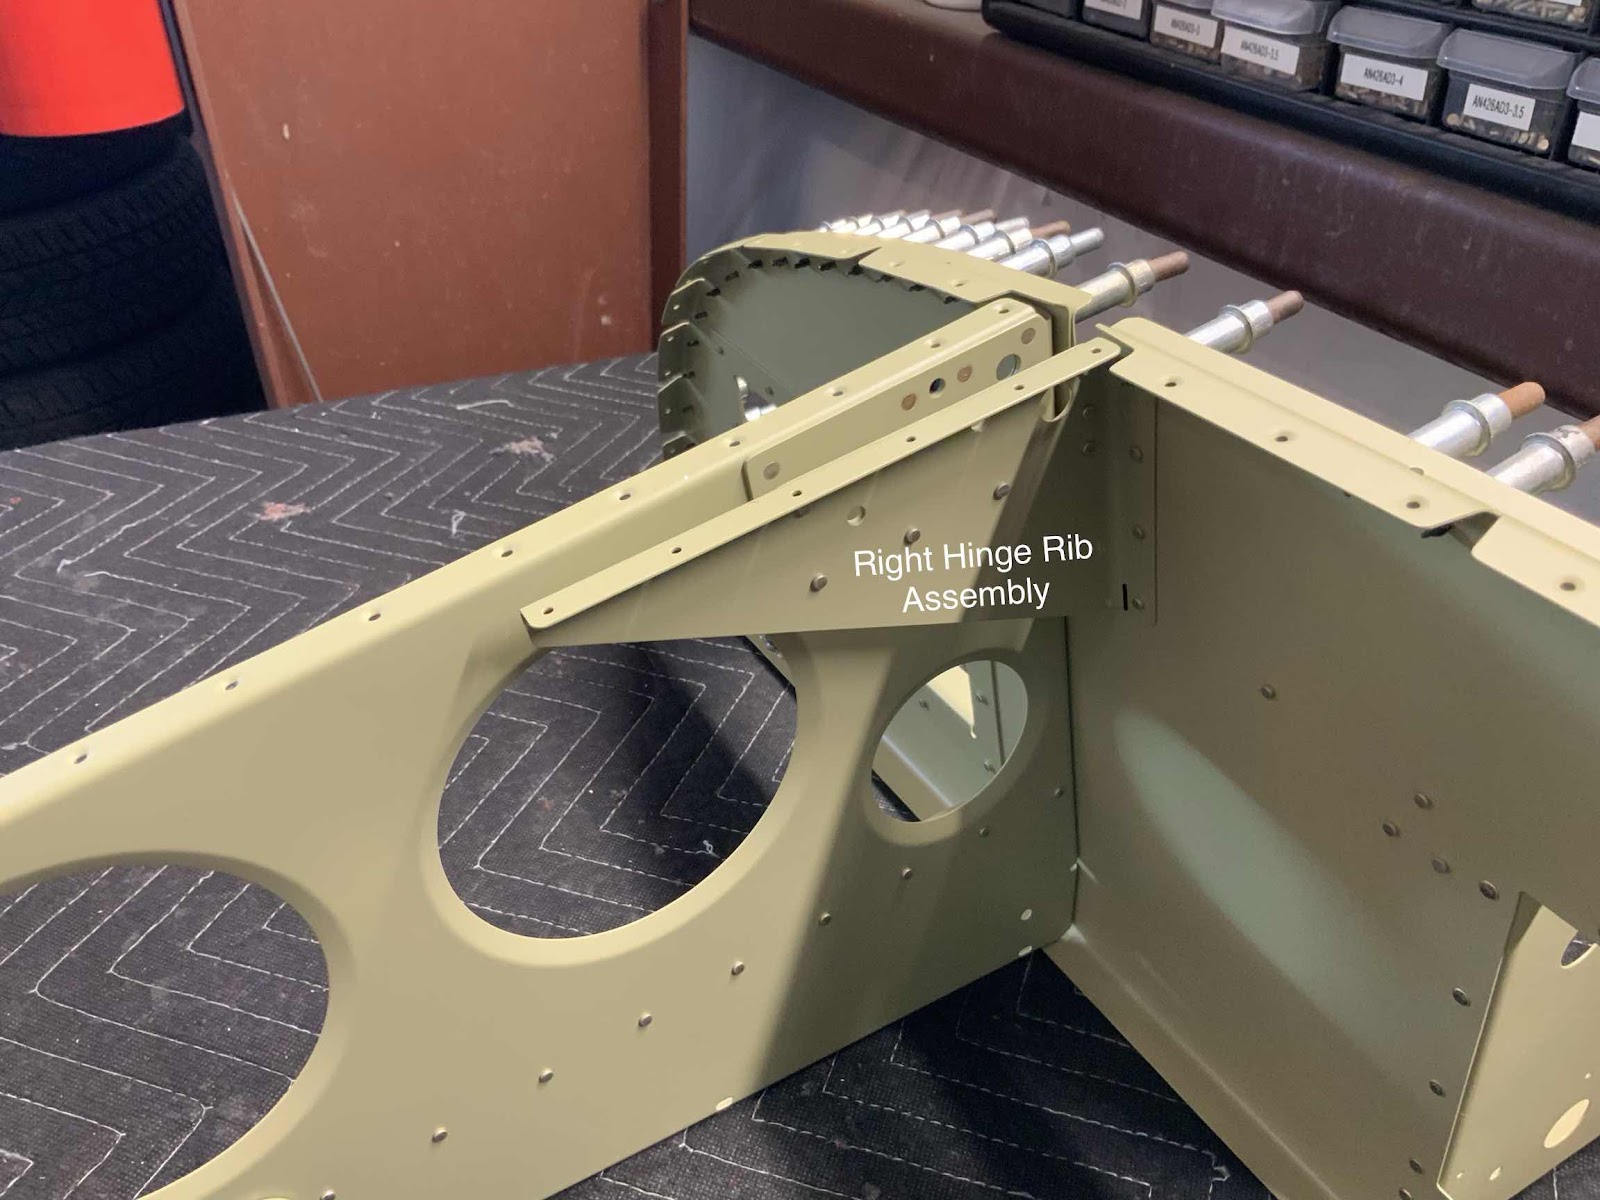
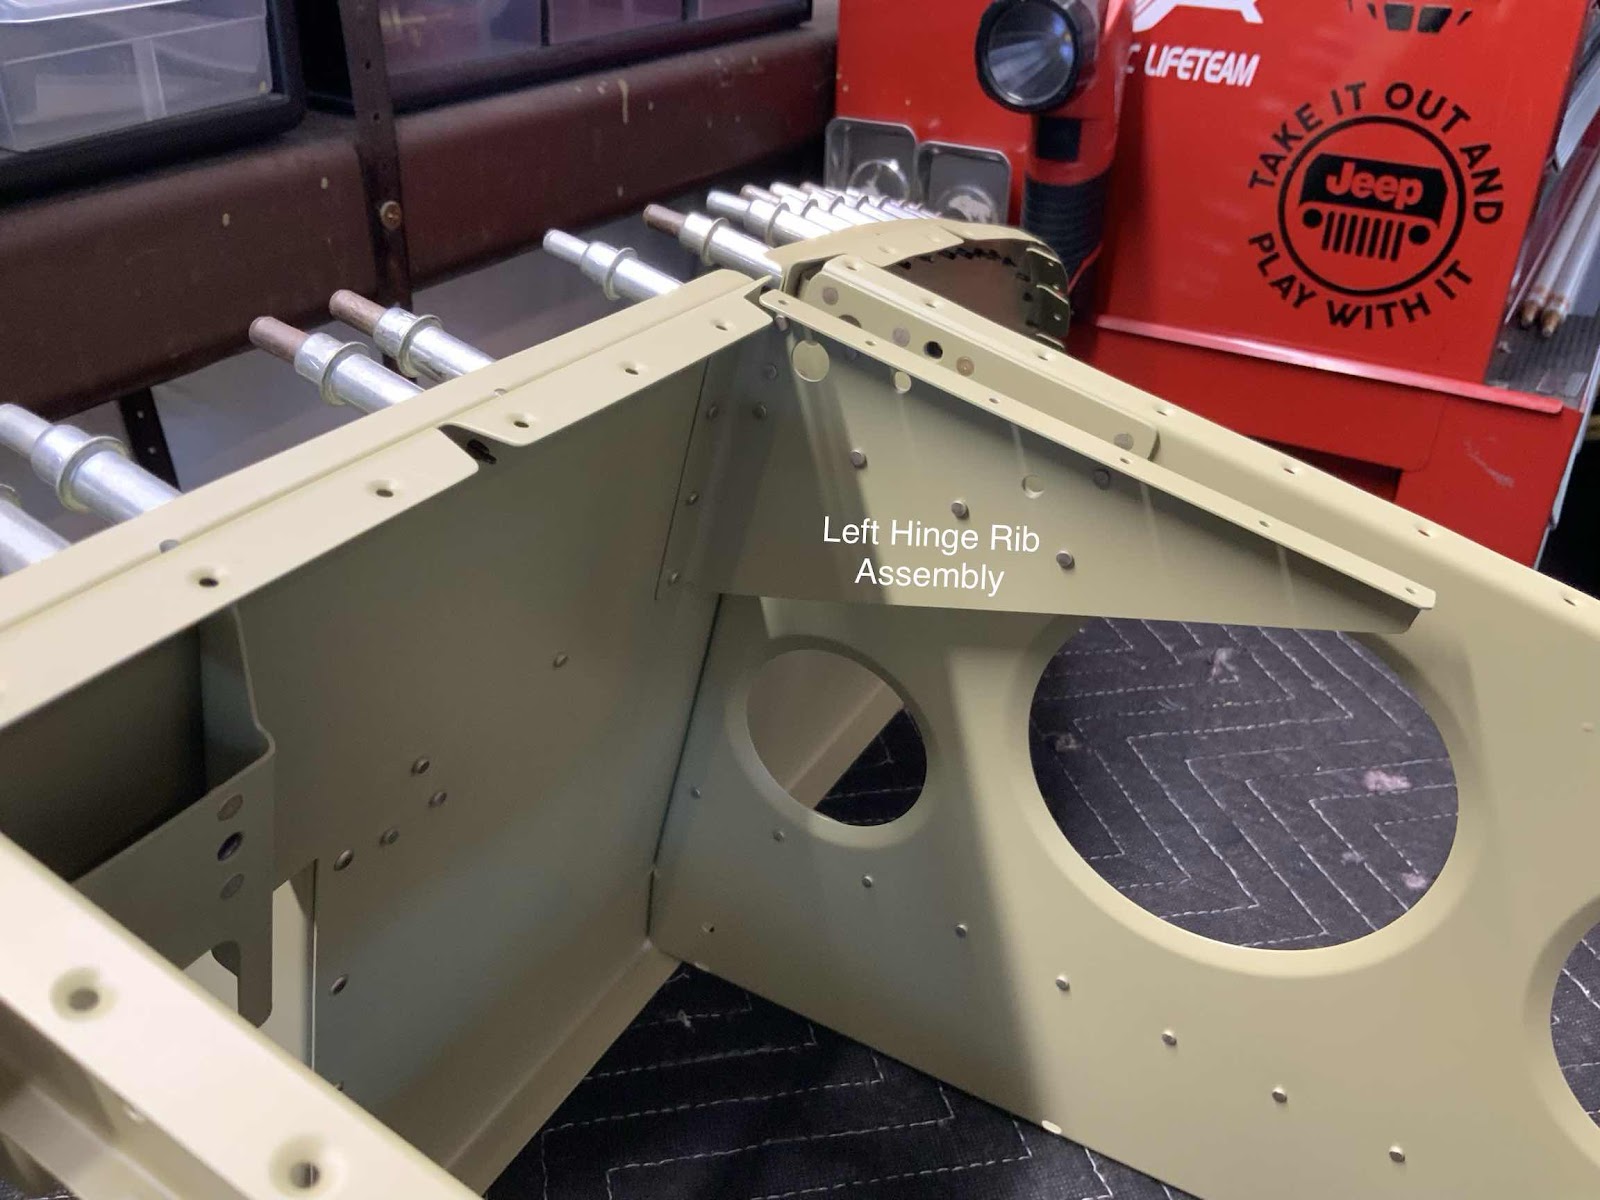
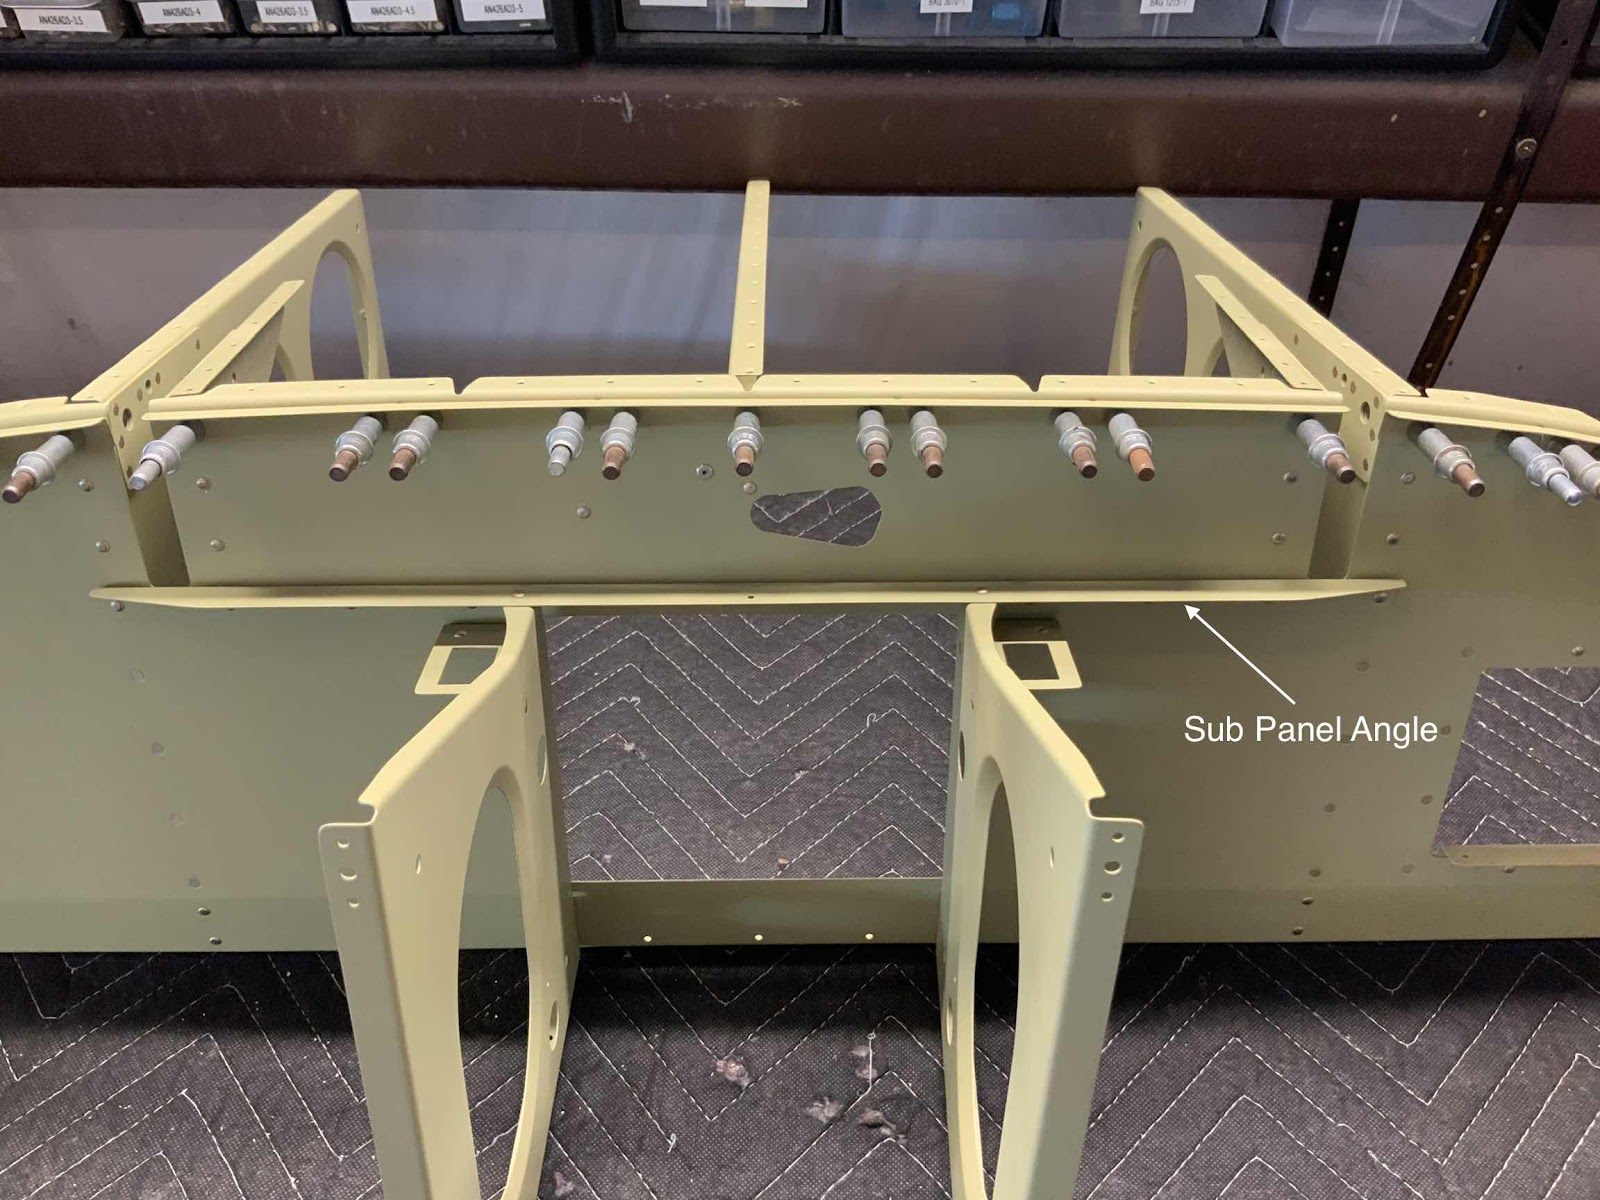
The next parts to get installed to the Sub Panel is the Left Hinge Rib Assembly, the Right Hinge Rib Assembly, the Channel Assembly, and the F-01455A Sub Panel Angle. Here is the excerpt from the plans showing the installation.....
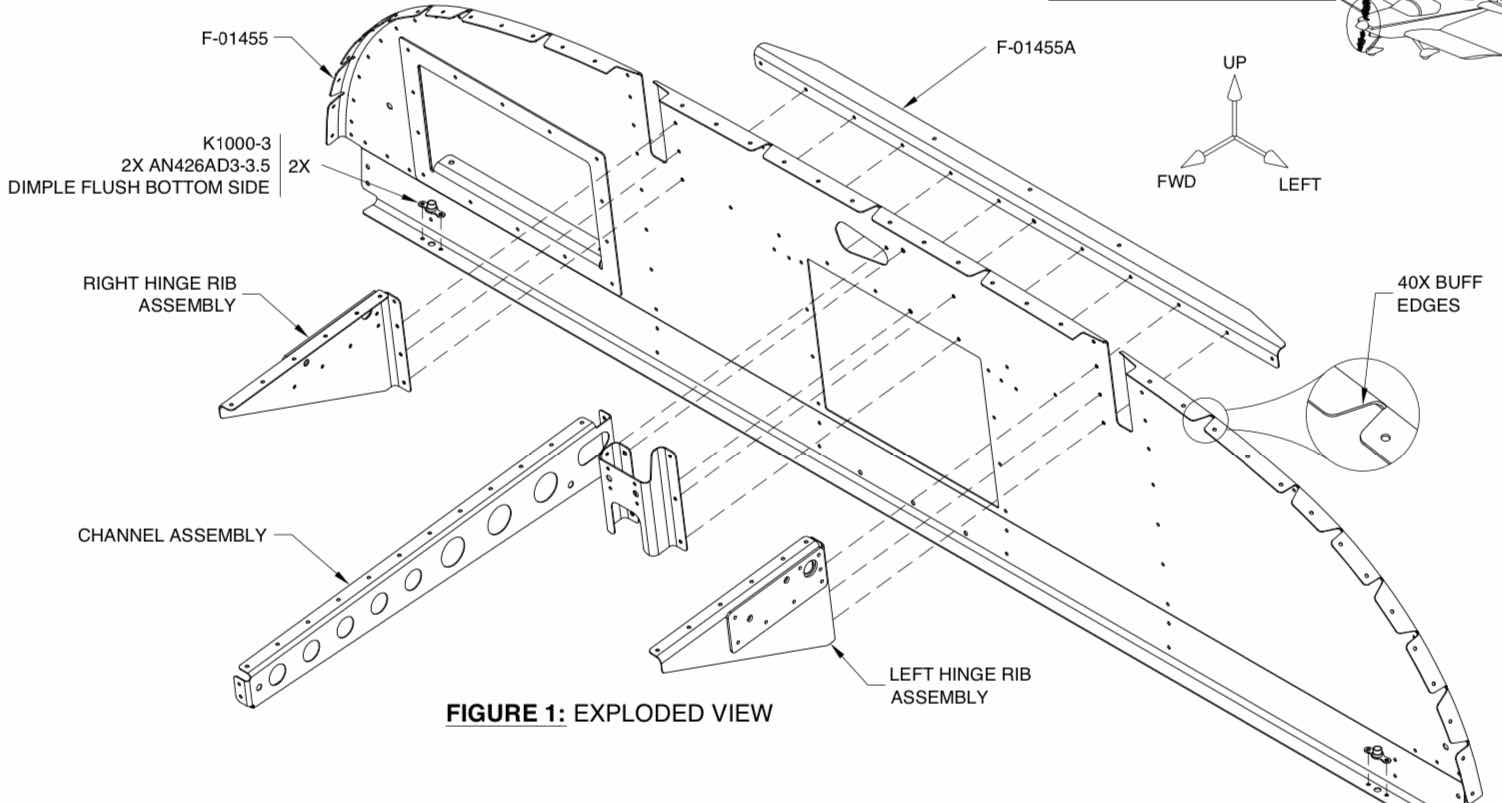
.....and on the plane. The Channel Assembly.....
.....the Right Hinge Rib Assembly.....
.....the Left Hinge Rib Assembly.....
.....and the Sub Panel Angle.
The Left and Right Forward Rib Assemblies are the next parts riveted to the Sub Panel. Here is a blow up of the installation from the plans.....
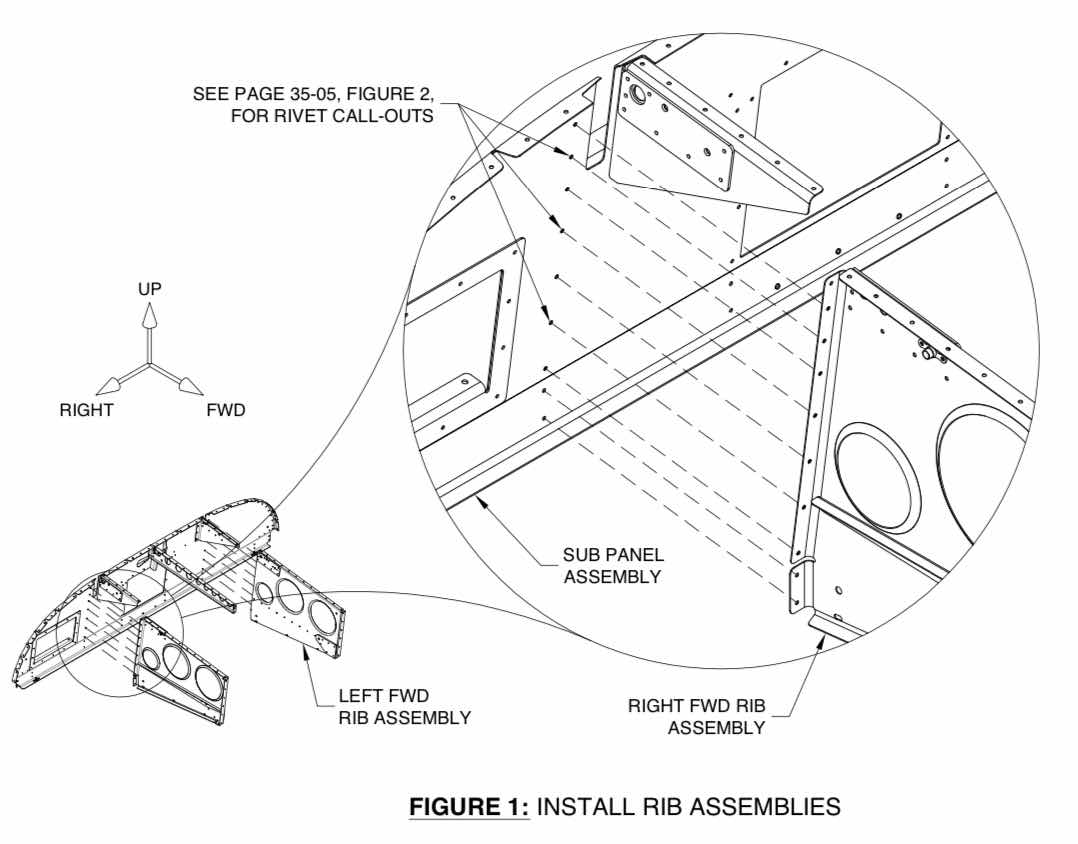
.....and on the plane. Here is the Left FWD Rib Assembly.....

.....and the Right FWD Rib Assembly.

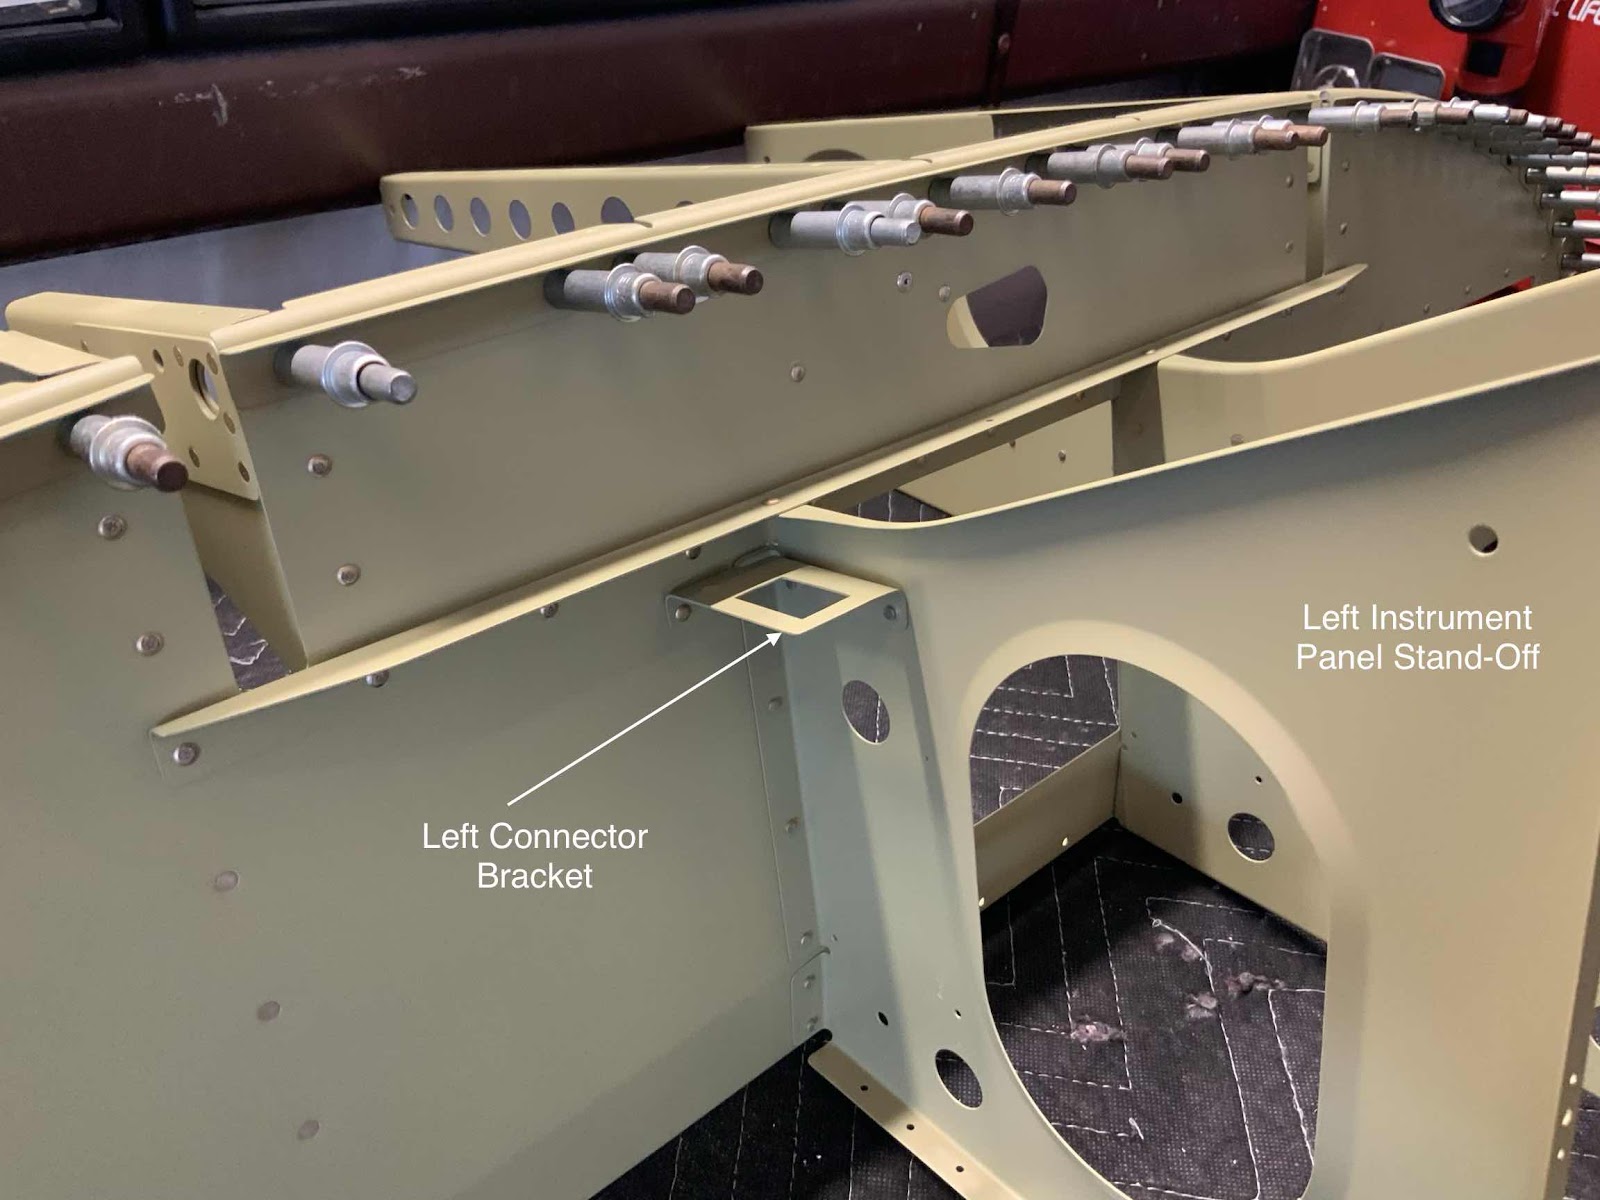
So far, all of the parts have been installed on the front or forward side of the Sub Panel. Now, the F-01494-L & -R Instrument Panel Stand-Offs and the F-01477-L & -R Connector Brackets will get installed on the back or aft side of the Sub Panel. Here is the left side.....
.....and the right side.
Lastly, for this session, the F-01455C-L & -C & -R Seal Angles were installed to the Sub Panel. Here is what it looks like in the plans.....
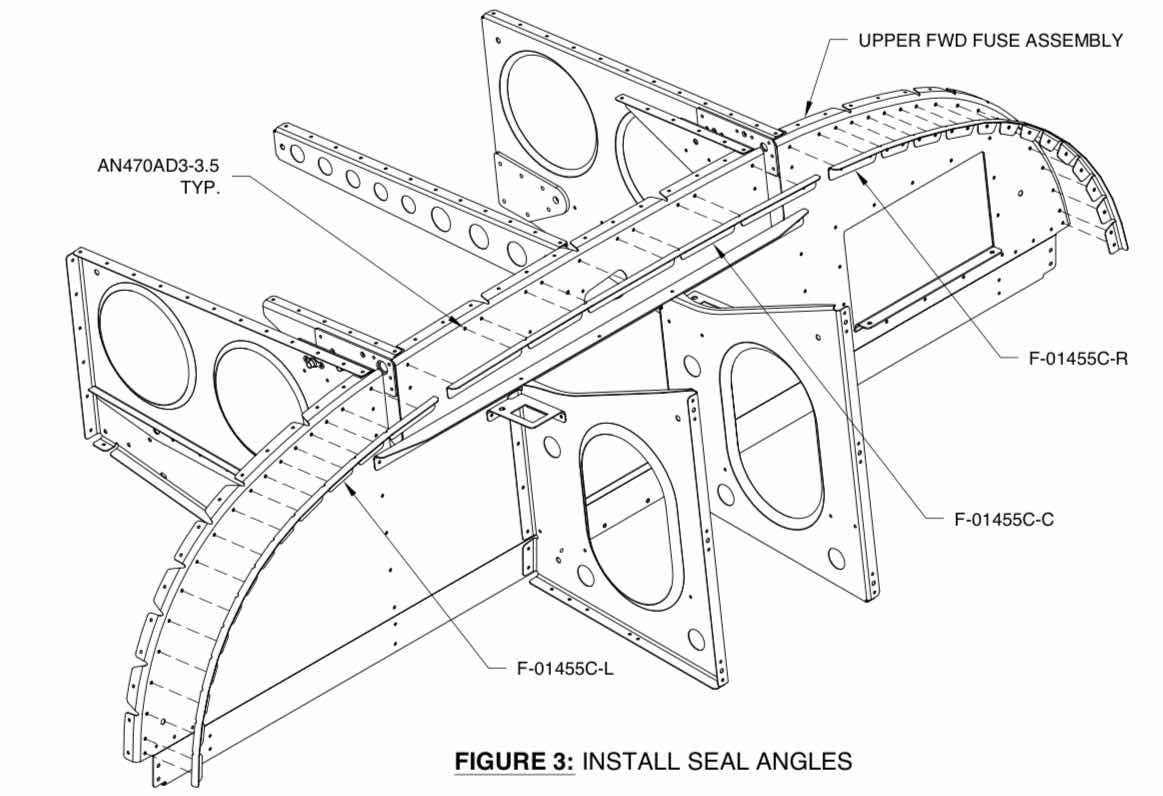
.....and on the plane. Here is the Left Seal Angle.....

.....the Center Seal Angle.....

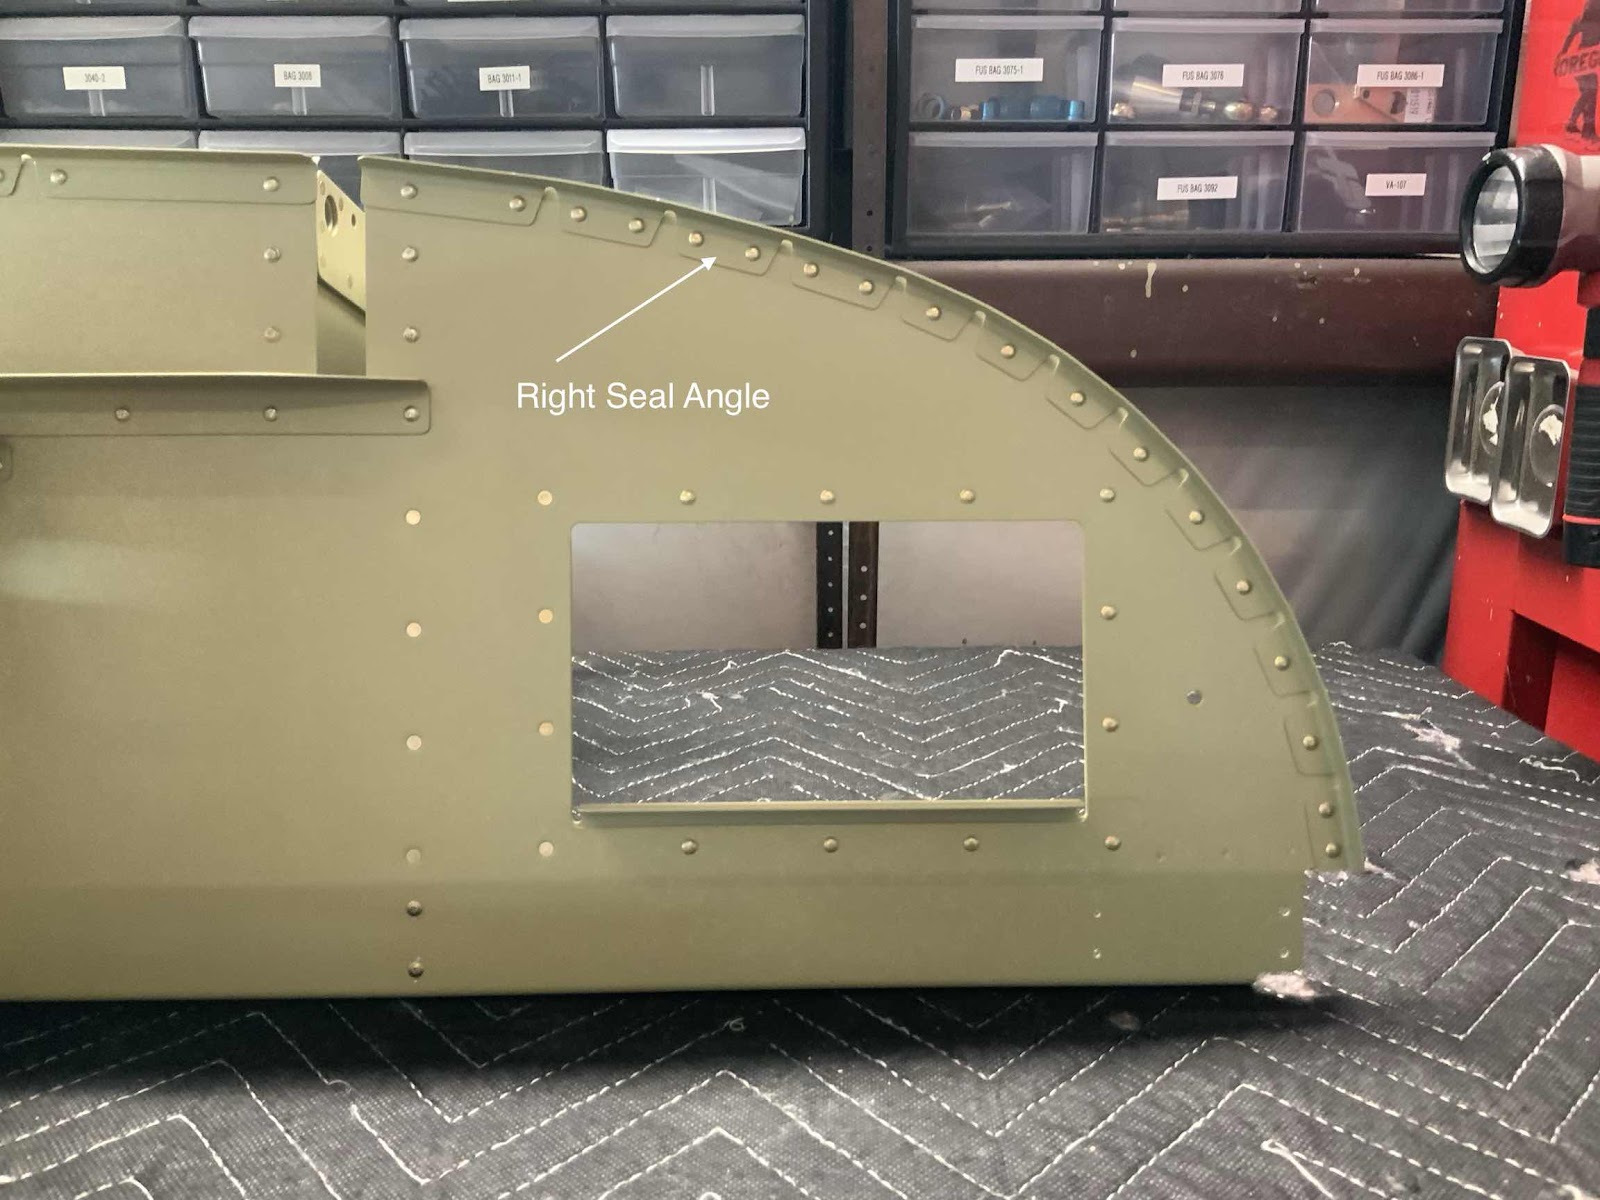
.....and the Right Seal Angle.
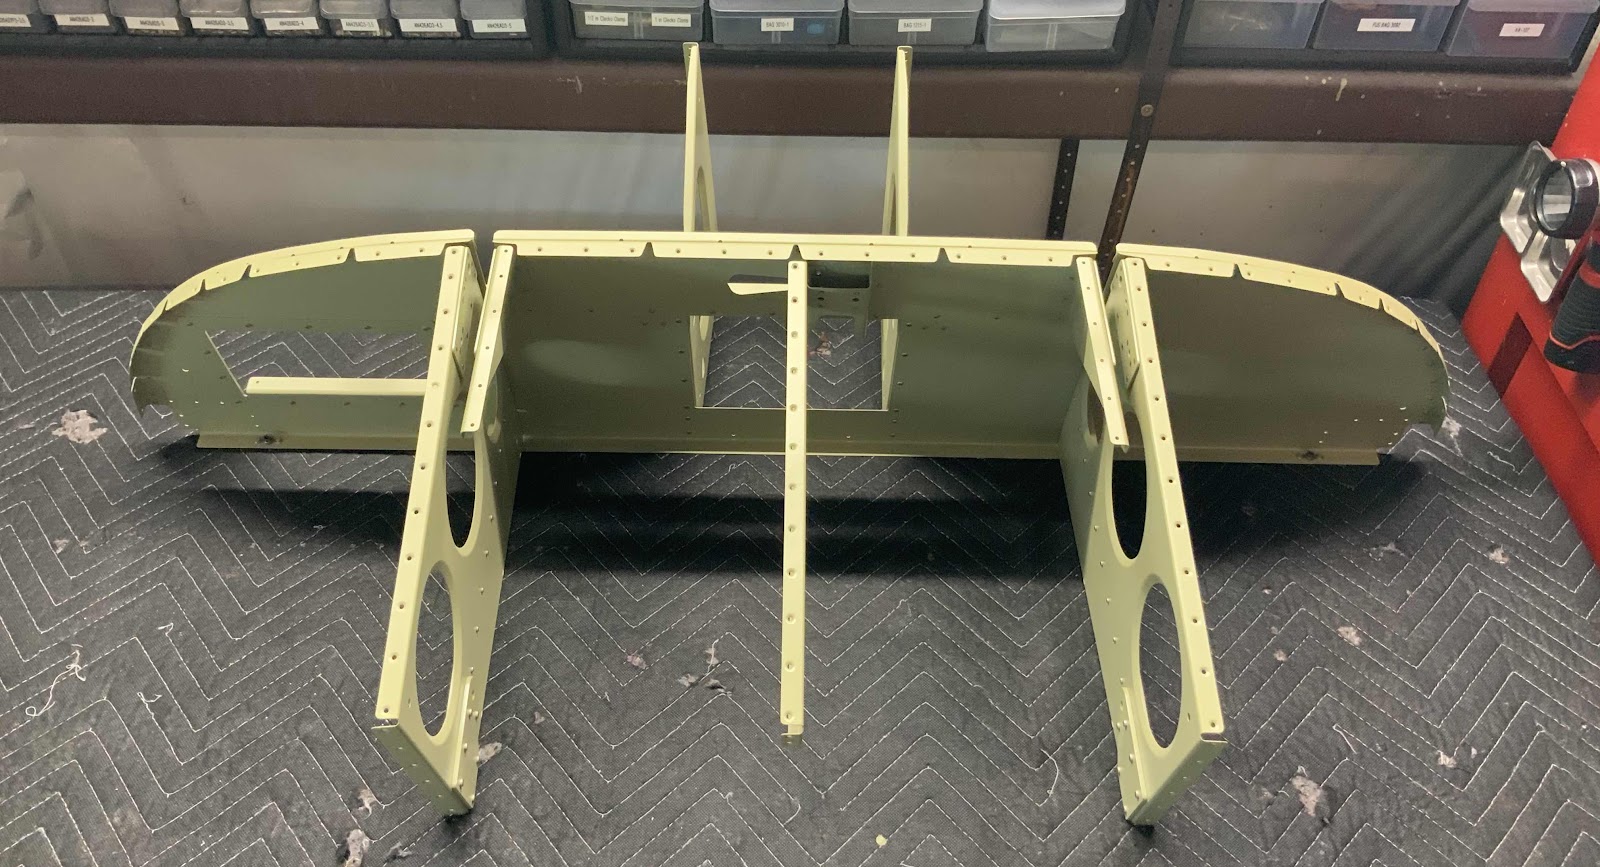
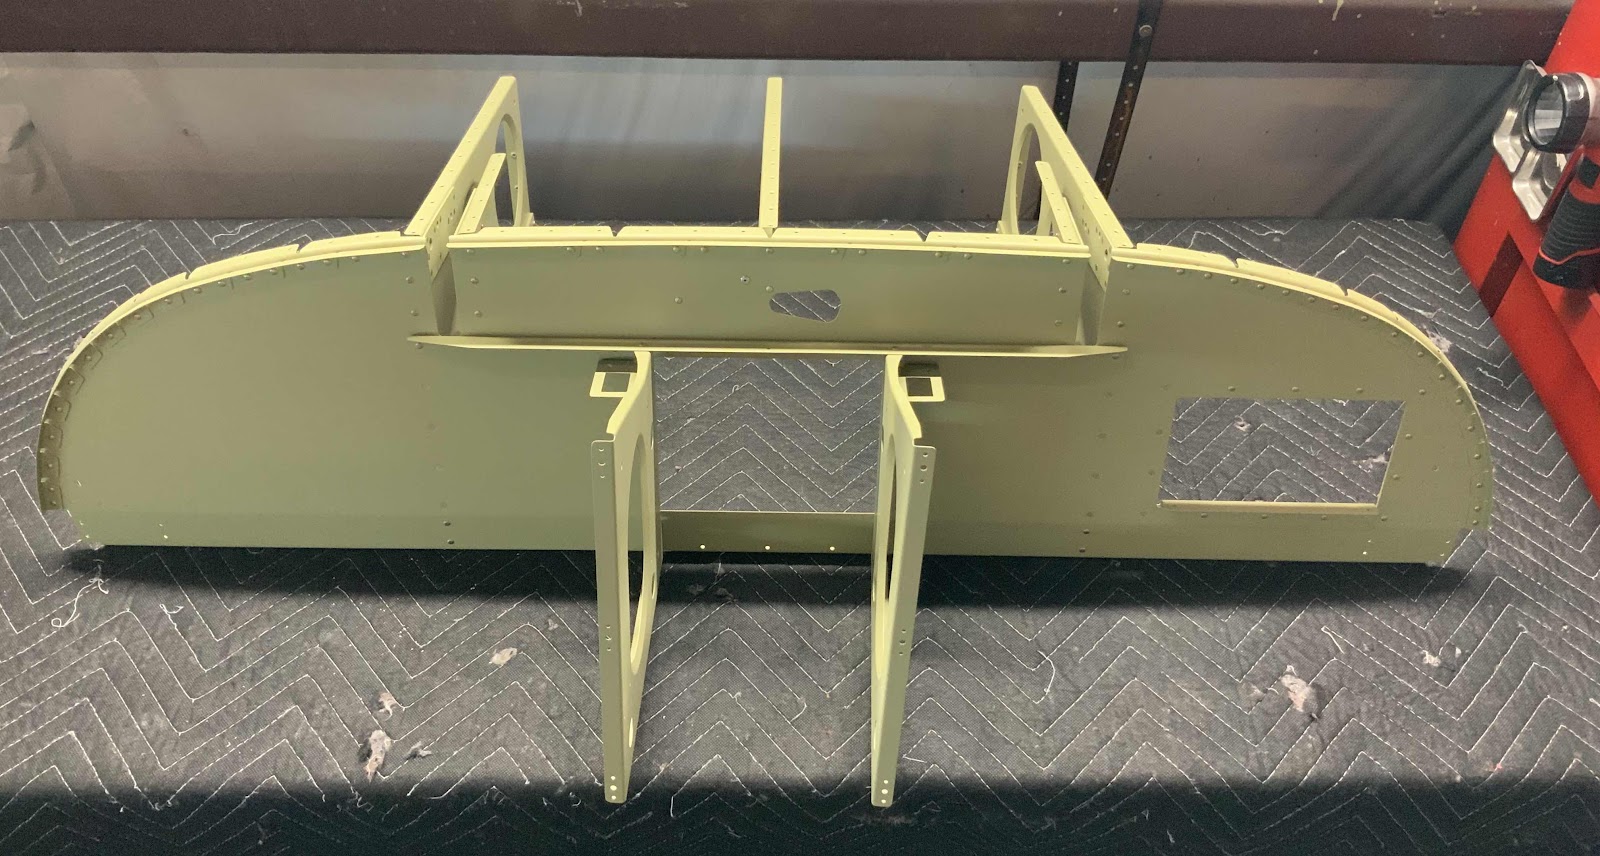
Here is a couple views of the “frame” that was assembled/riveted during today’s session.