
The pictures and work from this post are from January 6, 2024.
I completed the remaining electrical items (as it relates to the power bracket) in the pictures below (referencing my schematic drawing from the previous post):
-Fabricated/Installed the bridge wire from the top right post of the upper ANL limiter to the top post of the shunt
-Fabricated/Installed the copper bar between the right upper and lower posts of the ANL limiters
-Installed post #3, #5 and #6 on the standby alternator regulator
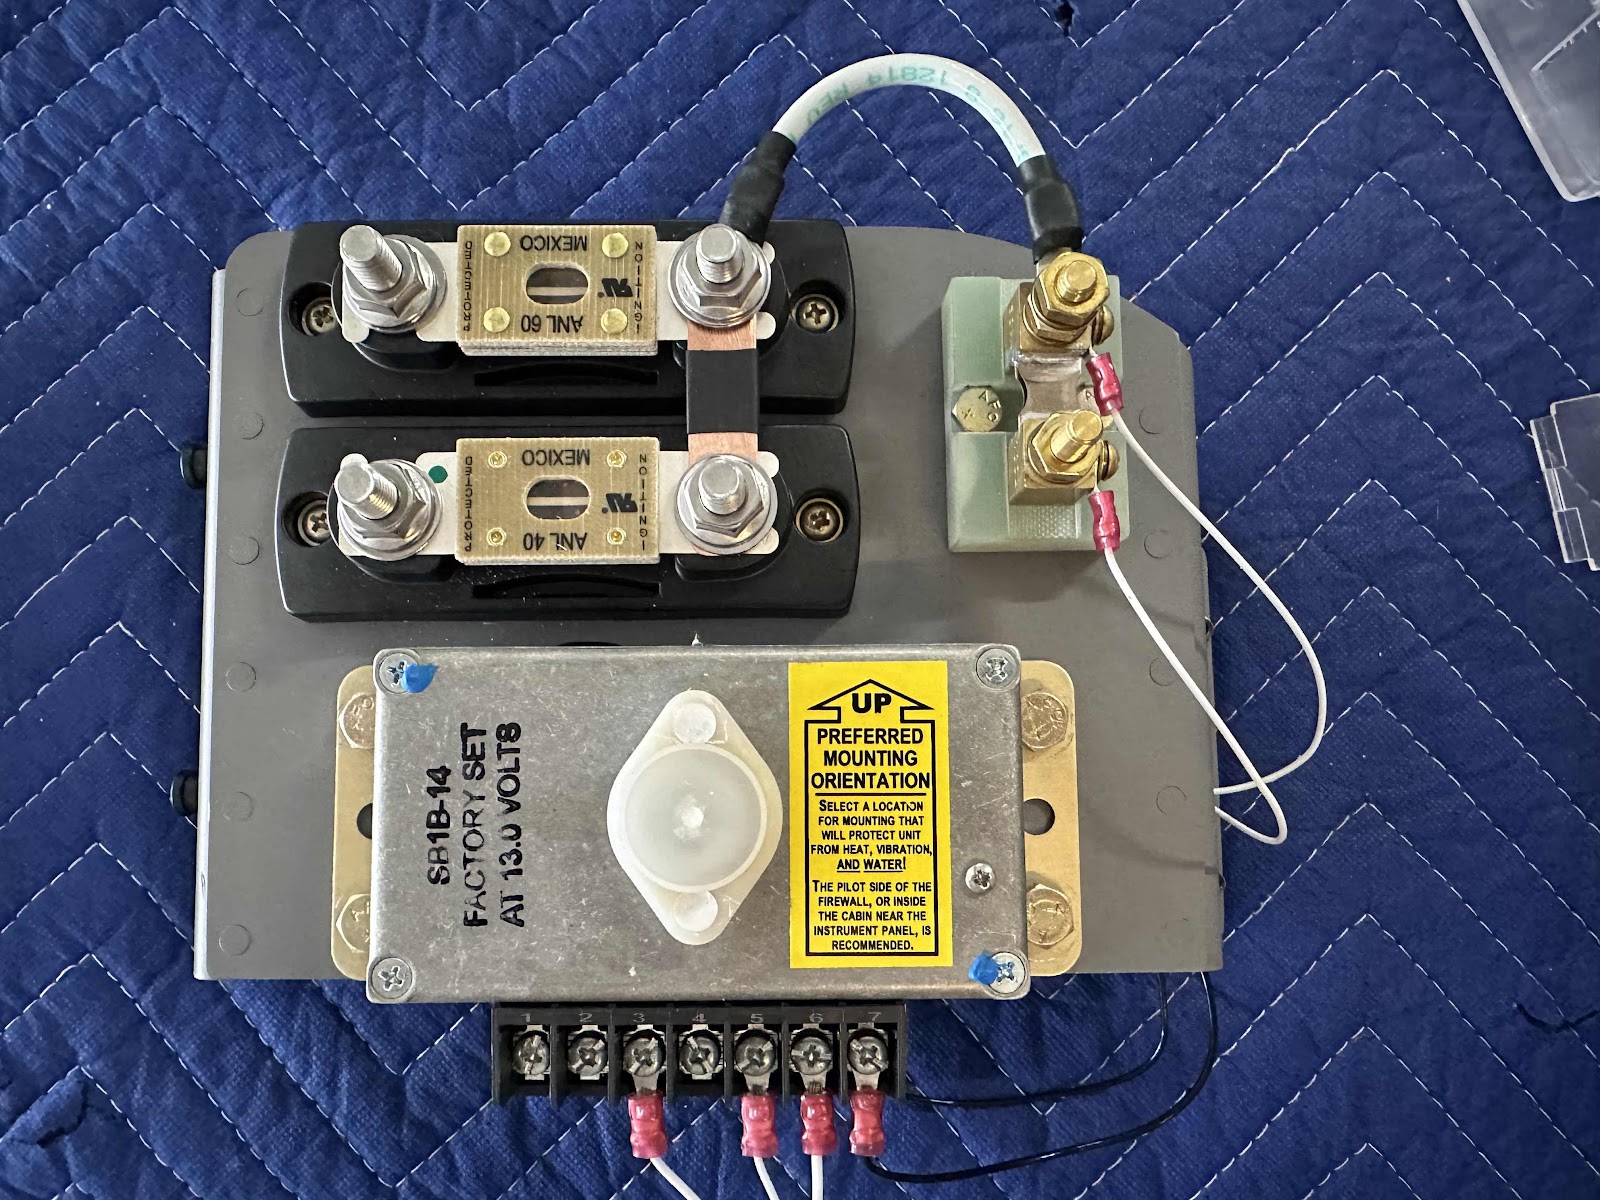
-Installed the amp shunt wire(s) from the GEA 24 through the grommet to the 1A circuit breakers
-Installed the proper sized adel clamp on the back of the bracket to hold the wires

-Installed the proper sized adel clamp on the back of the bracket to hold the wires
- Installed the starter solenoid wire to the lower post on the shunt
- Installed the circuit breaker panel wire to the lower post on the shunt
- Installed the B-Lead from the main alternator to the left post on the upper ANL limiter
- Installed the B-Lead from the standby alternator to the left post on the lower ANL limiter
- Installed the 60 ANL fuse between the left and right posts on the upper ANL limiter
- Installed the 40 ANL fuse between the left and right posts on the lower ANL limiter

That pretty much covers the JVL Aviation’s Electrical Power Bracket. There are a couple items I will address to call the installation truly complete.
1. I’m gong to turn the 40 ANL fuse the other way, so the opened end of the fuse is facing down (and won’t fall out if the nut gets loose????)
2. Make sure I have adequate clearance between the wires on the far right and the skin of the airplane. It doesn’t look it here, but there is about an inch of space between them in the picture
3. Install a boot for the wires on the lower post of the shunt (there is plastic covers that will be installed on the limiters)
3. Install a boot for the wires on the lower post of the shunt (there is plastic covers that will be installed on the limiters)